IMPORTANT: Do not remove the pins from the ends of the cabinet rails unless you are converting the rails for use in
1.Locate the bag of eight
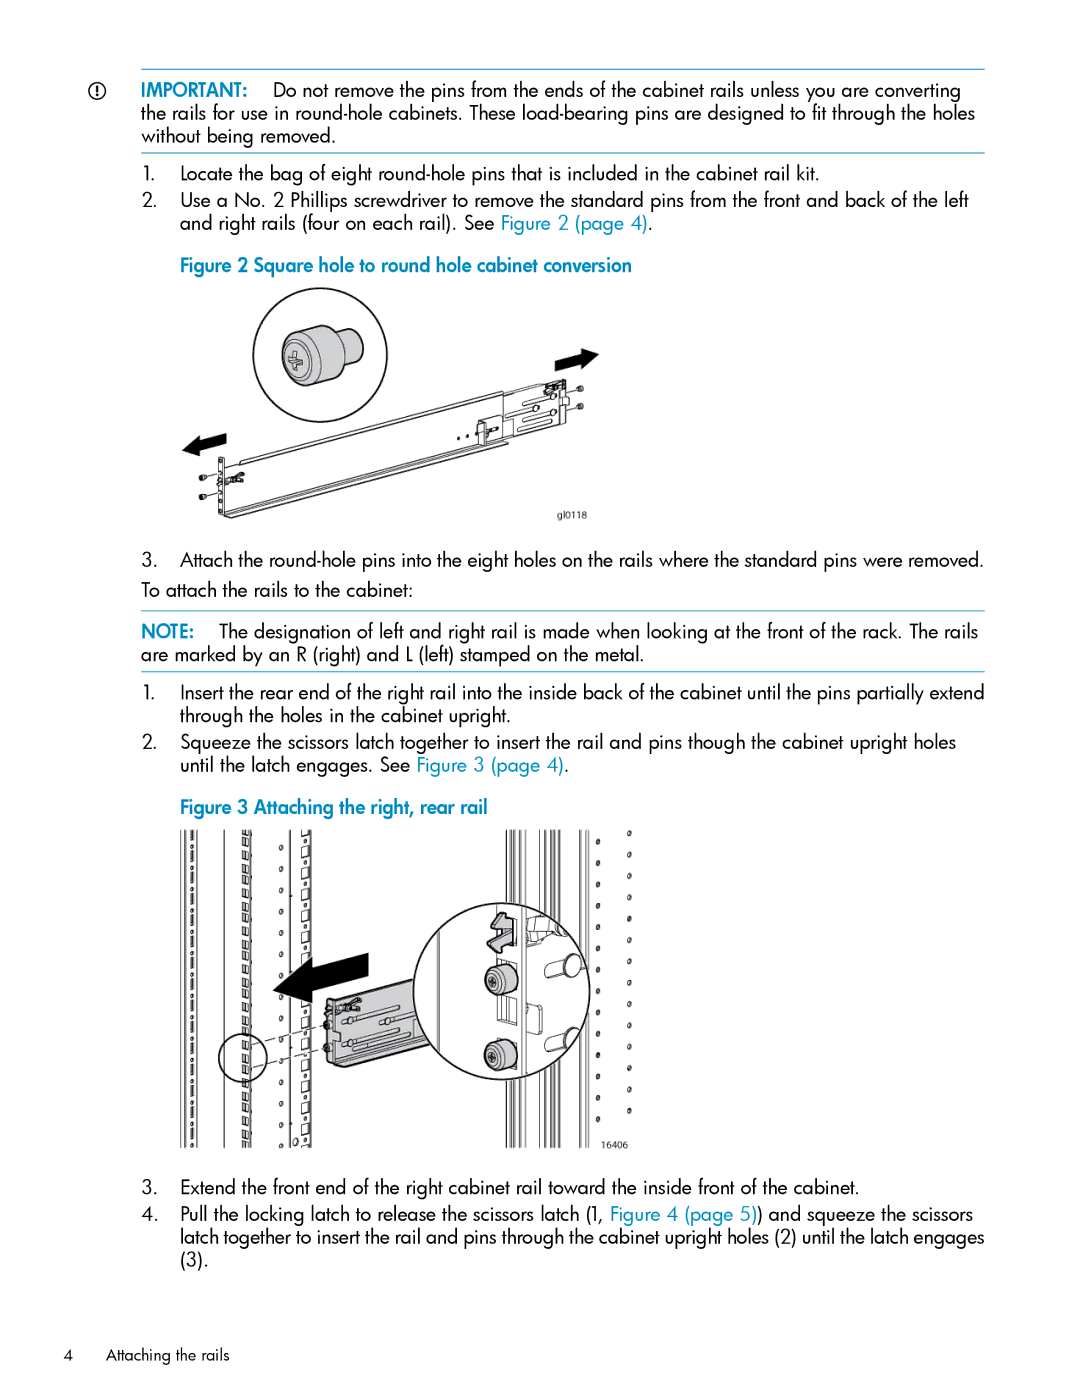
2.Use a No. 2 Phillips screwdriver to remove the standard pins from the front and back of the left and right rails (four on each rail). See Figure 2 (page 4).
Figure 2 Square hole to round hole cabinet conversion
3.Attach the
NOTE: The designation of left and right rail is made when looking at the front of the rack. The rails are marked by an R (right) and L (left) stamped on the metal.
1.Insert the rear end of the right rail into the inside back of the cabinet until the pins partially extend through the holes in the cabinet upright.
2.Squeeze the scissors latch together to insert the rail and pins though the cabinet upright holes until the latch engages. See Figure 3 (page 4).
Figure 3 Attaching the right, rear rail
3.Extend the front end of the right cabinet rail toward the inside front of the cabinet.
4.Pull the locking latch to release the scissors latch (1, Figure 4 (page 5)) and squeeze the scissors latch together to insert the rail and pins through the cabinet upright holes (2) until the latch engages
(3).
4Attaching the rails