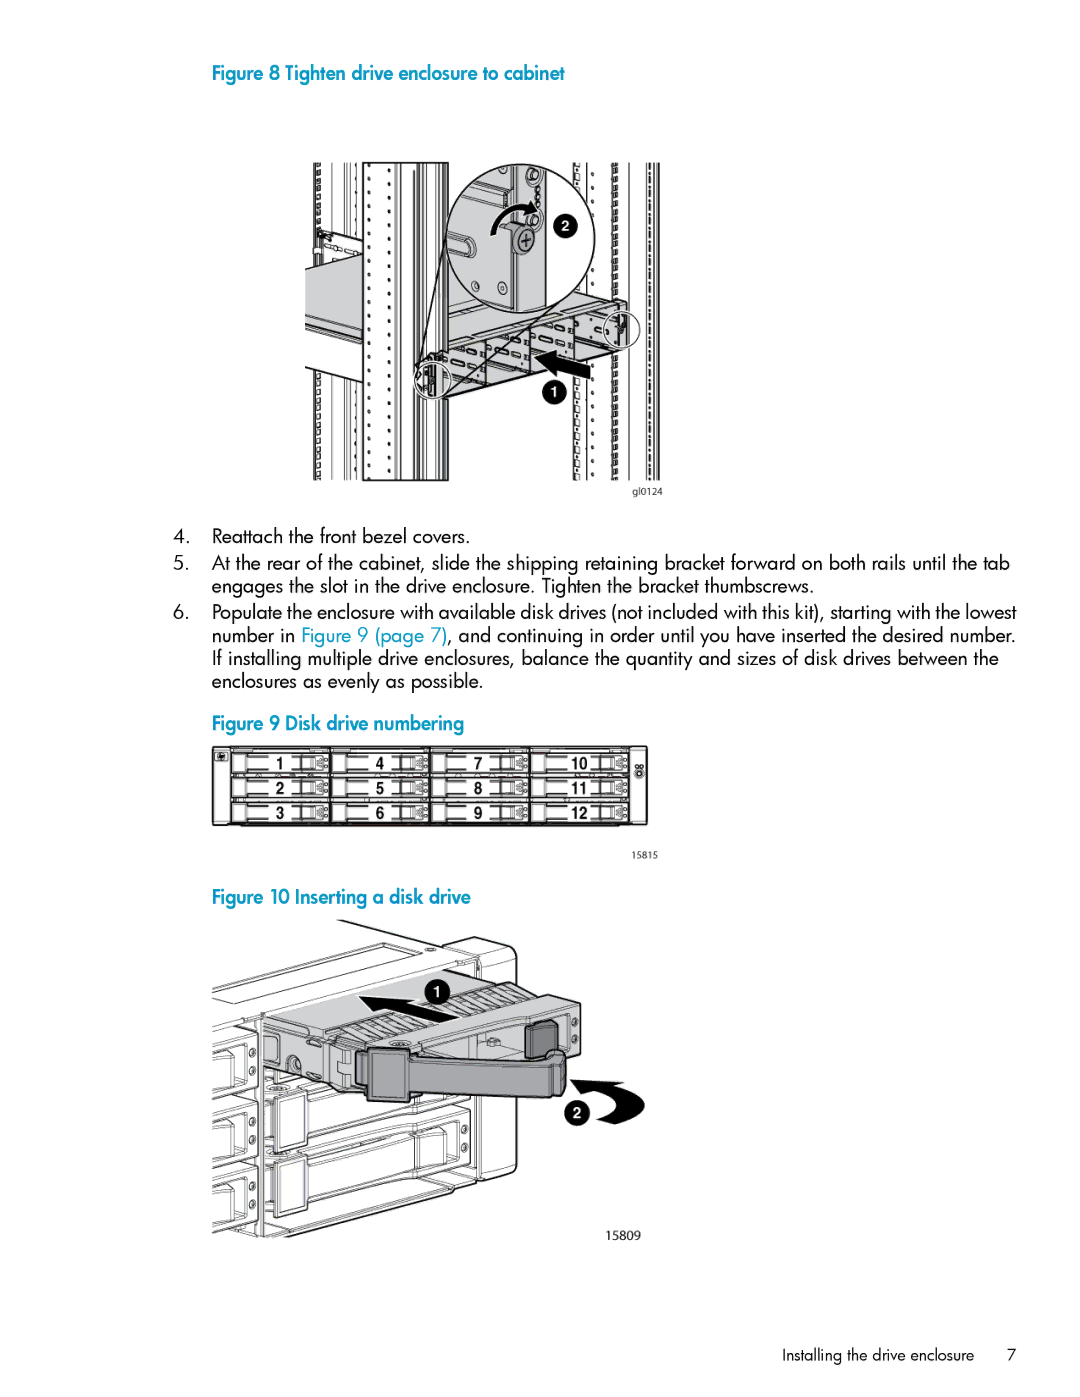
Figure 8 Tighten drive enclosure to cabinet
4.Reattach the front bezel covers.
5.At the rear of the cabinet, slide the shipping retaining bracket forward on both rails until the tab engages the slot in the drive enclosure. Tighten the bracket thumbscrews.
6.Populate the enclosure with available disk drives (not included with this kit), starting with the lowest number in Figure 9 (page 7), and continuing in order until you have inserted the desired number. If installing multiple drive enclosures, balance the quantity and sizes of disk drives between the enclosures as evenly as possible.
Figure 9 Disk drive numbering
Figure 10 Inserting a disk drive
Installing the drive enclosure | 7 |
