Install Air Fittings
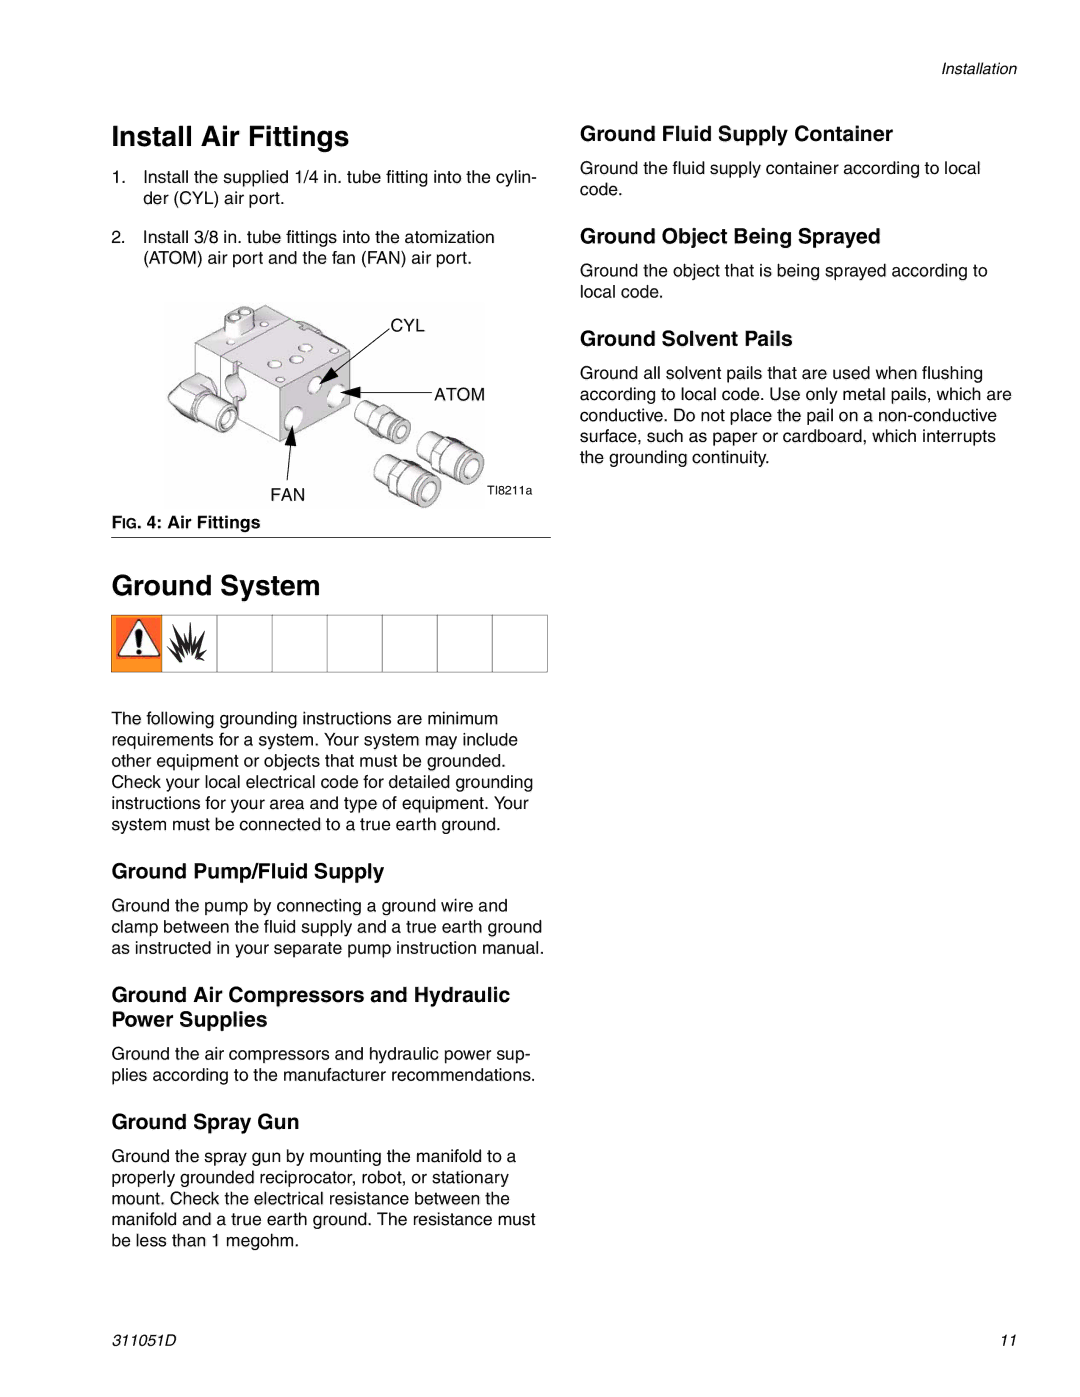
1.Install the supplied 1/4 in. tube fitting into the cylin- der (CYL) air port.
2.Install 3/8 in. tube fittings into the atomization (ATOM) air port and the fan (FAN) air port.
CYL
ATOM
FAN | TI8211a |
|
FIG. 4: Air Fittings
Ground System
The following grounding instructions are minimum requirements for a system. Your system may include other equipment or objects that must be grounded. Check your local electrical code for detailed grounding instructions for your area and type of equipment. Your system must be connected to a true earth ground.
Ground Pump/Fluid Supply
Ground the pump by connecting a ground wire and clamp between the fluid supply and a true earth ground as instructed in your separate pump instruction manual.
Ground Air Compressors and Hydraulic Power Supplies
Ground the air compressors and hydraulic power sup- plies according to the manufacturer recommendations.
Ground Spray Gun
Ground the spray gun by mounting the manifold to a properly grounded reciprocator, robot, or stationary mount. Check the electrical resistance between the manifold and a true earth ground. The resistance must be less than 1 megohm.
Installation
Ground Fluid Supply Container
Ground the fluid supply container according to local code.
Ground Object Being Sprayed
Ground the object that is being sprayed according to local code.
Ground Solvent Pails
Ground all solvent pails that are used when flushing according to local code. Use only metal pails, which are conductive. Do not place the pail on a
311051D | 11 |