
Bridge specifications
HP Bridge is an innovative solution designed to enhance connectivity and collaboration across various devices and platforms, primarily aimed at improving workflows in business environments. This comprehensive tool acts as a central hub, facilitating seamless communication between HP hardware and software systems, enabling users to achieve optimal productivity.One of the main features of HP Bridge is its cross-device compatibility. Users can easily connect their HP devices, such as printers, laptops, and tablets, to the platform. This integration allows for smooth data transfer and real-time collaboration, ensuring that users can access documents and projects regardless of the device they are using. This feature is particularly useful in hybrid work environments where flexibility and adaptability are crucial.
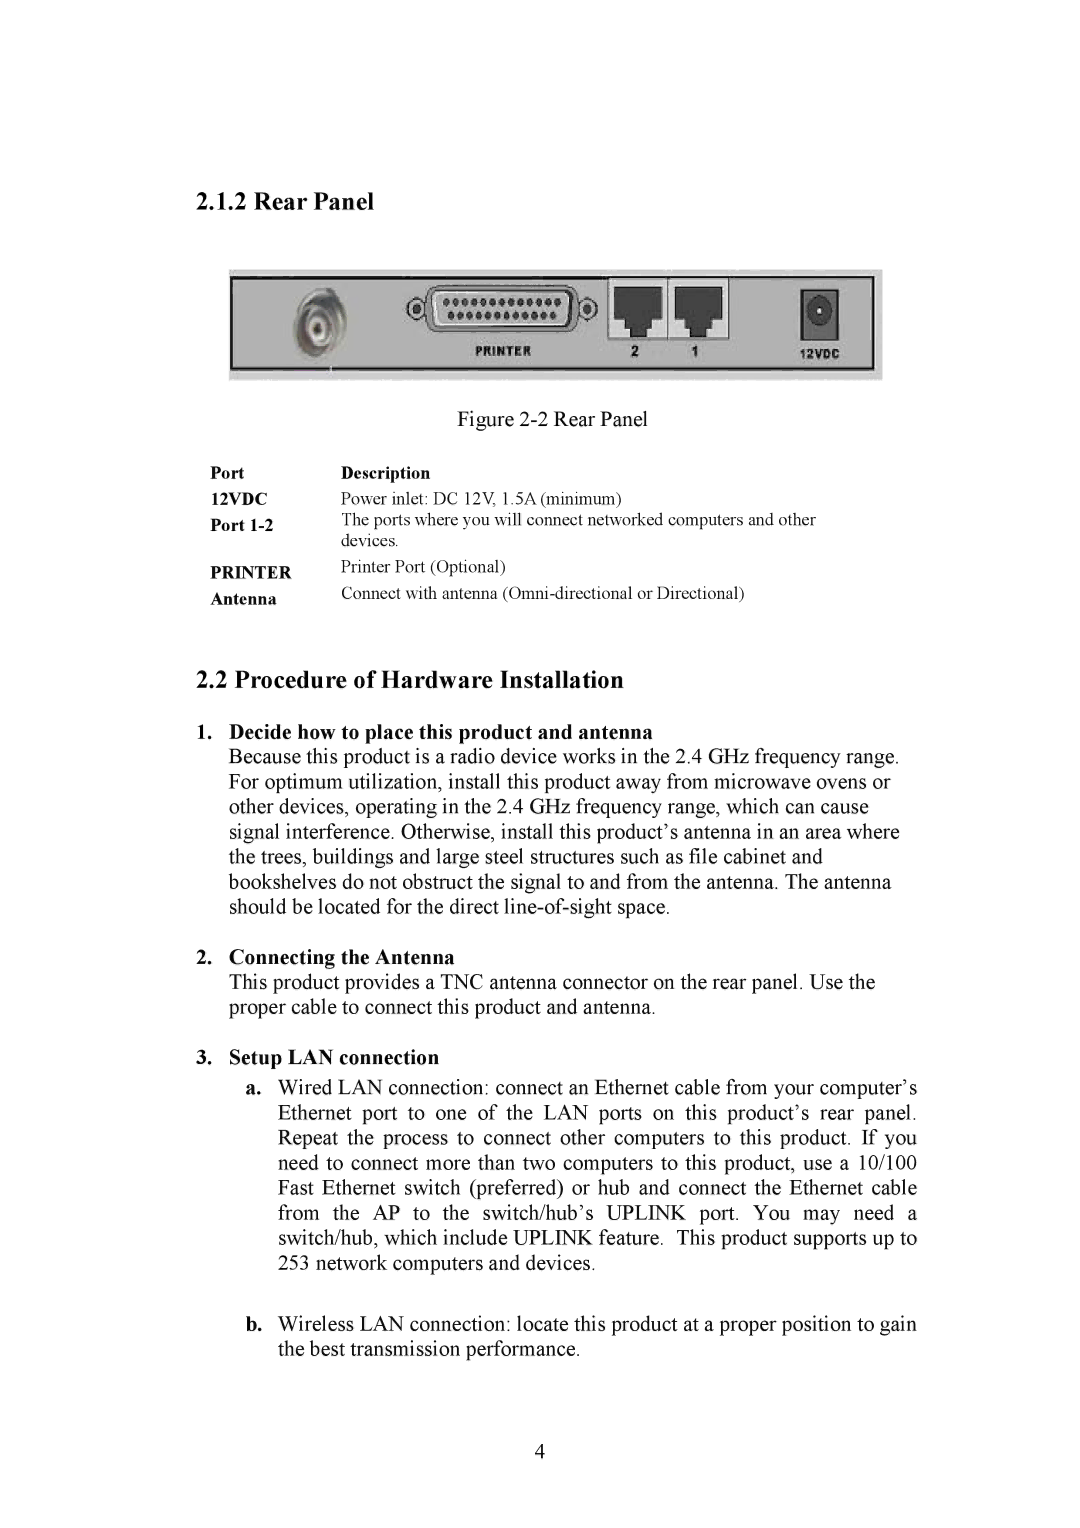
Another significant characteristic of HP Bridge is its robust security measures. In today's digital landscape, protecting sensitive information is paramount. HP Bridge employs advanced encryption protocols and secure authentication processes to ensure that all data exchanged between devices remains secure. This level of security instills confidence in users, knowing that their information is protected from unauthorized access and cyber threats.
HP Bridge also boasts an intuitive user interface, designed to streamline navigation and enhance user experience. Its simple layout allows users to efficiently manage their connected devices, access features, and monitor performance metrics without overwhelming complexity. This focus on usability is essential, especially for businesses with varying levels of technological proficiency among staff.
In terms of technology, HP Bridge leverages cloud-based services to enable remote access and management of devices. This feature is particularly beneficial for businesses with remote teams, providing employees with the ability to print, scan, and manage documents from anywhere. Furthermore, the platform is designed to integrate with existing software applications, allowing businesses to maintain their established workflows while incorporating HP Bridge's capabilities.
Additionally, HP Bridge incorporates artificial intelligence to optimize device performance. By analyzing usage patterns, the system can make recommendations for maintenance, such as ink replacement or software updates, ensuring that devices operate at peak efficiency.
In conclusion, HP Bridge represents a significant advancement in device connectivity and management. With its cross-device compatibility, robust security features, user-friendly interface, and cloud integration, it stands as a critical tool for businesses looking to enhance productivity and streamline their workflows. As technology continues to evolve, HP Bridge is well-positioned to adapt and grow, offering users new features and improved functionality in the future.