
C4272, C4275, C4288, C4283, C4210 specifications
The HP C4273, C4240, C4270, C4280, and C4210 are part of Hewlett-Packard’s series of all-in-one inkjet printers designed to meet a variety of printing needs for home and small office environments. Each model brings together printing, scanning, and copying capabilities while emphasizing ease of use, high-quality output, and efficiency.The HP C4273 focuses on providing reliable printing functions with an emphasis on cost-effectiveness. It incorporates HP's InkJet technology, which delivers vibrant color and sharp text, making it suitable for both document printing and photo reproduction. Its compact design allows for easy placement in any workspace, while the user-friendly control panel ensures that navigating through operations is straightforward.
The HP C4240 is well-known for its all-in-one convenience, providing printing, scanning, and copying functionalities in a single device. It features a built-in scanner with a flatbed design, allowing for versatile scanning options, from documents to photos. The C4240 employs HP’s advanced thermal InkJet technology, which not only enhances print quality but also ensures faster printing speeds. This model is designed for users who require a versatile machine without sacrificing space.
Meanwhile, the HP C4270 offers additional features, such as borderless photo printing, making it an appealing option for photography enthusiasts. It supports various paper sizes and types, allowing users to create professional-quality prints. The printer is equipped with dual-cartridge technology that simplifies ink replacement and enhances the overall efficiency of the printing process.
The HP C4280 builds upon the features of its predecessors by including a convenient memory card slot and a 1.5-inch color display, which allows for direct printing from cameras without the need for a computer. This enhances the overall user experience and provides added functionality for users who often print photos directly from their devices. The C4280 also includes HP Smart Web Printing, which helps users optimize web pages before printing, reducing paper waste.
Lastly, the HP C4210 caters to those who require basic printing capabilities while still benefiting from scanning and copying features. Its simplicity is ideal for users who want an easy-to-operate printer without the complexity of advanced features. The C4210 emphasizes value with its dependable performance and user-friendly interface.
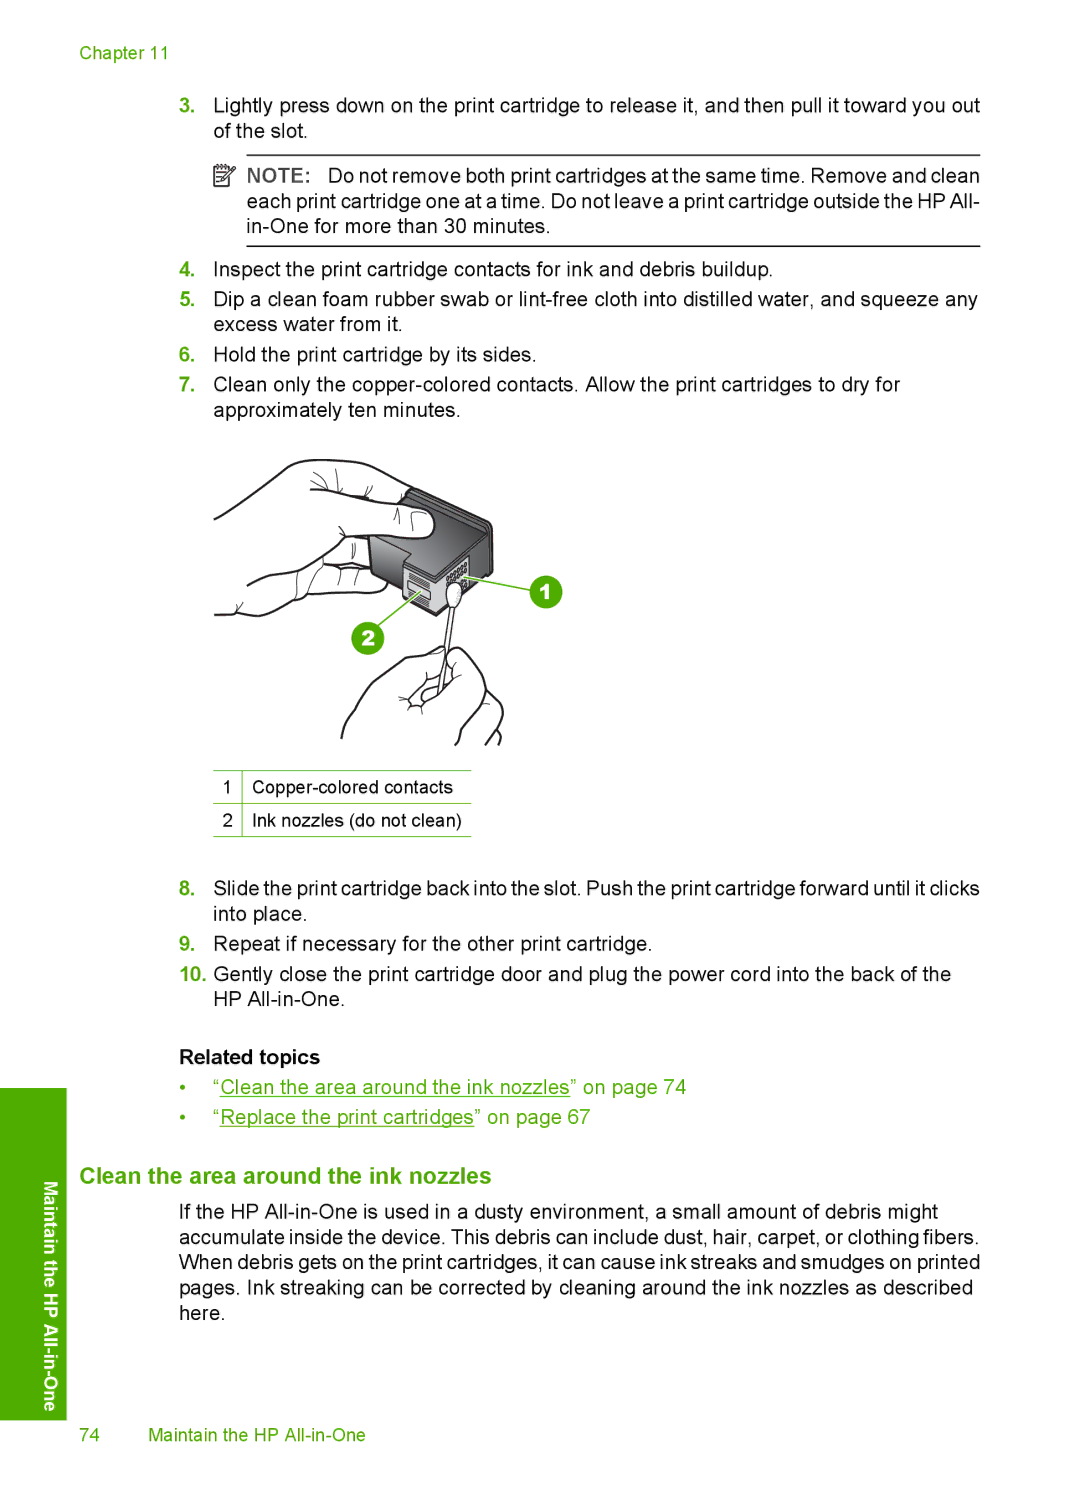
In summary, the HP C4273, C4240, C4270, C4280, and C4210 models represent a spectrum of versatile all-in-one inkjet printers, each designed to cater to different user requirements while showcasing HP's commitment to quality, innovation, and efficiency in home and office printing solutions.