Manuals
/
HP
/
Computer Equipment
/
Laptop
HP
CQ57-439WM, CQ57-489CA, CQ57-489WM, CQ57-339WM, CQ57-315NR manual Using optional external devices
Models:
CQ57-439WM
1
45
74
74
Download
74 pages
61.04 Kb
42
43
44
45
46
47
48
49
<
>
Troubleshooting
Install
Maintenance
Configuring audio for HDMI
Wireless-Refer to Creating a wireless connection on page
Setup Utility BIOS and System Diagnostics
Setting up a new WLAN
Adjusting the volume
Replacing the battery
Selecting a location setting
Page 45
Image 45
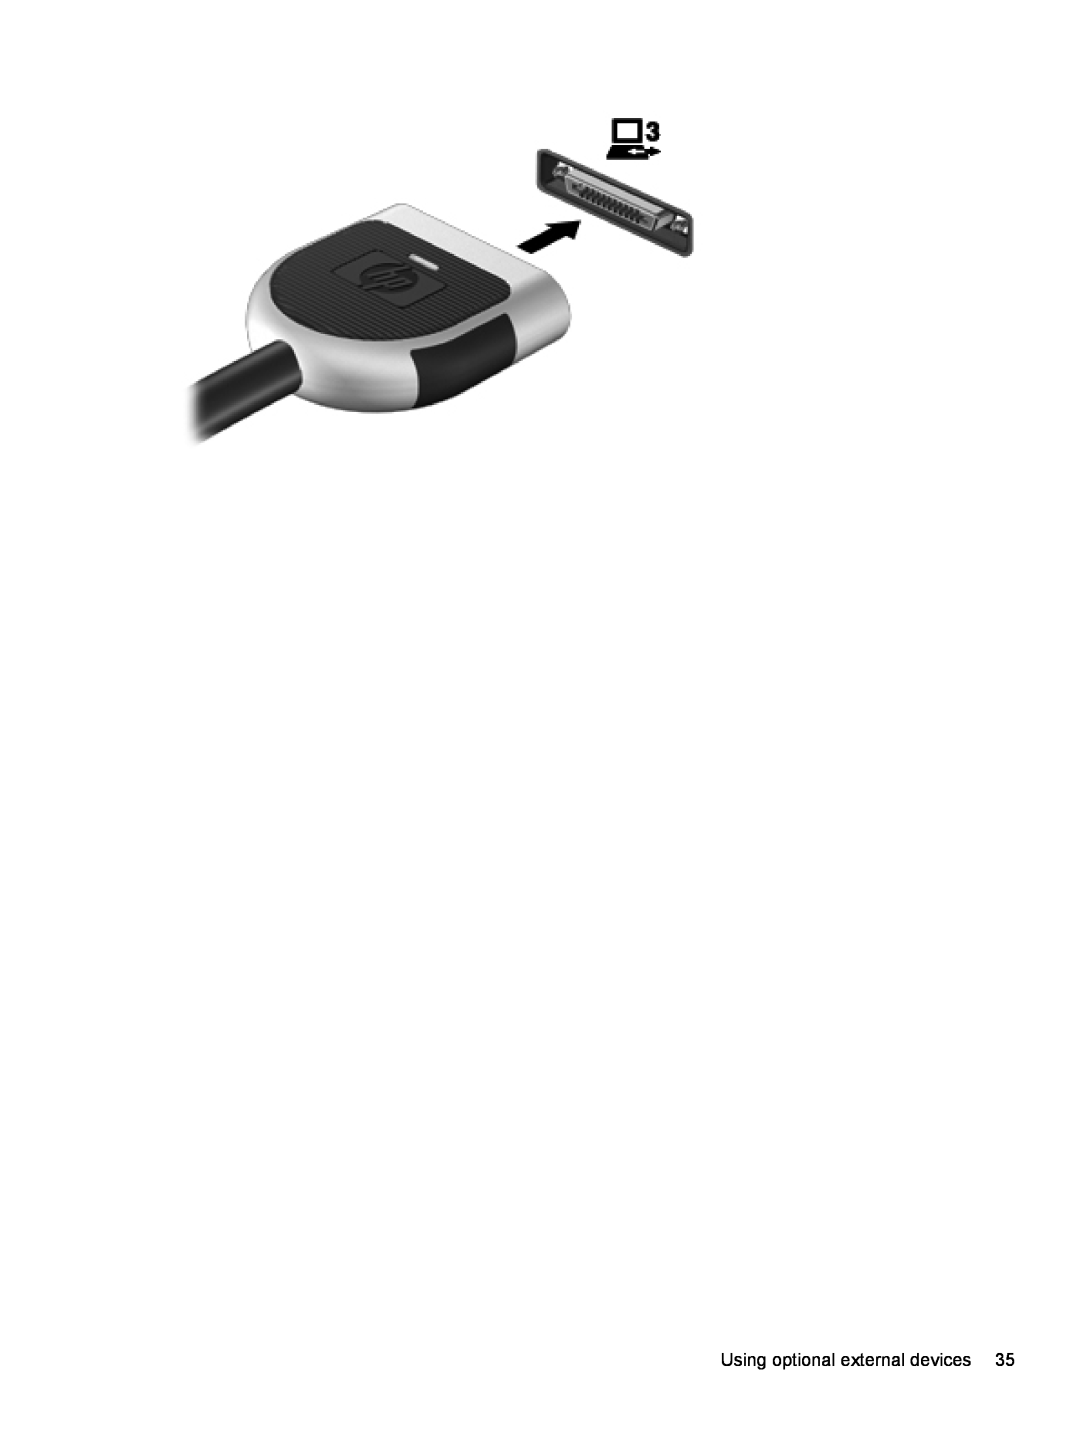
Using optional external devices 35
Page 44
Page 46
Page 45
Image 45
Page 44
Page 46
Contents
Reference Guide
HP Notebook
Product notice
Safety warning notice
iv Safety warning notice
Table of contents
Audio
Replacing the battery
8 Maintenance
9 Setup Utility BIOS and System Diagnostics
7 Security
Exiting Setup Utility BIOS
Restoring factory settings in Setup Utility BIOS
Updating the BIOS
Determining the BIOS version
Page
Finding more information about your new computer
1 Introduction
Identifying wireless and network status icons
Creating a wireless connection
2 Networking select models only
Wireless-Refer to Creating a wireless connection on page
Using HP Connection Manager select models only
Turning wireless devices on or off
Using operating system controls
Using a WLAN select models only
Connecting to an existing WLAN
Setting up a new WLAN
Protecting your WLAN
Using HP Mobile Broadband select models only
Roaming to another network
Inserting a SIM
Removing a SIM
Using GPS select models only
Connecting to a wired network
Using Bluetooth wireless devices select models only
Bluetooth and Internet Connection Sharing ICS
Using a modem select models only
Connecting a country- or region-specific modem cable adapter
Connecting a modem cable
Adding new locations when traveling
Selecting a location setting
Viewing the current location selection
1. Select Start Control Panel 2. Click Clock, Language, and Region
1. Select Start Devices and Printers
Connecting to a local area network LAN select models only
12 Chapter 2 Networking select models only
Using the media activity controls
3 Multimedia
Audio
1. Select Start All Programs Accessories Sound Recorder
Adjusting the volume
Webcam select models only
Checking audio functions on the computer
DisplayPort
Video
HDMI
Using CyberLink PowerDVD select models only
Intel Wireless Display select models only
Configuring audio for HDMI
4 Power management
Shutting down the computer
2. Select Start Shut down
Using power-saving states
Setting power options
Initiating and exiting Sleep
Initiating and exiting Hibernation
Using power plans
Using the power meter
Viewing the current power plan
Selecting a different power plan
Setting password protection on wakeup
Using HP Power Manager select models only
Customizing power plans
1. Select Start Control Panel System and Security Power Options
Using battery power
Finding battery information
Using Battery Check
Maximizing battery discharge time
Displaying the remaining battery charge
Managing low battery levels
Identifying low battery levels
Storing a battery
Conserving battery power
Resolving a low battery level
Resolving a low battery level when external power is available
Using external AC power
Disposing of a used battery
Replacing the battery
Testing an AC adapter
Using HP CoolSense select models only
Using Digital Media Slot cards select models only
5 External cards and devices
Inserting a digital card
Configuring an ExpressCard
Using ExpressCards select models only
Removing a digital card
Inserting an ExpressCard
Removing an ExpressCard
Inserting a smart card
Using smart cards select models only
Using a USB device
Connecting a USB device
Removing a smart card
Using 1394 devices select models only
Connecting a 1394 device
Removing a USB device
Using an eSATA device select models only
Connecting an eSATA device
Removing a 1394 device
Using optional external drives
Using optional external devices
Using the expansion port select models only
Removing an eSATA device
Using optional external devices
Handling drives
6 Drives
Using HP 3D DriveGuard select models only
Using hard drives
Using Disk Defragmenter
Using Disk Cleanup
Using HP 3D DriveGuard software
Managing power with a parked hard drive
Identifying HP 3D DriveGuard status
1. Select Start Control Panel Hardware and Sound HP 3D DriveGuard
Identifying the installed optical drive select models only
Using optical drives select models only
Inserting an optical disc
Tray load
Removing an optical disc
Slot load
Tray load
When the disc tray fails to open normally
When the disc tray opens normally
Slot load
Using RAID select models only
Sharing optical drives
3. Select the Sharing tab Advanced Sharing
Using passwords
7 Security
Protecting the computer
Setting passwords in Windows
Setting passwords in Setup Utility BIOS
After you set a user or administrator password, follow these
Entering an administrator password
Managing an administrator password
Using firewall software
Using antivirus software
Managing a power-on password
Entering a power-on password
Installing an optional security cable
Installing critical security updates
Locating the fingerprint reader
Using the fingerprint reader select models only
Cleaning your computer
8 Maintenance
Cleaning the display
Cleaning the sides and cover
Using SoftPaq Download Manager
Using Setup Utility BIOS
9 Setup Utility BIOS and System Diagnostics
Starting Setup Utility BIOS
Changing the language of Setup Utility BIOS
Navigating and selecting in Setup Utility BIOS
Restoring factory settings in Setup Utility BIOS
Displaying system information
Exiting Setup Utility BIOS
Updating the BIOS
Determining the BIOS version
1. Select Start Help and Support Maintain
Downloading a BIOS update
Using System Diagnostics
A Traveling with the computer
58 Appendix A Traveling with the computer
If you are traveling internationally, follow these suggestions
B Troubleshooting resources
C Electrostatic Discharge
Index
Symbols/Numerics
P passwords