4. Connect the network cables.
Connect network devices, such as an HP ProLiant MicroServer Gen8, to any of the switch’s
Note: Any of the switch’s network ports can be used for the following connections. You do not have to use the specific ports shown in the illustrations.
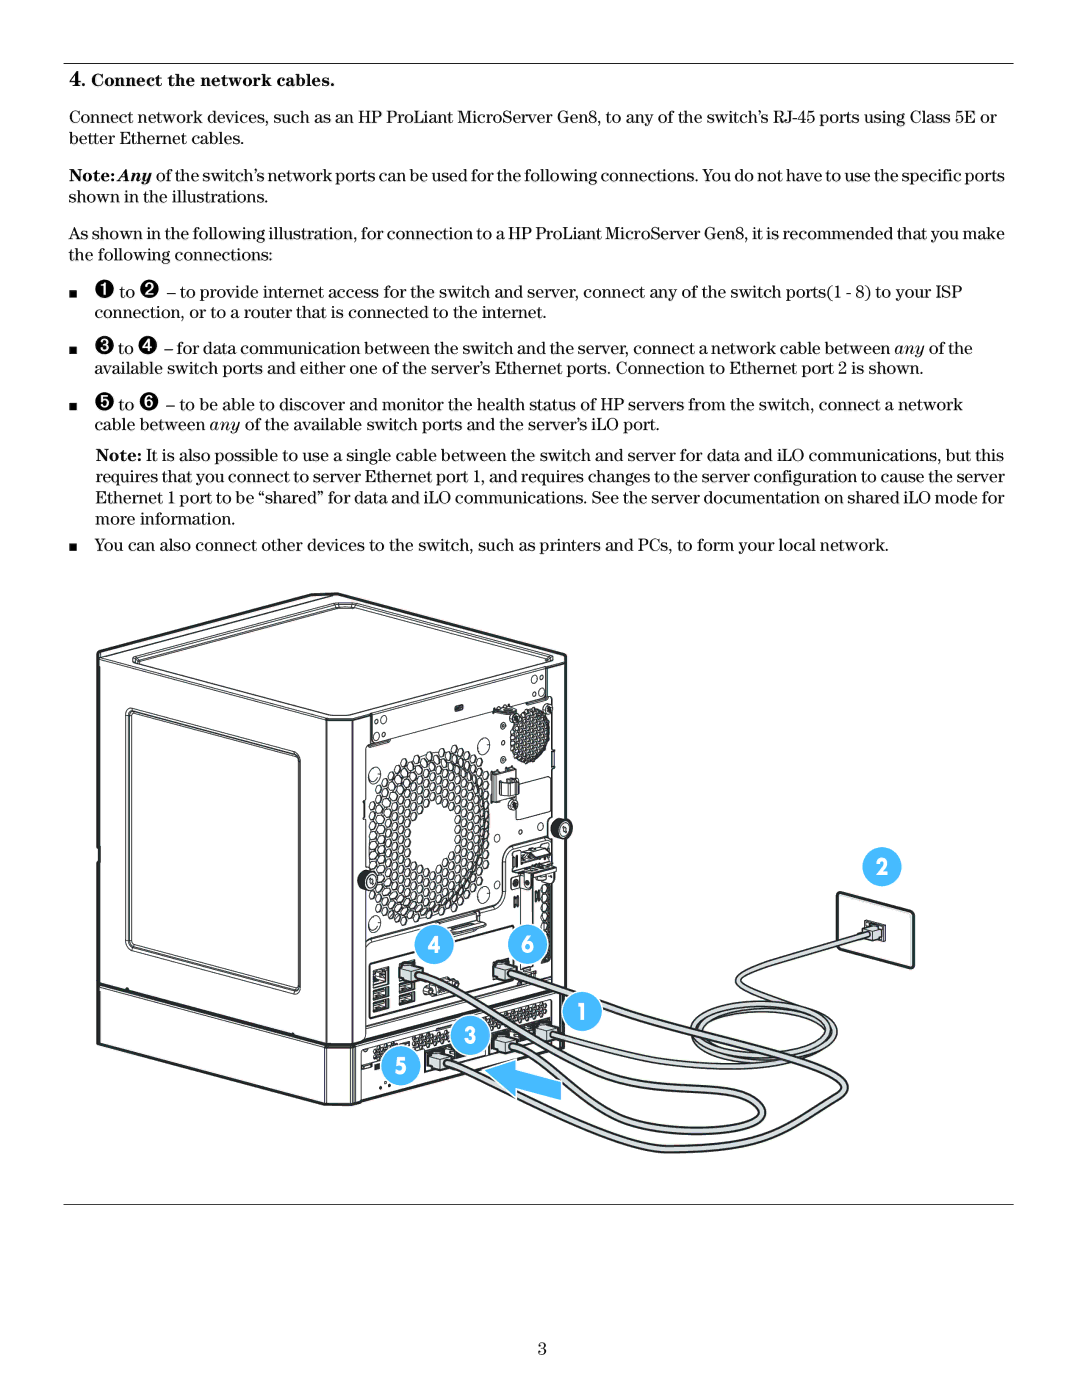
As shown in the following illustration, for connection to a HP ProLiant MicroServer Gen8, it is recommended that you make the following connections:
■➊ to ➋ – to provide internet access for the switch and server, connect any of the switch ports(1 - 8) to your ISP connection, or to a router that is connected to the internet.
■➌ to ➍ – for data communication between the switch and the server, connect a network cable between any of the available switch ports and either one of the server’s Ethernet ports. Connection to Ethernet port 2 is shown.
■➎ to ➏ – to be able to discover and monitor the health status of HP servers from the switch, connect a network cable between any of the available switch ports and the server’s iLO port.
Note: It is also possible to use a single cable between the switch and server for data and iLO communications, but this requires that you connect to server Ethernet port 1, and requires changes to the server configuration to cause the server Ethernet 1 port to be “shared” for data and iLO communications. See the server documentation on shared iLO mode for more information.
■You can also connect other devices to the switch, such as printers and PCs, to form your local network.
2
4 1 | 6 |
| 1 |
5 | 3 |
|
3
