(2) | Ethernet | (6) | Monitor connector |
|
|
|
|
(3) | Parallel connector | (7) | Serial connector |
|
|
|
|
(4) | Universal serial bus (USB) connectors (4) | (8) | Power connector |
For more information, see the
Installing the stand
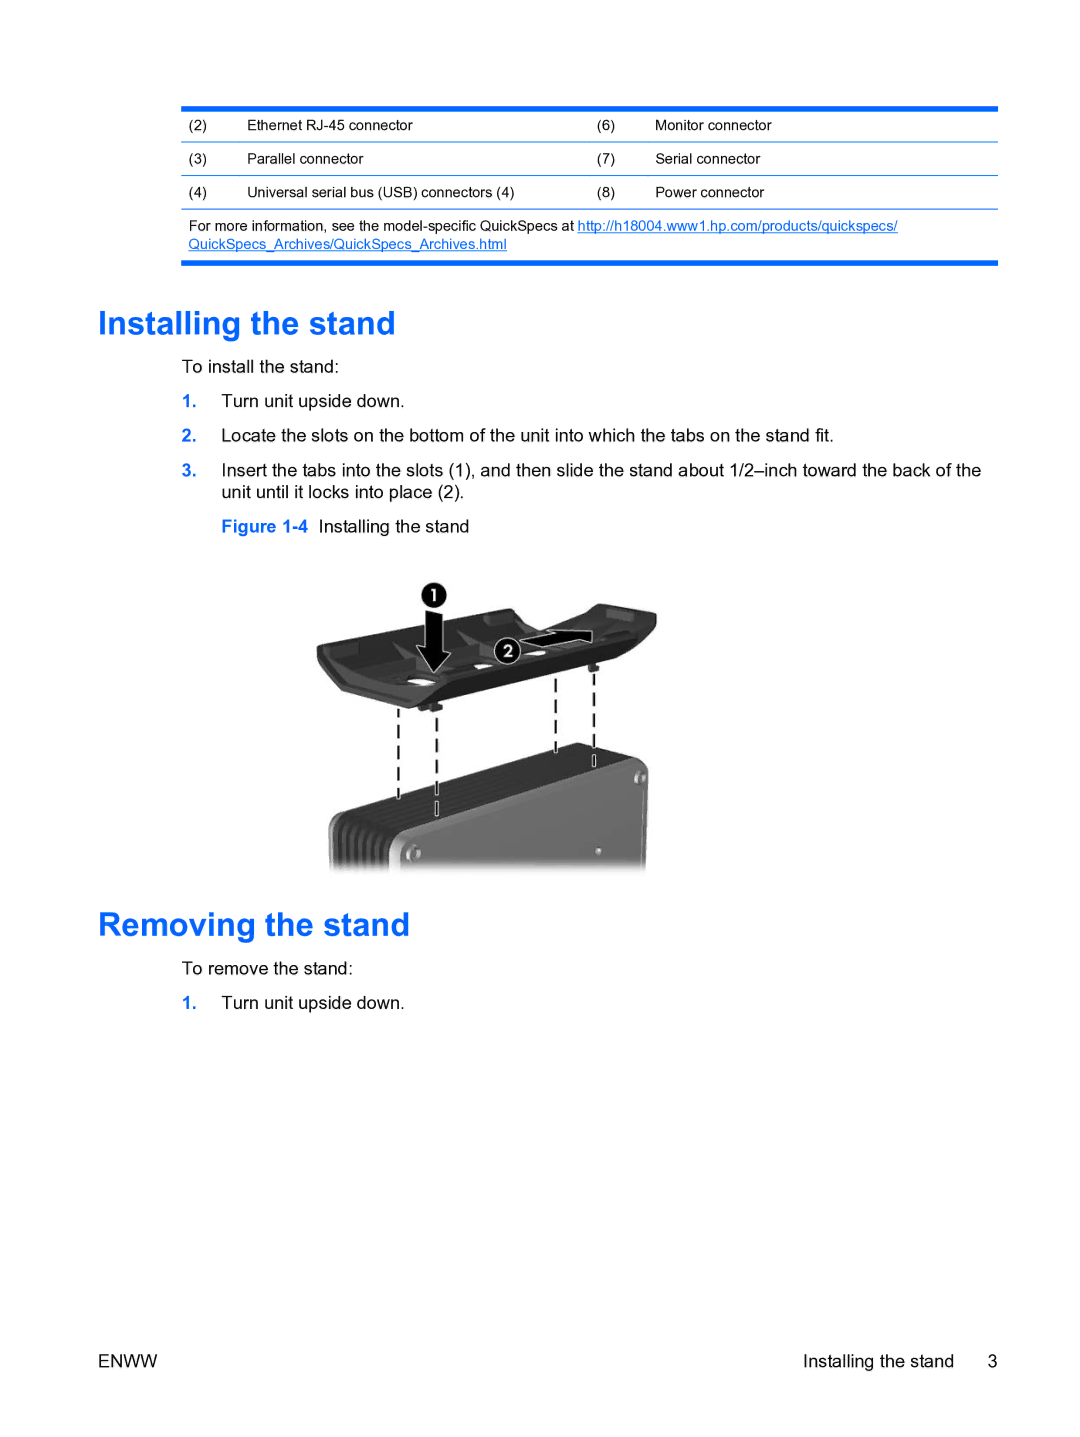
To install the stand:
1.Turn unit upside down.
2.Locate the slots on the bottom of the unit into which the tabs on the stand fit.
3.Insert the tabs into the slots (1), and then slide the stand about
Figure 1-4 Installing the stand
Removing the stand
To remove the stand:
1.Turn unit upside down.
ENWW | Installing the stand 3 |