Installing Accessories in the New Desktop Package
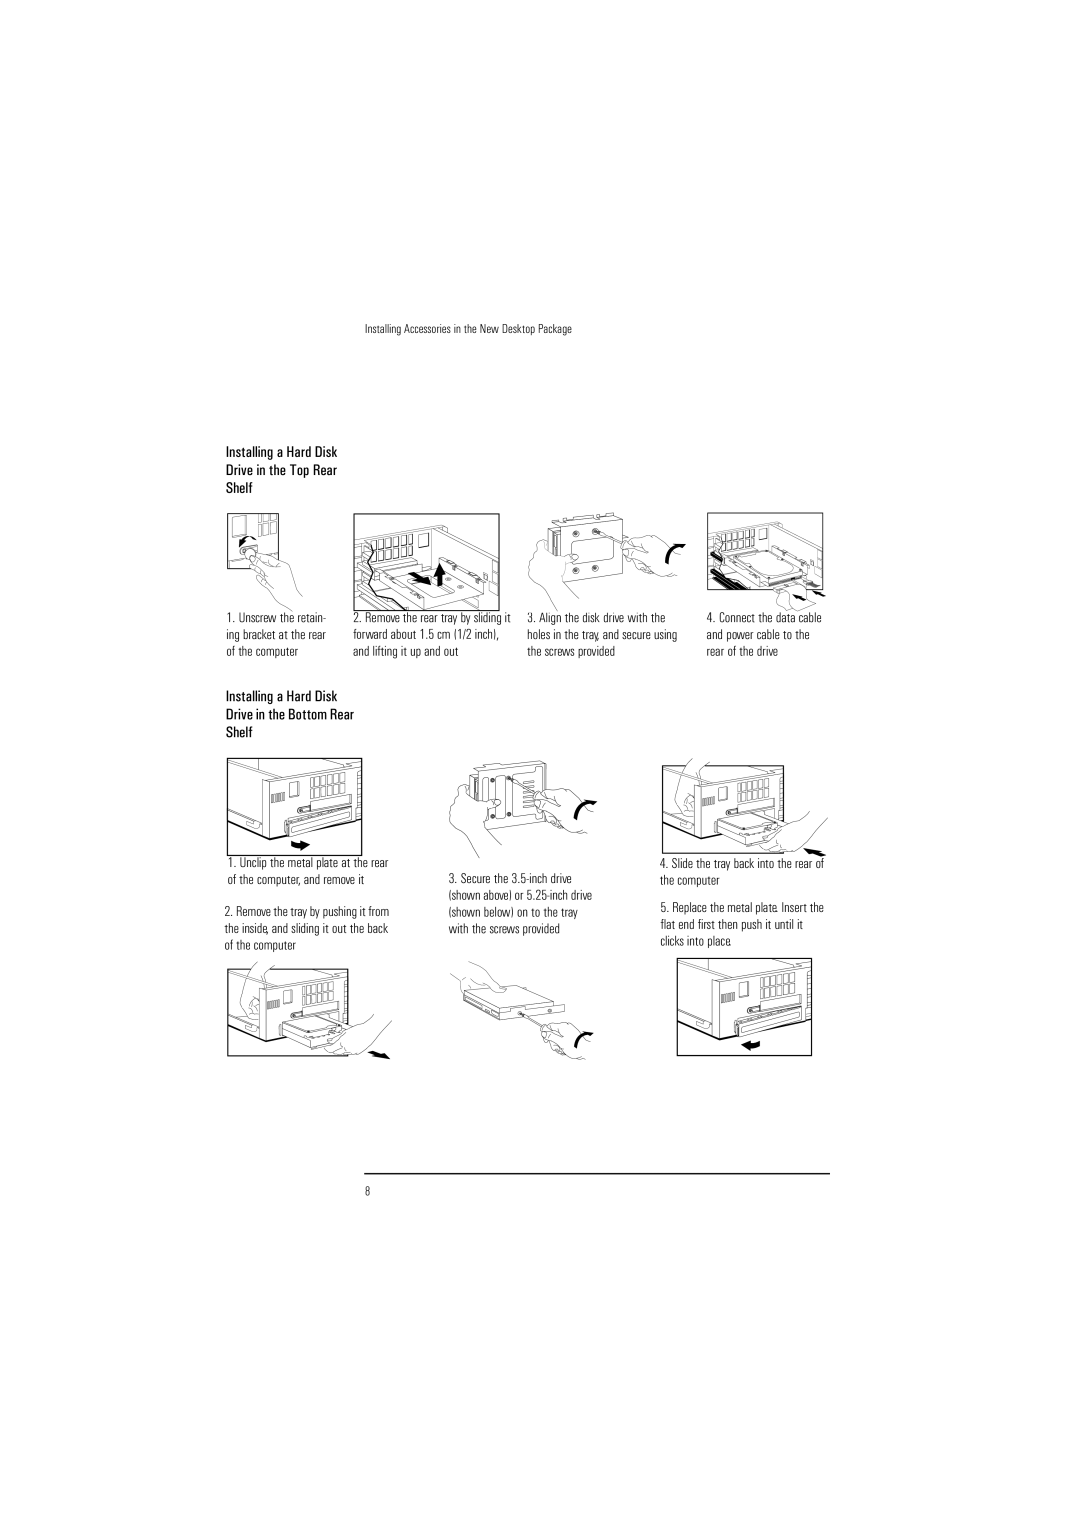
Installing a Hard Disk
Drive in the Top Rear
Shelf
1.Unscrew the retain- ing bracket at the rear of the computer
2.Remove the rear tray by sliding it forward about 1.5 cm (1/2 inch), and lifting it up and out
3.Align the disk drive with the
holes in the tray, and secure using the screws provided
4.Connect the data cable and power cable to the rear of the drive
Installing a Hard Disk
Drive in the Bottom Rear
Shelf
1.Unclip the metal plate at the rear of the computer, and remove it
2.Remove the tray by pushing it from the inside, and sliding it out the back of the computer
3.Secure the
4.Slide the tray back into the rear of the computer
5.Replace the metal plate. Insert the flat end first then push it until it clicks into place.
8