HP Vectra VL 6 manual Replacing the System Board

Models: Vectra VL 6

1 20
Download 20 pages 20.4 Kb
Page 13
Image 13

Installing Accessories in the New Desktop Package

Replacing the Flexible Disk Drive

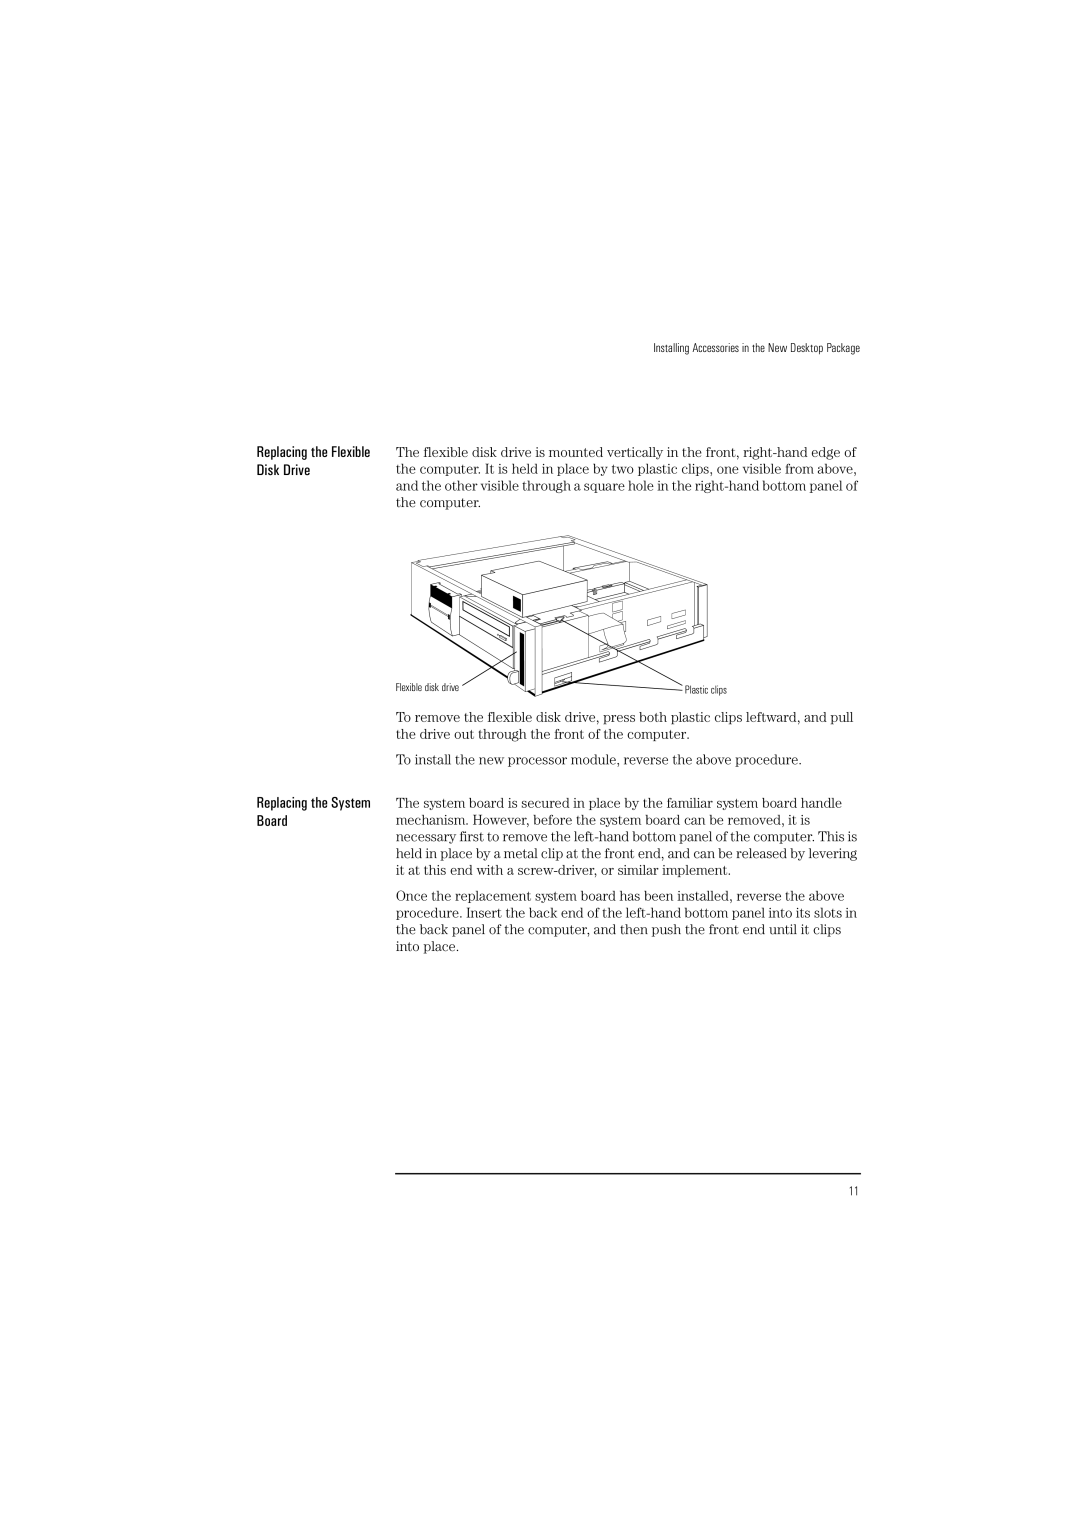
The flexible disk drive is mounted vertically in the front, right-hand edge of the computer. It is held in place by two plastic clips, one visible from above, and the other visible through a square hole in the right-hand bottom panel of the computer.

Replacing the System Board

Flexible disk drive

Plastic clips

To remove the flexible disk drive, press both plastic clips leftward, and pull the drive out through the front of the computer.

To install the new processor module, reverse the above procedure.

The system board is secured in place by the familiar system board handle mechanism. However, before the system board can be removed, it is necessary first to remove the left-hand bottom panel of the computer. This is held in place by a metal clip at the front end, and can be released by levering it at this end with a screw-driver, or similar implement.

Once the replacement system board has been installed, reverse the above procedure. Insert the back end of the left-hand bottom panel into its slots in the back panel of the computer, and then push the front end until it clips into place.

11

Page 13
Image 13
HP Vectra VL 6 manual Replacing the System Board