FA 400.2
5. Transportation, installation
•Place the shredder in its packaging on a smooth, level surface.
•Remove the packaging.
•If you need to move the shredder through narrow doors, you can wait until it is at its final location before fitting the loading tray. Without the tray, the machine is only 805 mm wide.
•When moving the shredder, note that it may topple over.
•The shredder can be moved on its rollers.
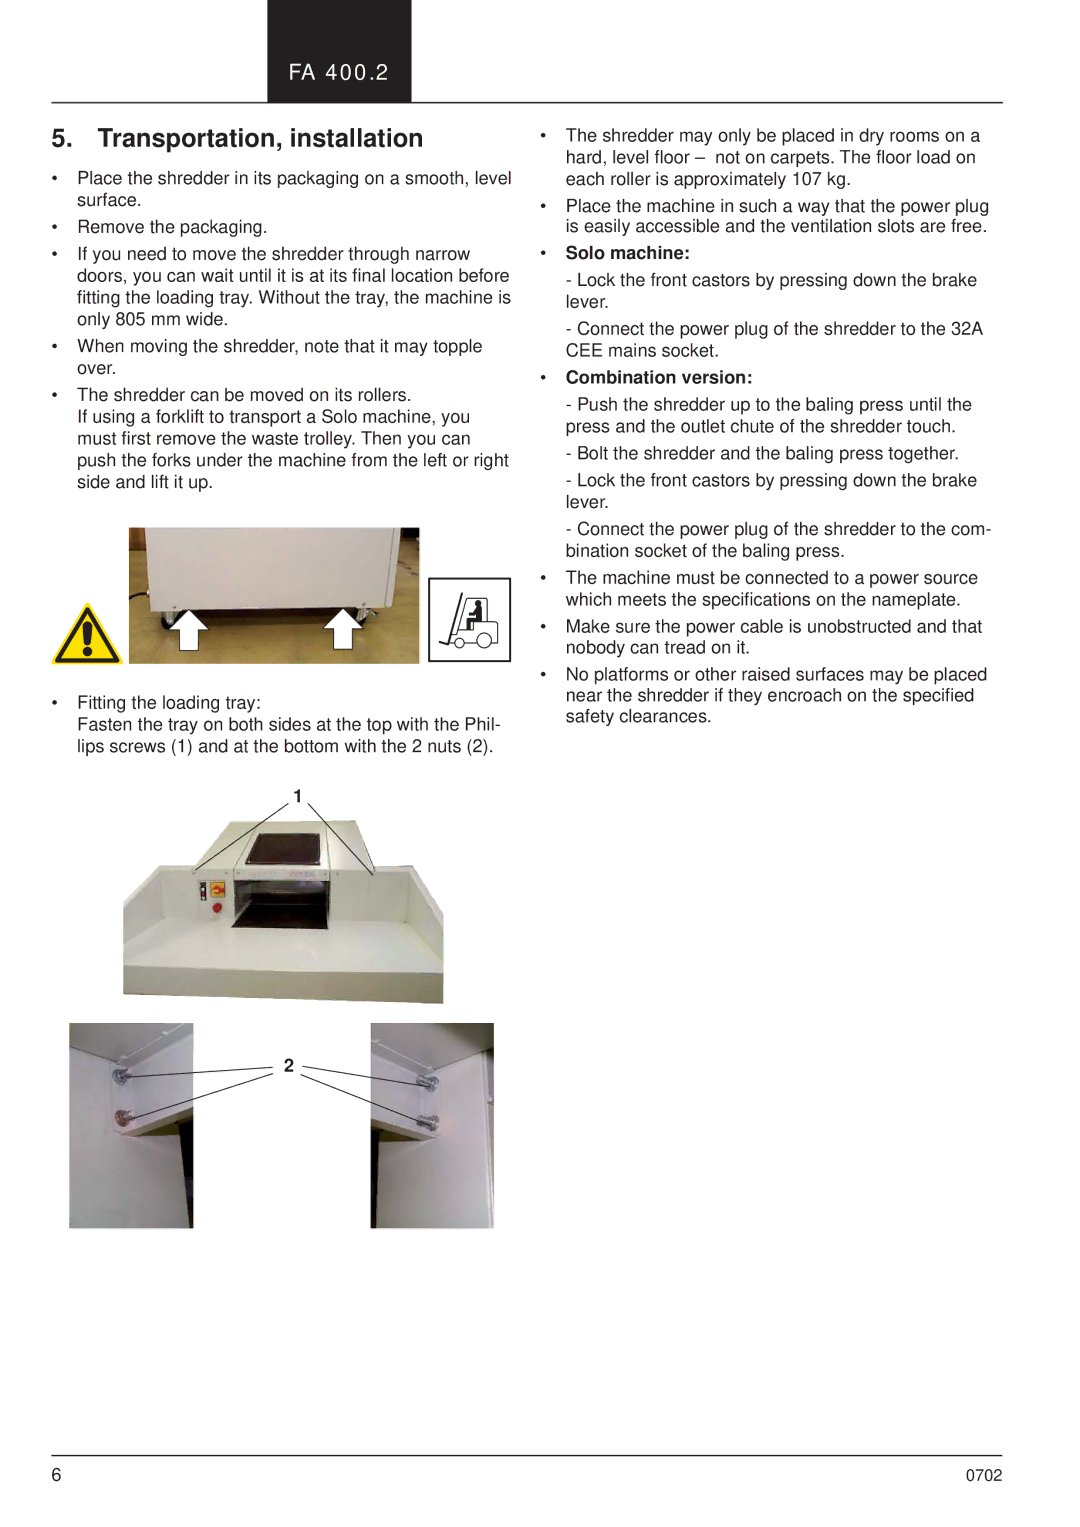
If using a forklift to transport a Solo machine, you must first remove the waste trolley. Then you can push the forks under the machine from the left or right side and lift it up.
•Fitting the loading tray:
Fasten the tray on both sides at the top with the Phil- lips screws (1) and at the bottom with the 2 nuts (2).
1
2
•The shredder may only be placed in dry rooms on a hard, level floor – not on carpets. The floor load on each roller is approximately 107 kg.
•Place the machine in such a way that the power plug is easily accessible and the ventilation slots are free.
•Solo machine:
-Lock the front castors by pressing down the brake lever.
-Connect the power plug of the shredder to the 32A CEE mains socket.
•Combination version:
-Push the shredder up to the baling press until the press and the outlet chute of the shredder touch.
-Bolt the shredder and the baling press together.
-Lock the front castors by pressing down the brake lever.
-Connect the power plug of the shredder to the com- bination socket of the baling press.
•The machine must be connected to a power source which meets the specifications on the nameplate.
•Make sure the power cable is unobstructed and that nobody can tread on it.
•No platforms or other raised surfaces may be placed near the shredder if they encroach on the specified safety clearances.
6 | 0702 |