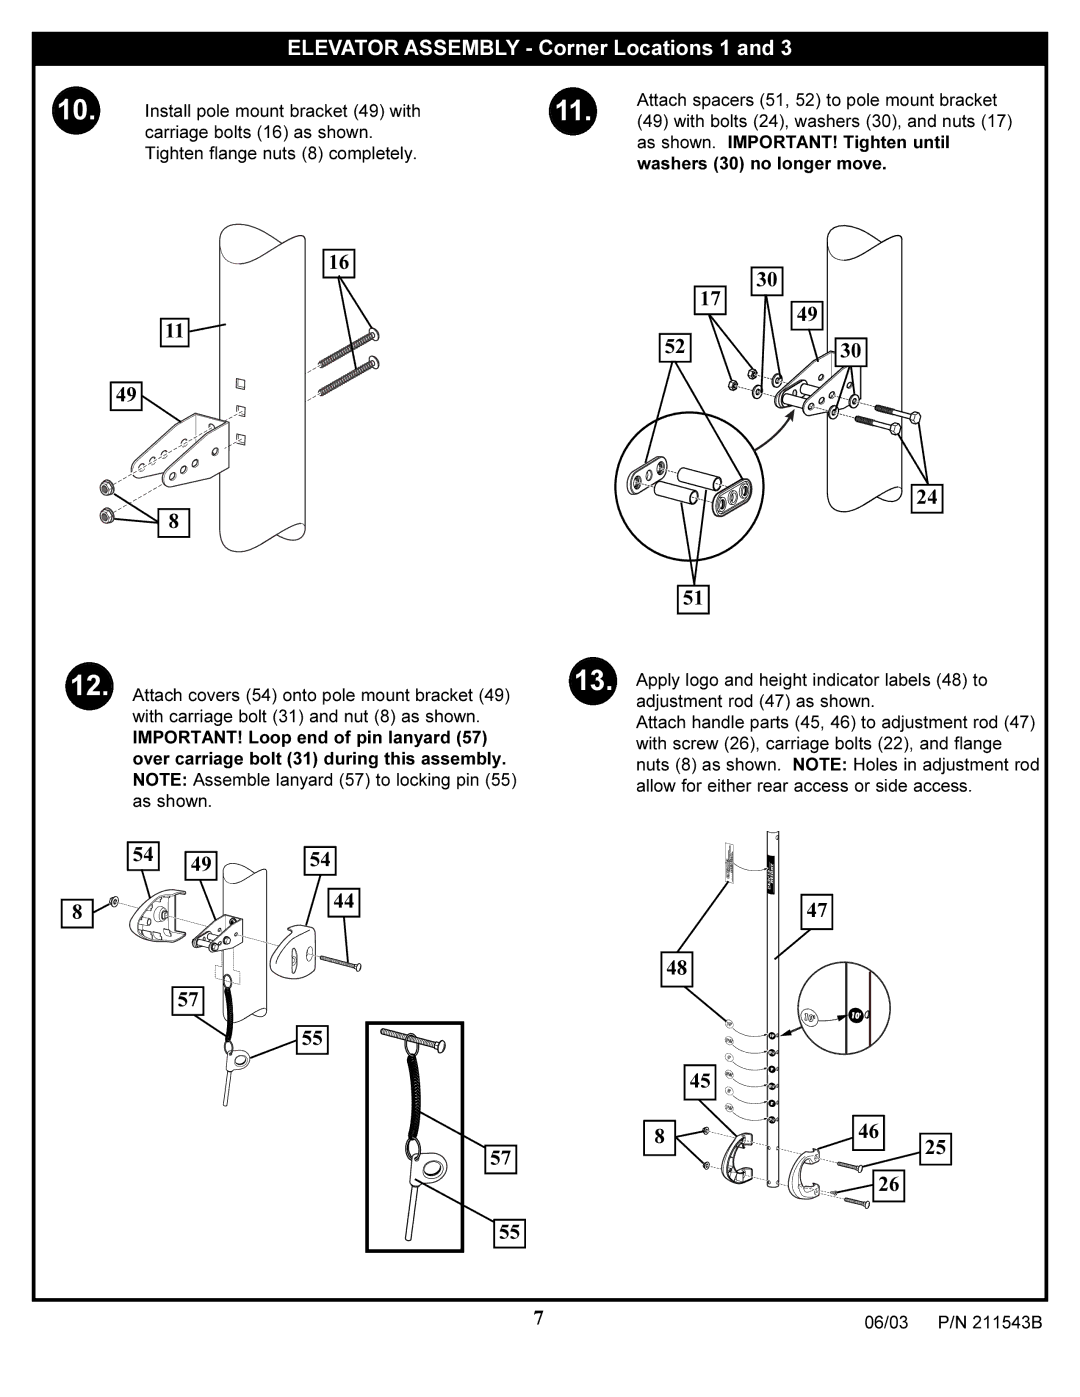
ELEVATOR ASSEMBLY - Corner Locations 1 and 3
10. | Install pole mount bracket (49) with |
| carriage bolts (16) as shown. |
| Tighten flange nuts (8) completely. |
|
|
16
11 ![]()
49
![]()
![]() 8
8
Attach spacers (51, 52) to pole mount bracket
11. (49) with bolts (24), washers (30), and nuts (17) as shown. IMPORTANT! Tighten until washers (30) no longer move.
30
17![]()
![]()
49
52 | 30 |
24
51
12. | Attach covers (54) onto pole mount bracket (49) | 13. | Apply logo and height indicator labels (48) to |
| with carriage bolt (31) and nut (8) as shown. |
| adjustment rod (47) as shown. |
|
| Attach handle parts (45, 46) to adjustment rod (47) | |
| IMPORTANT! Loop end of pin lanyard (57) |
| |
|
| with screw (26), carriage bolts (22), and flange | |
| over carriage bolt (31) during this assembly. |
| nuts (8) as shown. NOTE: Holes in adjustment rod |
| NOTE: Assemble lanyard (57) to locking pin (55) |
| allow for either rear access or side access. |
| as shown. |
| |
|
|
| |
|
|
| |
|
|
|
|
54
8 ![]()
49
57
54
44
55
57
55
47
48
| 45 |
8 | 46 |
|
26 |
25
7 | 06/03 P/N 211543B |
