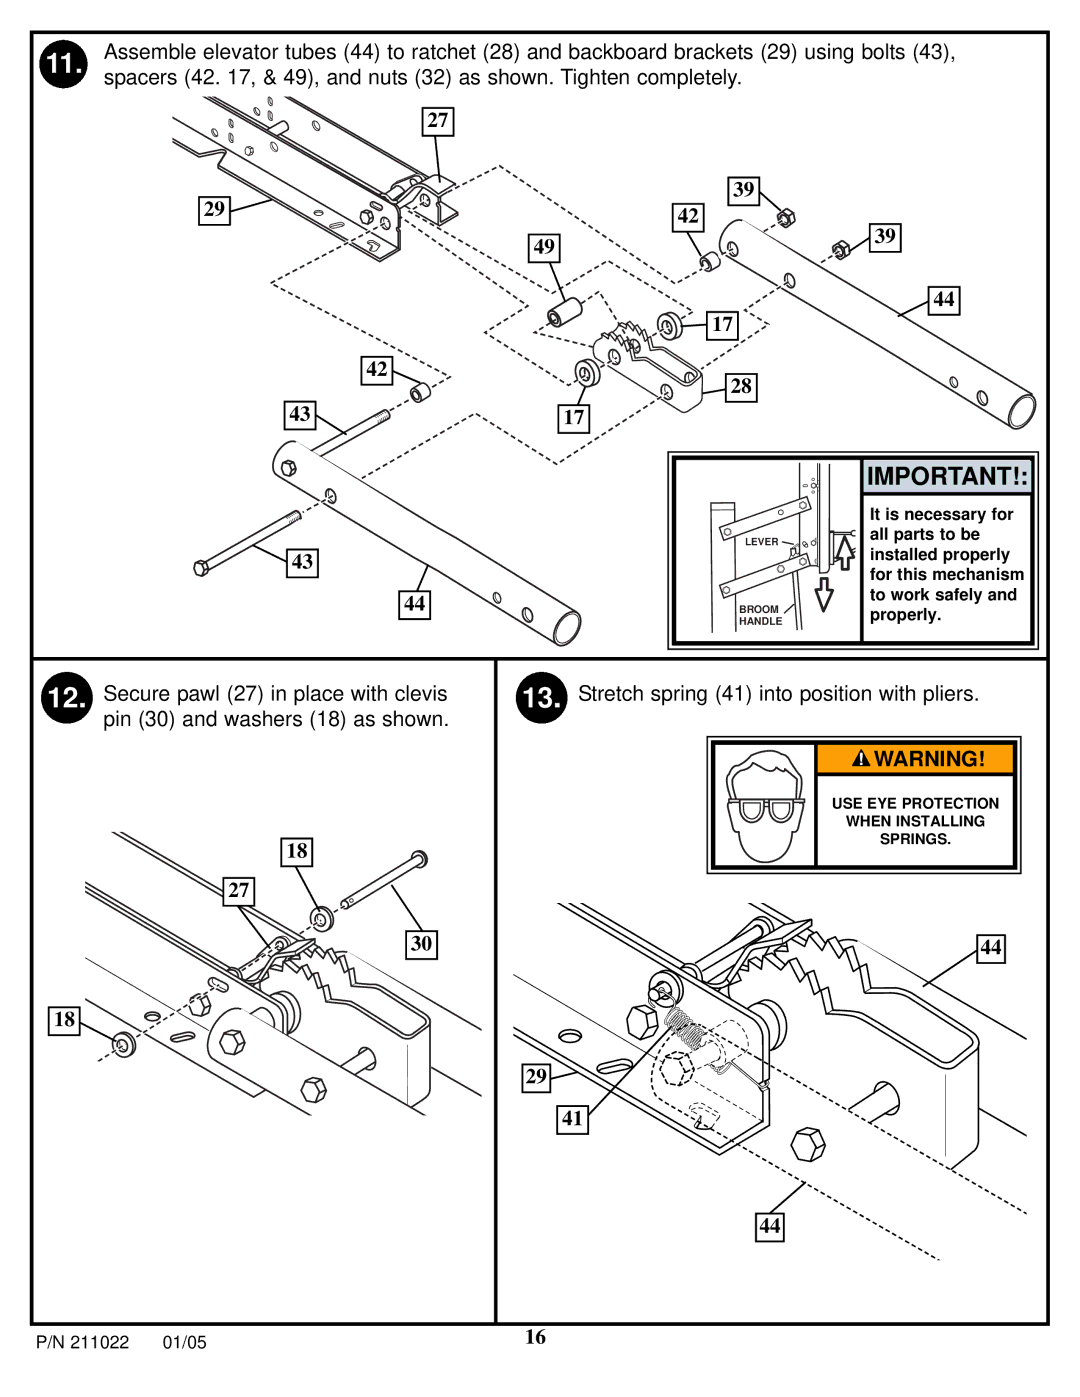
11. Assemble elevator tubes (44) to ratchet (28) and backboard brackets (29) using bolts (43), spacers (42. 17, & 49), and nuts (32) as shown. Tighten completely.
27
29 ![]()
42
43
39
42
49![]()
![]() 39
39
44
![]()
![]() 17
17
![]()
![]() 28 17
28 17
![]() 43
43
44
LEVER ![]()
BROOM HANDLE
IMPORTANT!:
It is necessary for all parts to be installed properly for this mechanism to work safely and properly.
12. Secure pawl (27) in place with clevis pin (30) and washers (18) as shown.
18
27
30
18![]()
13. Stretch spring (41) into position with pliers.
WARNING! |
USE EYE PROTECTION |
WHEN INSTALLING |
SPRINGS. |
![]() 44
44
29![]()
41
44
P/N 211022 | 01/05 | 16 |