IMPORTANT! WRITE DOWN MODEL NUMBER FROM BOX ON PAGE 1 OF THIS OWNERS MANUAL
1.
2.
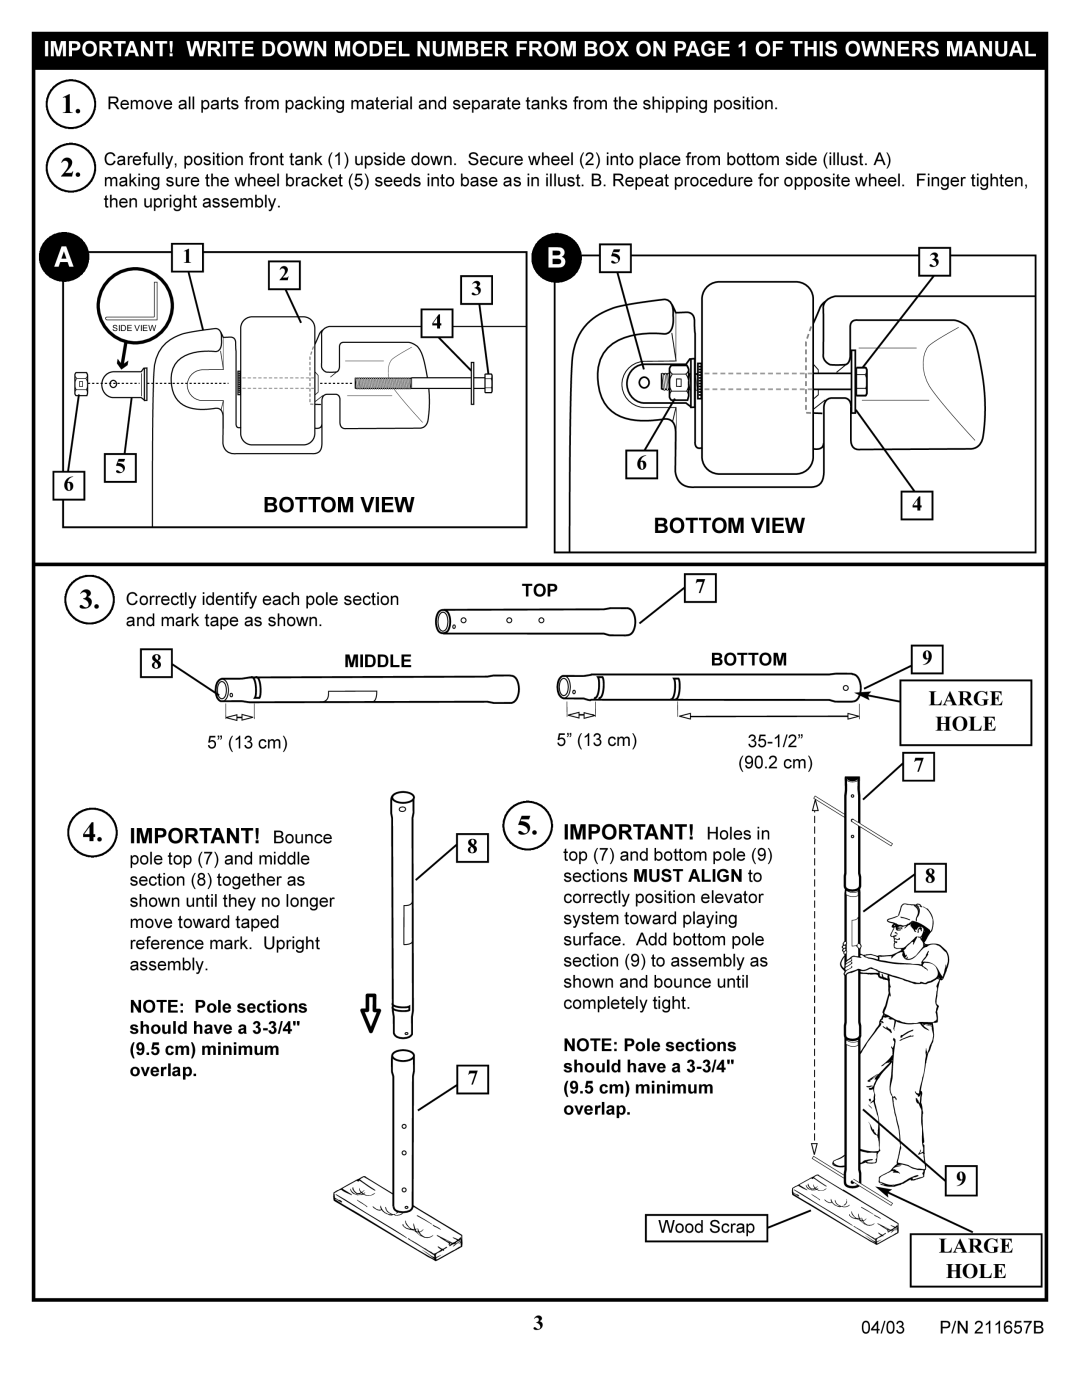
Remove all parts from packing material and separate tanks from the shipping position.
Carefully, position front tank (1) upside down. Secure wheel (2) into place from bottom side (illust. A)
making sure the wheel bracket (5) seeds into base as in illust. B. Repeat procedure for opposite wheel. Finger tighten, then upright assembly.
A | 1 | B | 5 | 3 |
| 2 | 3 |
|
|
|
|
|
| |
| SIDE VIEW | 4 |
|
|
6 | 5 |
|
| 6 |
|
|
|
| |
| BOTTOM VIEW |
|
| 4 |
|
|
|
| BOTTOM VIEW |
3. | Correctly identify each pole section | TOP |
| 7 |
|
|
| ||
| and mark tape as shown. |
|
|
|
8MIDDLE
5” (13 cm)
4. IMPORTANT! Bounce |
| |
8 | ||
pole top (7) and middle | ||
| ||
| ||
section (8) together as |
| |
shown until they no longer |
| |
move toward taped |
| |
reference mark. Upright |
| |
assembly. |
|
NOTE: Pole sections should have a
overlap.7
| BOTTOM |
5” (13 cm) | |
| (90.2 cm) |
5. IMPORTANT! Holes in top (7) and bottom pole (9) sections MUST ALIGN to correctly position elevator system toward playing surface. Add bottom pole section (9) to assembly as shown and bounce until completely tight.
NOTE: Pole sections should have a
9
LARGE
HOLE
![]() 7
7
![]()
![]() 8
8
9
Wood Scrap ![]()
![]()
![]()
![]()
LARGE
HOLE
3 | 04/03 | P/N 211657B |
