USING THE 405SX
USING DIAGNOSTIC
Another frequent use of depth offset is to show the depth beneath the deepest point of the hull. A negative value equal to the distance from the transducer location and the deepest point of the hull will have the same effect as mounting the transducer at the deepest point.
Depth offset is remembered after power is disconnected.
Reset. With the many User Options available to customize the 405SX, it is easy to configure the unit in such a way that it is detrimental to a particular use. By using the Reset function, all variable or user- controlled features of the 405SX are returned to the factory settings.
The Reset function is an important first step in
troubleshooting problems to ensure that a user selected setting is not the cause for the perceived problem.
USING THE DIAGNOSTIC FEATURE
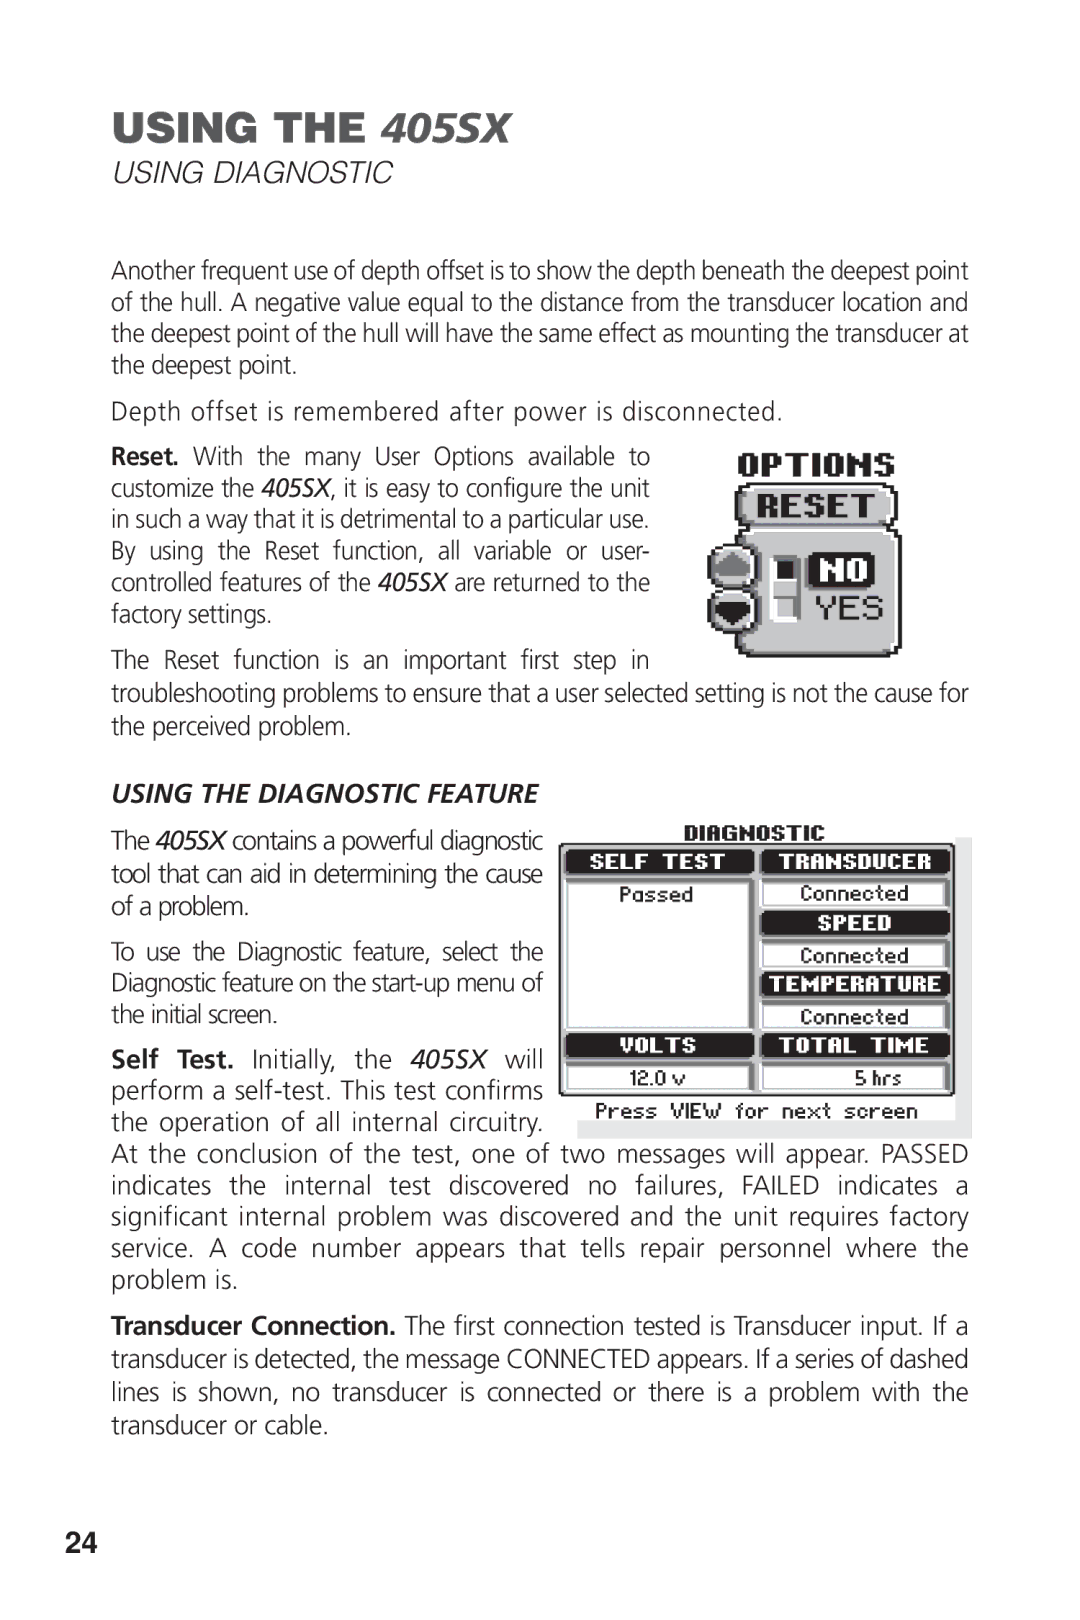
The 405SX contains a powerful diagnostic tool that can aid in determining the cause of a problem.
To use the Diagnostic feature, select the Diagnostic feature on the
Self Test. Initially, the 405SX will perform a
At the conclusion of the test, one of two messages will appear. PASSED indicates the internal test discovered no failures, FAILED indicates a significant internal problem was discovered and the unit requires factory service. A code number appears that tells repair personnel where the problem is.
Transducer Connection. The first connection tested is Transducer input. If a transducer is detected, the message CONNECTED appears. If a series of dashed lines is shown, no transducer is connected or there is a problem with the transducer or cable.
24