Hunter Fan 41923 warranty Installing the Canopy and Canopy Trim Ring, Step Steps

Models: 41923

1 14
Download 14 pages 635 b
Page 9
Image 9
6 • Installing the Canopy and Canopy Trim Ring

6 • Installing the Canopy and Canopy Trim Ring

6-1. Holding the canopy, raise the fan off the hook.

6-2. Align the slots in the canopy with the tabs on the ceiling plate.

6-3. Raise the canopy over the ceiling plate. Rotate the canopy clockwise until the tabs on the ceiling plate totally engage with the slots in the canopy.

6-4. Loosely assemble the three canopy screws into the canopy one at a time. Once all three screws are in, tighten them.

6-5. Using both hands, push the canopy trim ring up to the top of the canopy. e canopy trim ring will snap and lock into place.

Should you need to remove the canopy trim ring, follow these steps:

1.Locate the tab indicators, small bumps on top of tabs.

2.Press firmly on opposite sides of the ring towards the canopy. e tabs will flex out releasing the trim ring from the canopy.
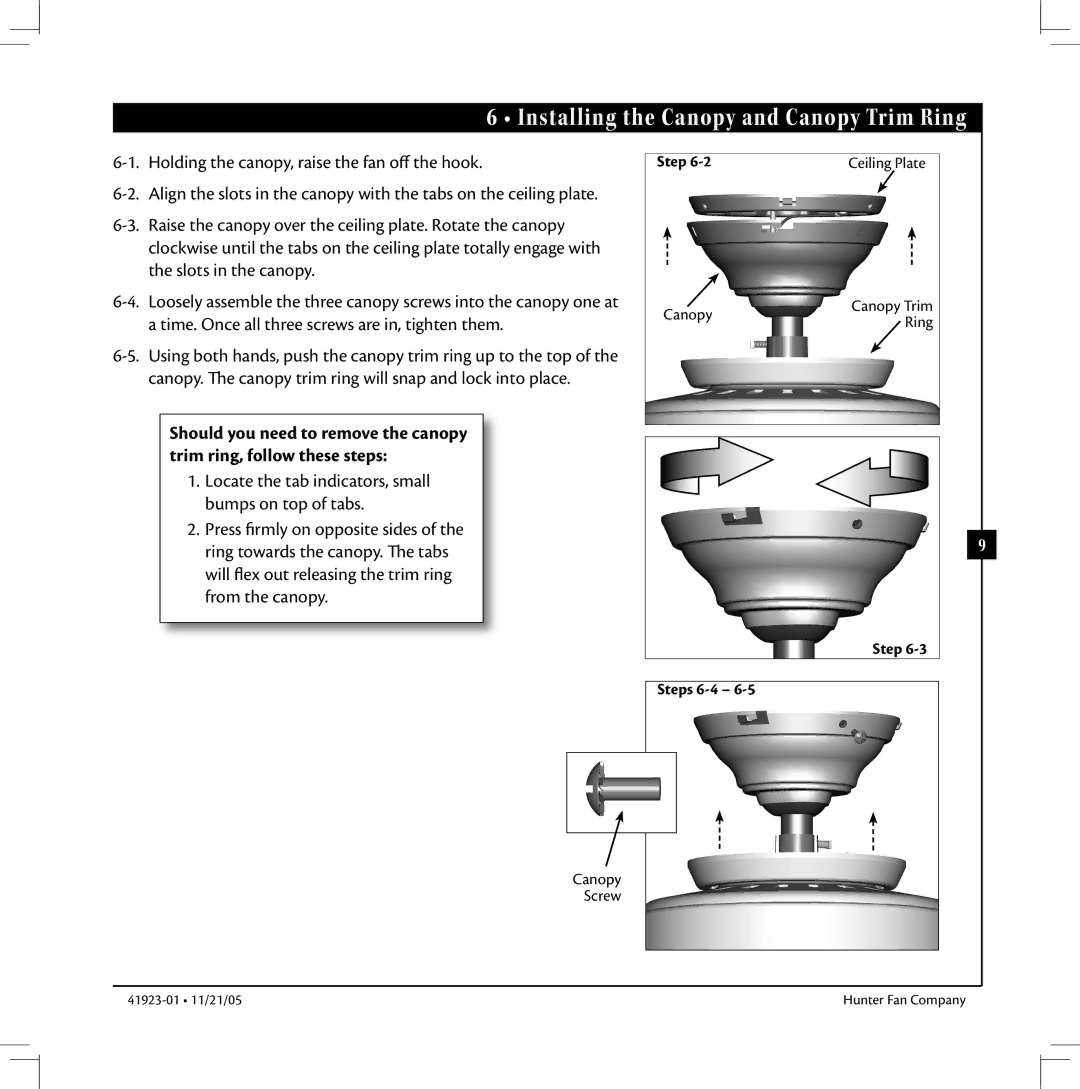
Step 6-2

Ceiling Plate

Canopy

Canopy Trim

Ring


Step 6-3

Steps 6-46-5

9

Canopy Screw

41923-01 • 11/21/05

Hunter Fan Company

Page 9
Image 9
Hunter Fan 41923 warranty Installing the Canopy and Canopy Trim Ring, Step Steps