42656-01 specifications
The Hunter Fan 42656-01 is a remarkable ceiling fan that combines modern design with advanced functionality, making it a popular choice for both residential and commercial spaces. With a sleek appearance and a variety of features, this fan not only enhances the aesthetic of a room but also provides exceptional performance in air circulation.One of the main features of the Hunter Fan 42656-01 is its powerful motor, which allows for efficient airflow while remaining quiet during operation. The WhisperWind motor technology ensures that you can enjoy a peaceful environment without the distracting noise typically associated with ceiling fans. This feature is especially beneficial for bedrooms, offices, or any place where tranquility is valued.
The fan comes equipped with multiple speed settings, giving users the flexibility to adjust airflow according to their comfort levels. Whether you need a gentle breeze on a warm day or a stronger draft for improved circulation, the Hunter Fan 42656-01 has you covered. In addition, this model features a reverse function, enabling it to operate in both summer and winter modes. By reversing the direction of the blades, the fan can push warm air down during the chilly months, enhancing heating efficiency.
Aesthetically, the Hunter Fan 42656-01 showcases a contemporary design that blends well with various interior styles. With a selection of finishes and blade options, it can complement any decor, whether rustic, modern, or traditional. The fan's clean lines and understated elegance make it a versatile addition to living rooms, dining areas, or covered patios.
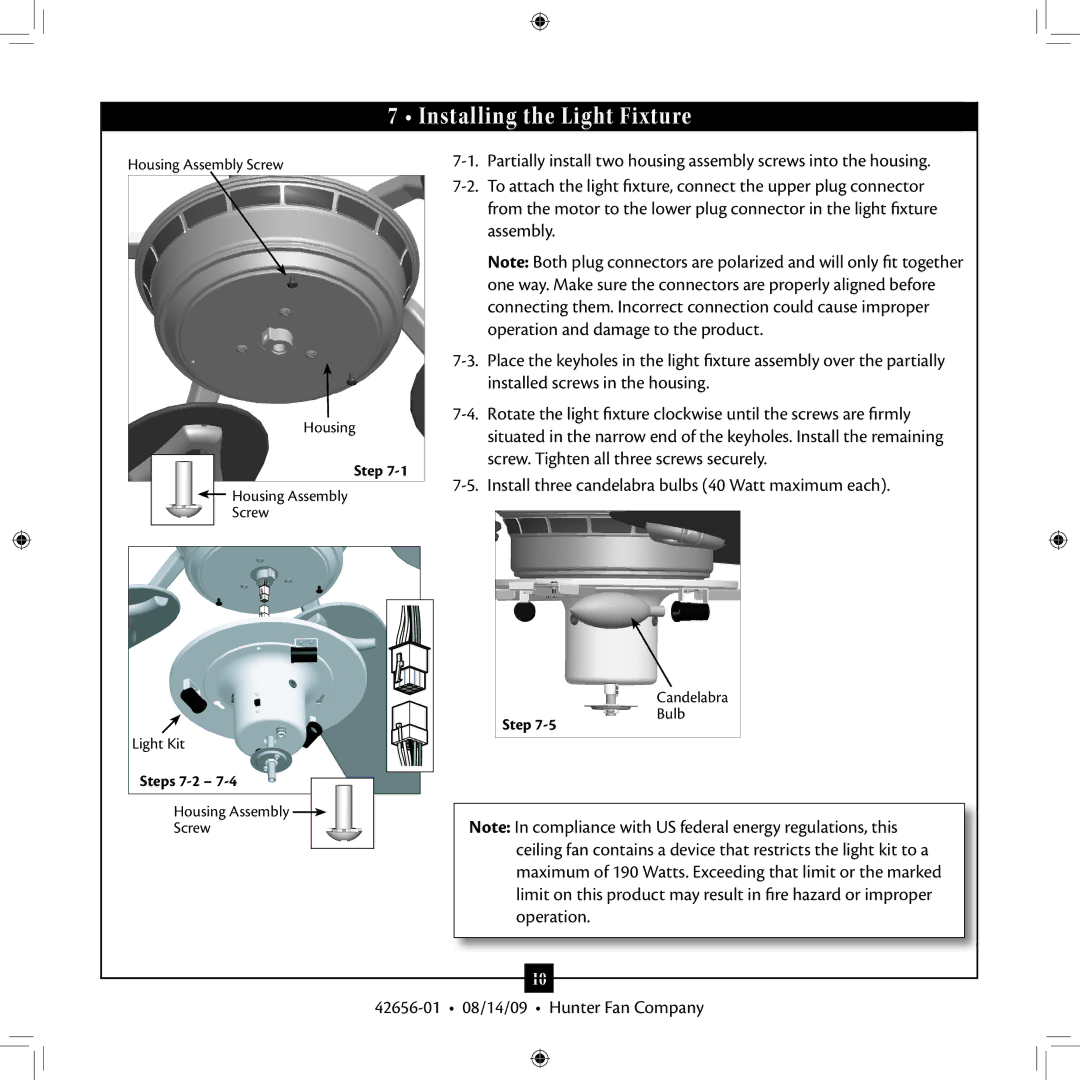
Installation is user-friendly, as the fan comes with a comprehensive guide, and its lightweight construction makes it easy to mount. The fan is compatible with both standard and angled ceilings, allowing for further versatility in where it can be placed.
Moreover, the Hunter Fan 42656-01 is designed with energy efficiency in mind. By utilizing energy-efficient motors and LED lighting options, it contributes to reduced energy consumption, making it an eco-friendly choice for consumers looking to lower their environmental impact.
In conclusion, the Hunter Fan 42656-01 offers a perfect blend of style, functionality, and energy efficiency. With its whisper-quiet operation, versatile speed settings, attractive design, and user-friendly installation, it remains an excellent option for anyone seeking to enhance their indoor climate while adding a touch of sophistication to their space.

