BASIC CONNECTION
uEnsure that the power switch of this unit and other equipment to be connected is turned off before commenc- ing connection
uRead through the instructions before connecting other
equipment
uEnsure that you observe the
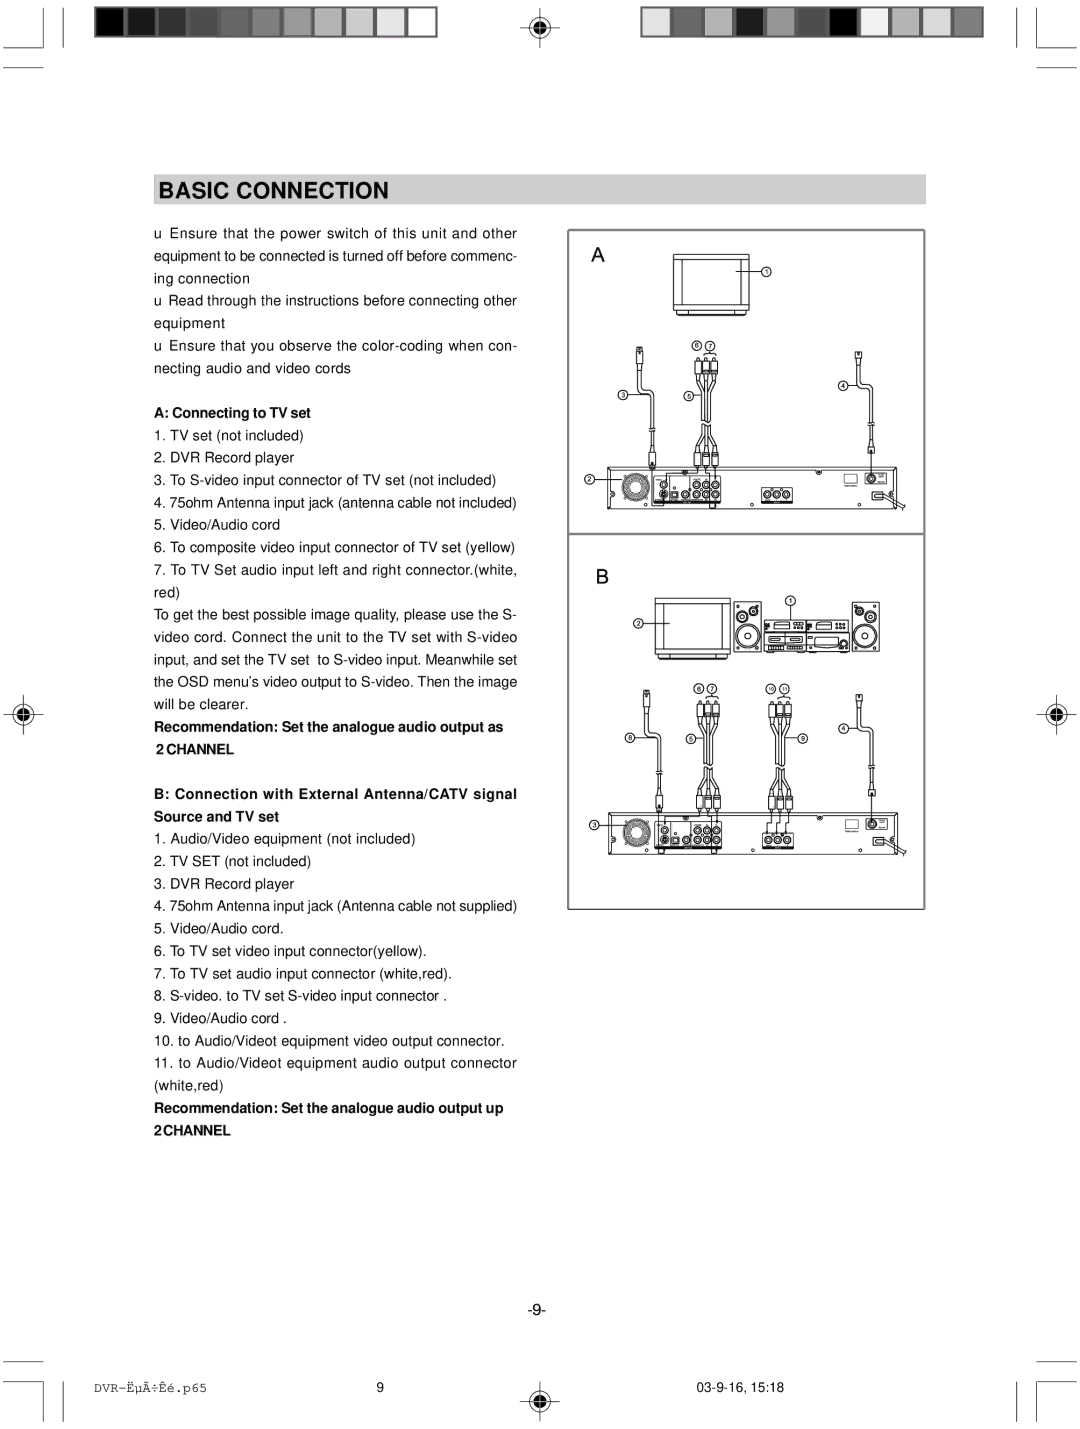
A: Connecting to TV set
1.TV set (not included)
2.DVR Record player
3.To
4.75ohm Antenna input jack (antenna cable not included)
5.Video/Audio cord
6.To composite video input connector of TV set (yellow)
7.To TV Set audio input left and right connector.(white, red)
To get the best possible image quality, please use the S- video cord. Connect the unit to the TV set with
Recommendation: Set the analogue audio output as
2 CHANNEL
B:Connection with External Antenna/CATV signal Source and TV set
1.Audio/Video equipment (not included)
2.TV SET (not included)
3.DVR Record player
4.75ohm Antenna input jack (Antenna cable not supplied)
5.Video/Audio cord.
6.To TV set video input connector(yellow).
7.To TV set audio input connector (white,red).
8.
9.Video/Audio cord .
10.to Audio/Videot equipment video output connector.
11.to Audio/Videot equipment audio output connector
(white,red)
Recommendation: Set the analogue audio output up
2 CHANNEL
9 |