MAINTENANCE FUNDAMENTALS, CONTINUED
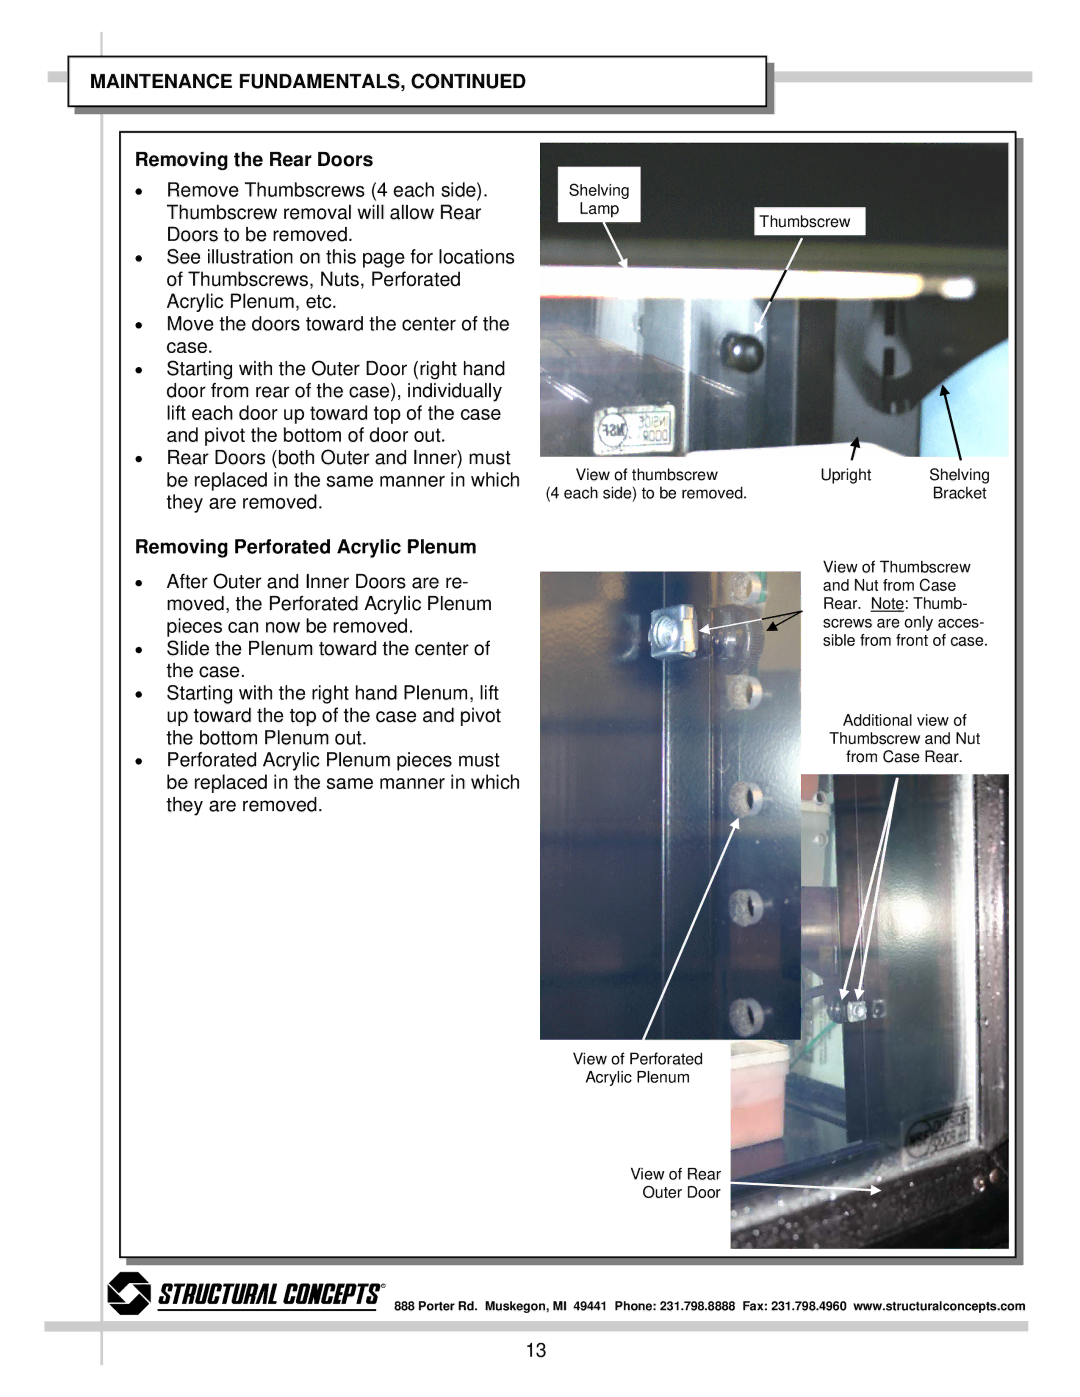
Removing the Rear Doors
•Remove Thumbscrews (4 each side). Thumbscrew removal will allow Rear Doors to be removed.
•See illustration on this page for locations of Thumbscrews, Nuts, Perforated Acrylic Plenum, etc.
•Move the doors toward the center of the case.
•Starting with the Outer Door (right hand door from rear of the case), individually lift each door up toward top of the case and pivot the bottom of door out.
•Rear Doors (both Outer and Inner) must be replaced in the same manner in which they are removed.
Removing Perforated Acrylic Plenum
•After Outer and Inner Doors are re- moved, the Perforated Acrylic Plenum pieces can now be removed.
•Slide the Plenum toward the center of the case.
•Starting with the right hand Plenum, lift up toward the top of the case and pivot the bottom Plenum out.
•Perforated Acrylic Plenum pieces must be replaced in the same manner in which they are removed.
Shelving
Lamp
Thumbscrew
View of thumbscrew | Upright | Shelving |
(4 each side) to be removed. |
| Bracket |
|
|
|
|
|
|
View of Thumbscrew and Nut from Case Rear. Note: Thumb- screws are only acces- sible from front of case.
Additional view of
Thumbscrew and Nut
from Case Rear.
View of Perforated
Acrylic Plenum
View of Rear
Outer Door ![]()
R
888 Porter Rd. Muskegon, MI 49441 Phone: 231.798.8888 Fax: 231.798.4960 www.structuralconcepts.com
13