burners, hold a lighted match or lighter near the burner. Push and turn the corresponding knob counter clockwise
till to max position ![]() . Each burner can be operated at its maximum, minimum or intermediate power. Show on the knob are the different symbols for off • and it is in this position when the symbol corresponds with the reference
. Each burner can be operated at its maximum, minimum or intermediate power. Show on the knob are the different symbols for off • and it is in this position when the symbol corresponds with the reference
mark for maximum ![]() and minimum
and minimum ![]() . To obtain these settings, turn the knob counter clockwise with respect to the off position. To turn off the burner, turn the knob clockwise until it stops (corresponding again with the symbol •).
. To obtain these settings, turn the knob counter clockwise with respect to the off position. To turn off the burner, turn the knob clockwise until it stops (corresponding again with the symbol •).
Gas cook-top electronic ignition (4)
This device operates when a sliht pressure is applied on
the botton “4” marked with ![]() . To light a specific burner just press the button labeled “4” while pushing the corresponding knob all the way in and turning it counter- clockwise until it lights. For immediate lighting, first press the button and then turn the knob.
. To light a specific burner just press the button labeled “4” while pushing the corresponding knob all the way in and turning it counter- clockwise until it lights. For immediate lighting, first press the button and then turn the knob.
Important: should the burner flames accidentally go out, turn off the control knob and wait at least 1 minu- te before trying to
Oven light button (3)
This is marked by the symbol ![]() and switchs on the light inside the oven so that you can control the cooking without opening the door.
and switchs on the light inside the oven so that you can control the cooking without opening the door.
Pilot lamp
This turns on whenever any electric heating element in the oven is on.
Practical advice for using the burners
In order to obtain the best performance keep in mind the following:
•use the appropriate cookware for each burner (see table) so that the flames do not emerge from beneath the bottom of the container.
•Only flat bottom containers should be used.
•At the boiling point, turn the knob to minimum.
•Always use cookware with a lid.
Burner | Cookware Diameter (cm) |
|
|
Fast Large (RG) | 24 - 26 |
|
|
Fast (R) | 22 - 24 |
|
|
16 - 20 | |
|
|
16 - 20 | |
|
|
N.B. On the models supplied with a reducer shelf, remember that this should be used only for the
Important: The cooker is equipped with a protective gra- te located on the front part of the cooking surface to prevent cookware from falling accidentally. When the front burners are in use, this grate must be raised.
Inner glass oven door
The cooker is provided with an inner glass that can be removed unscrewing the two screws. This glass must be replaced after cleaning and always be in position when cooking.
Oven door
You can buy a special kit to reduce door temperature when the oven is on and save energy. If there are little children in the house, this kit is a must. The kit code number is 039888 or 039104 (for traditional models with
The cooking programmer
| 4 | 5 |
12.05 | 120 | 7 |
| 2 | 3 |
1
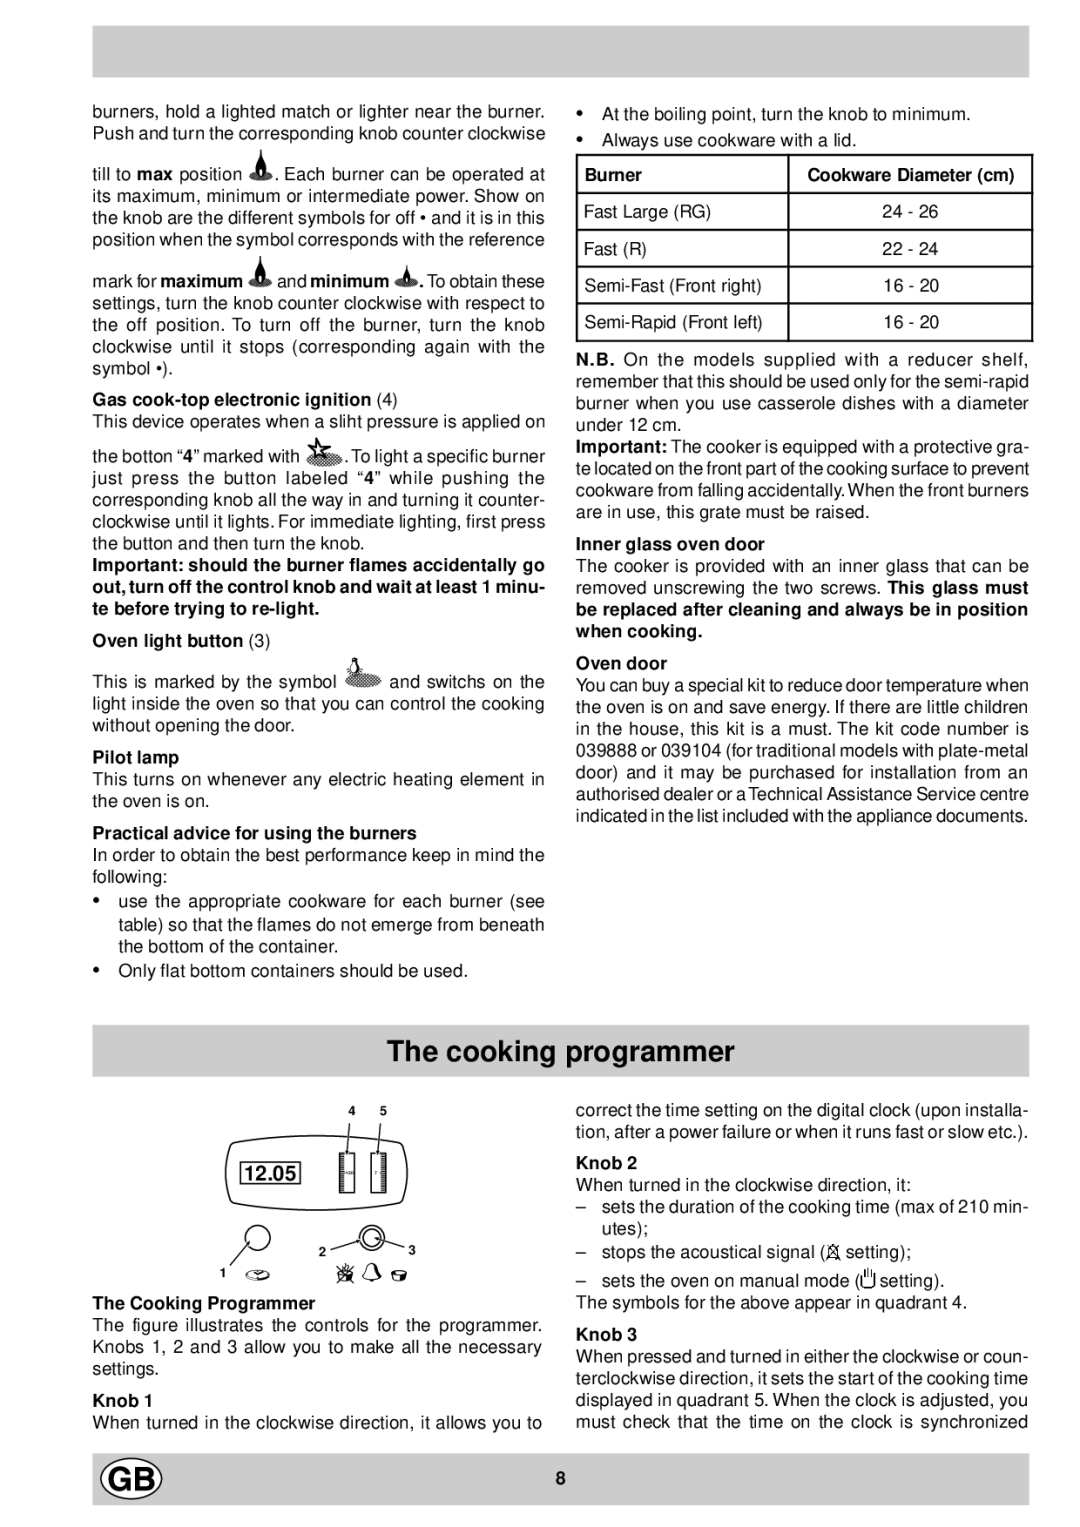
The Cooking Programmer
The figure illustrates the controls for the programmer. Knobs 1, 2 and 3 allow you to make all the necessary settings.
Knob 1
When turned in the clockwise direction, it allows you to
correct the time setting on the digital clock (upon installa- tion, after a power failure or when it runs fast or slow etc.).
Knob 2
When turned in the clockwise direction, it:
–sets the duration of the cooking time (max of 210 min- utes);
–stops the acoustical signal (![]() setting);
setting);
–sets the oven on manual mode (![]() setting).
setting).
The symbols for the above appear in quadrant 4.
Knob 3
When pressed and turned in either the clockwise or coun- terclockwise direction, it sets the start of the cooking time displayed in quadrant 5. When the clock is adjusted, you must check that the time on the clock is synchronized
8
