Using the Width Selector
![]() Read the following instructions carefully. The example presented may not look like the graph you just created. Focus on the concepts and techniques presented. Specific cases will be discussed later.
Read the following instructions carefully. The example presented may not look like the graph you just created. Focus on the concepts and techniques presented. Specific cases will be discussed later.
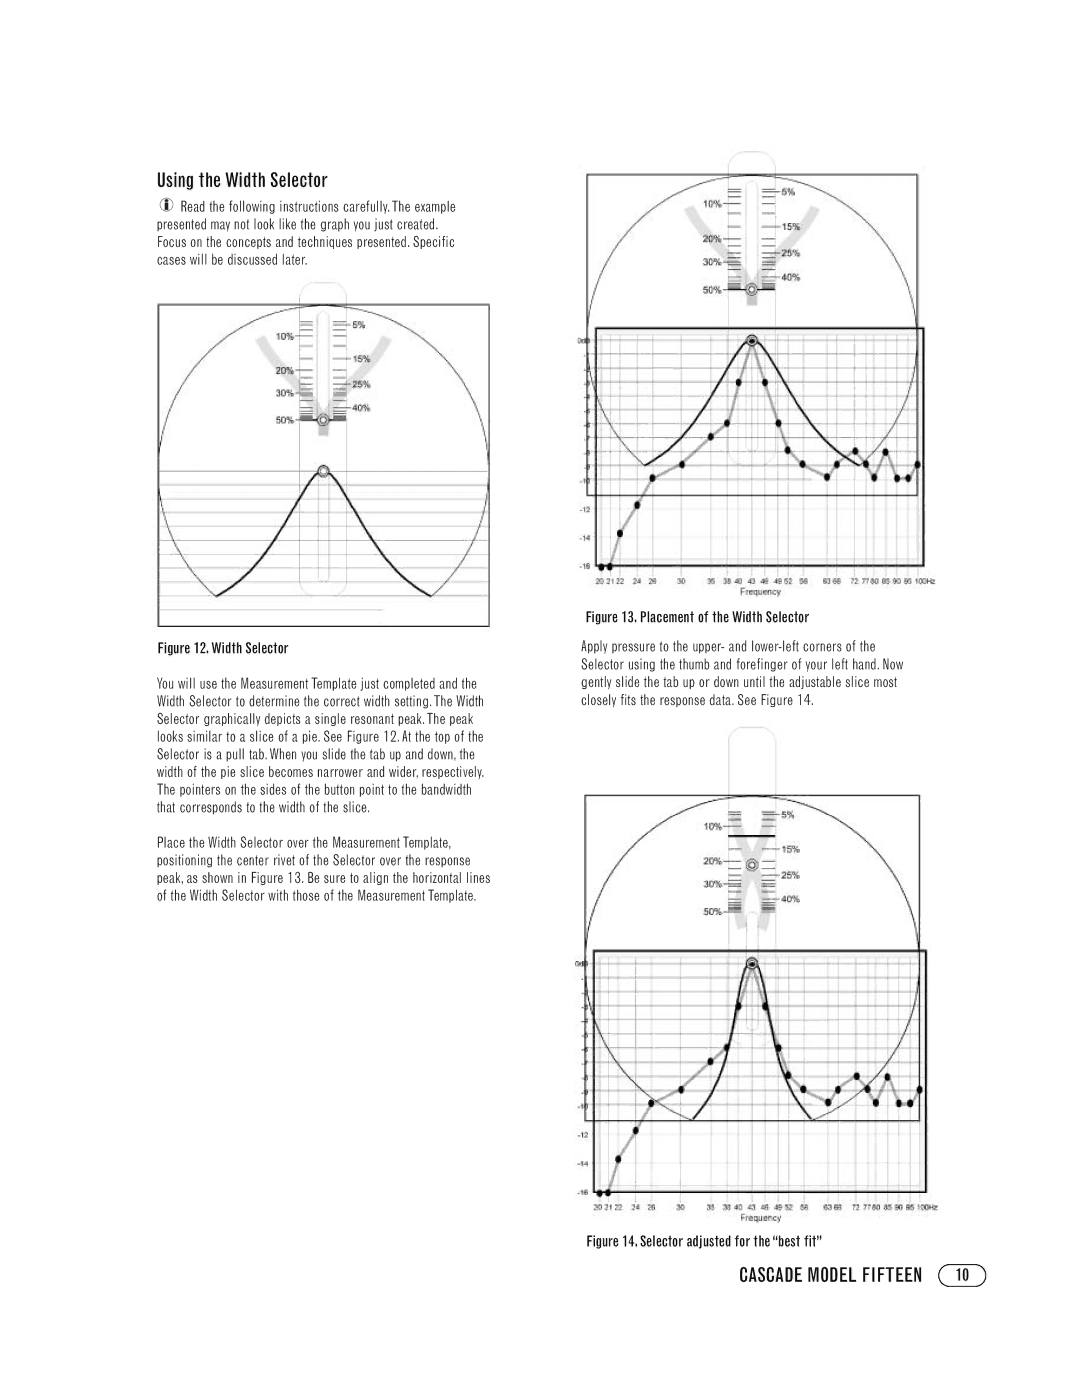
Figure 12. Width Selector
You will use the Measurement Template just completed and the Width Selector to determine the correct width setting. The Width Selector graphically depicts a single resonant peak. The peak looks similar to a slice of a pie. See Figure 12. At the top of the Selector is a pull tab. When you slide the tab up and down, the width of the pie slice becomes narrower and wider, respectively. The pointers on the sides of the button point to the bandwidth that corresponds to the width of the slice.
Place the Width Selector over the Measurement Template, positioning the center rivet of the Selector over the response peak, as shown in Figure 13. Be sure to align the horizontal lines of the Width Selector with those of the Measurement Template.
Figure 13. Placement of the Width Selector
Apply pressure to the upper- and
Figure 14. Selector adjusted for the “best fit”
CASCADE MODEL FIFTEEN | 10 |
