WALL-MOUNTING THE SATELLITES
IMPORTANT SAFETY NOTE: The customer is solely responsible for proper selection of mounting hardware not included with the speakers, and for proper assembly and installation of the wall brackets, including but not limited to the selection of appropriate
Step 1. Remove the rear foot by loosening the screw on the bottom of the satellite.
Adjustable Wall Bracket
Step 1. Remove the rear foot by loosening the screw on the bottom of the satellite.
Step 2. Mark the positions on the wall where you would like to place the mounting screws.
Step 3. Place bracket against the wall and fasten four
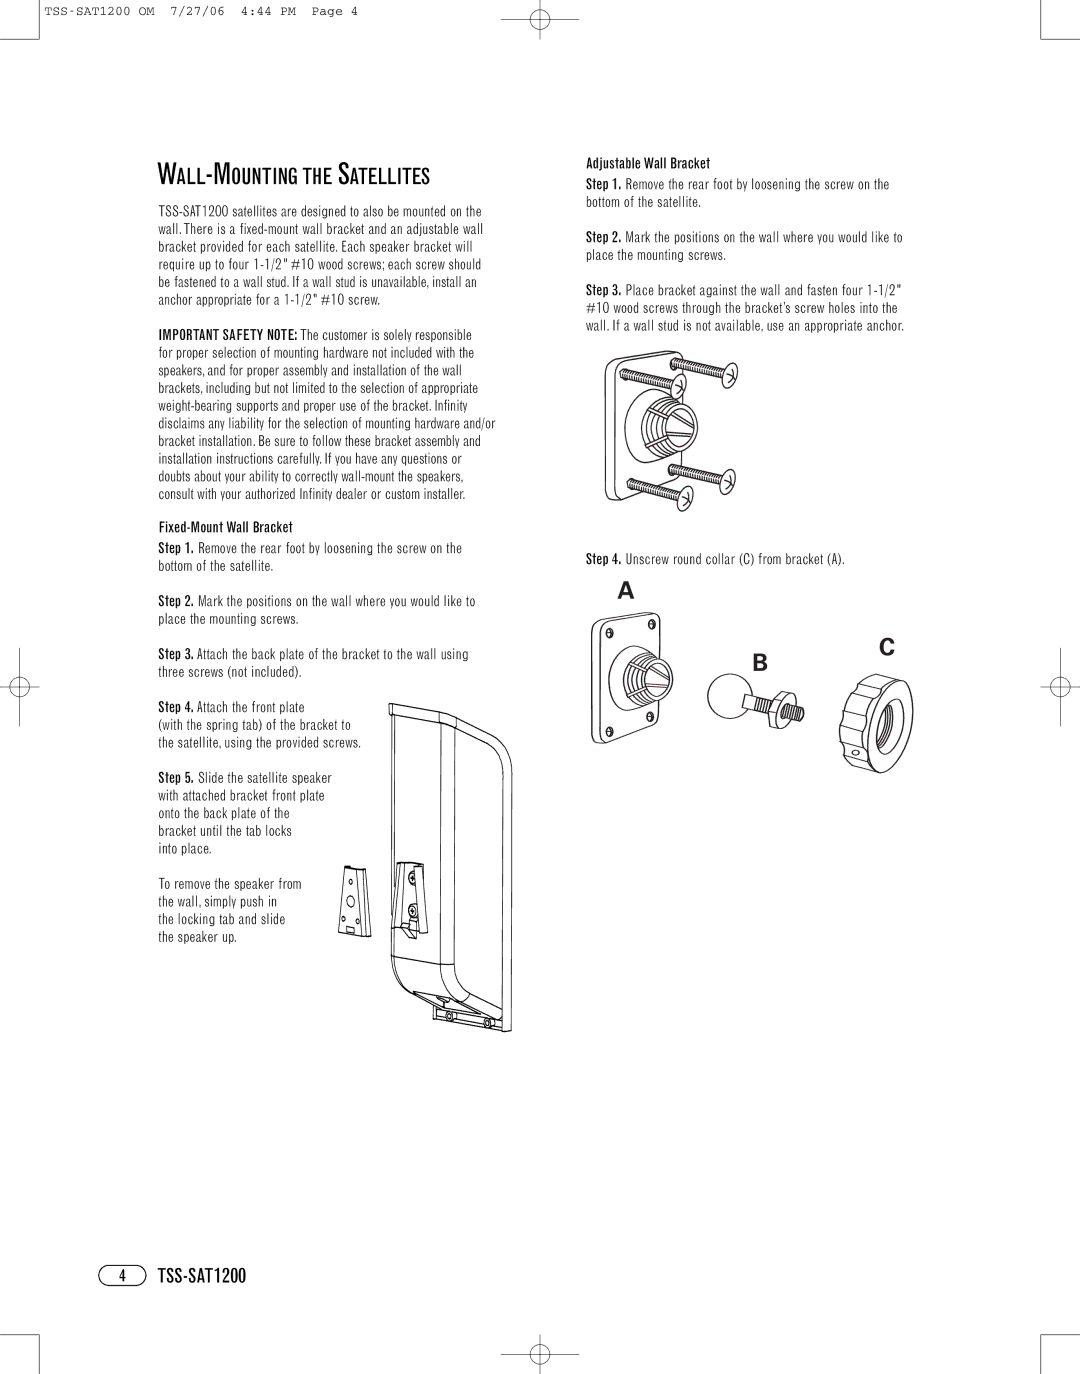
Step 4. Unscrew round collar (C) from bracket (A).
Step 2. Mark the positions on the wall where you would like to place the mounting screws.
Step 3. Attach the back plate of the bracket to the wall using three screws (not included).
Step 4. Attach the front plate
(with the spring tab) of the bracket to the satellite, using the provided screws.
Step 5. Slide the satellite speaker with attached bracket front plate onto the back plate of the bracket until the tab locks
into place.
To remove the speaker from the wall, simply push in the locking tab and slide the speaker up.
A
B
C
