Intel Desktop Board D425KT Product Guide
Installing and Removing Memory
![]() NOTE
NOTE
To be fully compliant with all applicable Intel SDRAM memory specifications, the boards require DIMMs that support the Serial Presence Detect (SPD) data structure.
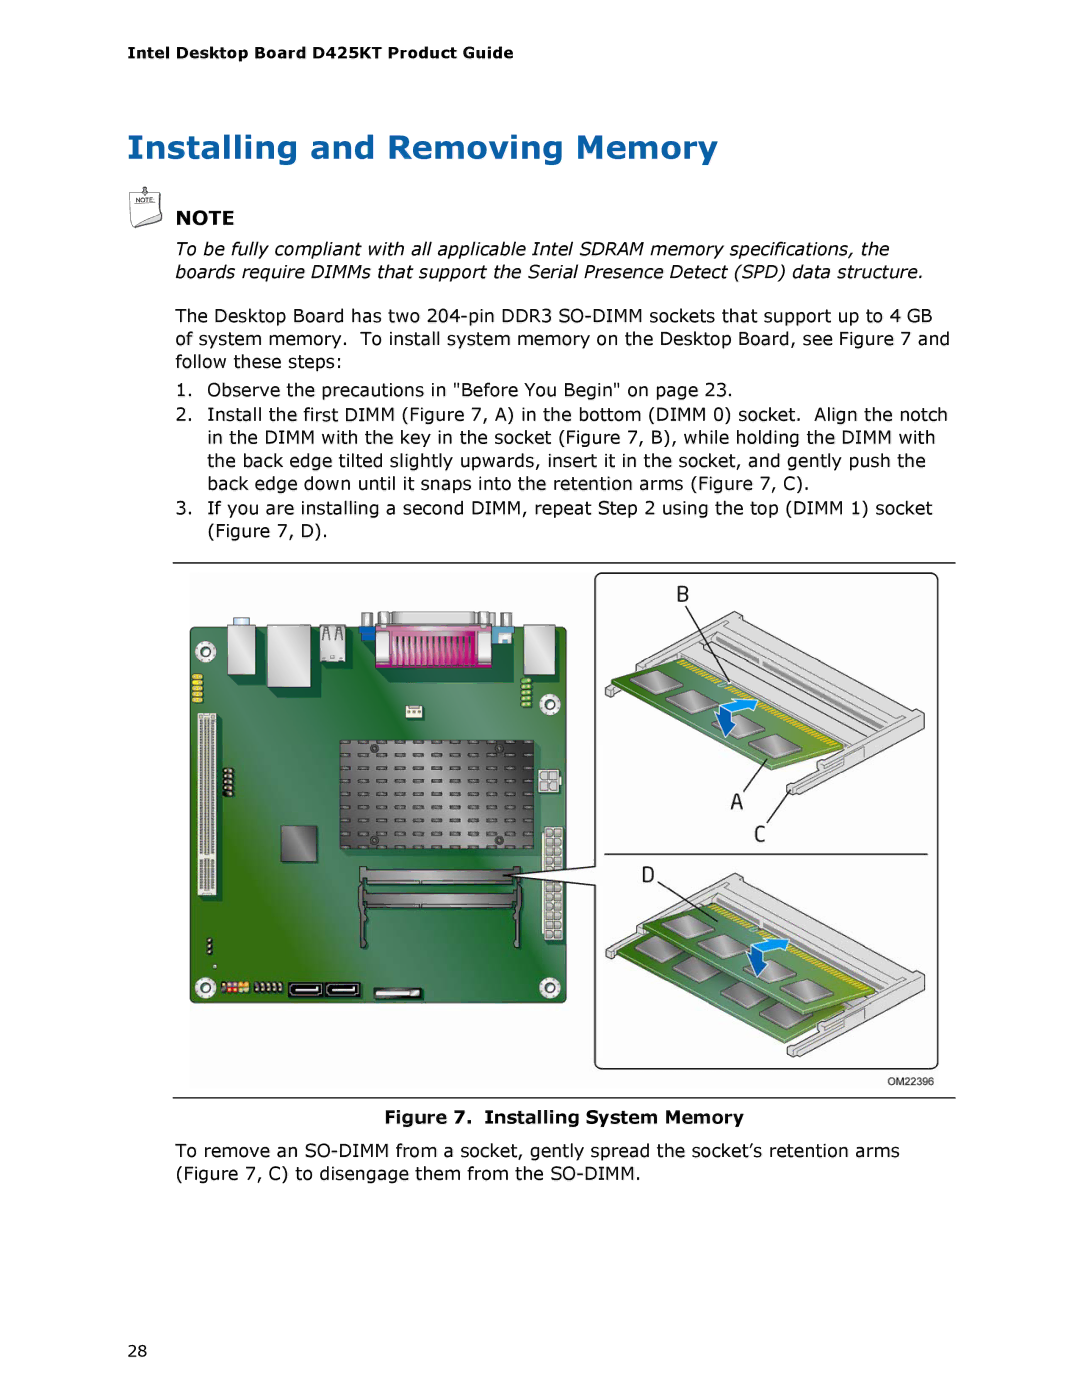
The Desktop Board has two
1.Observe the precautions in "Before You Begin" on page 23.
2.Install the first DIMM (Figure 7, A) in the bottom (DIMM 0) socket. Align the notch in the DIMM with the key in the socket (Figure 7, B), while holding the DIMM with the back edge tilted slightly upwards, insert it in the socket, and gently push the back edge down until it snaps into the retention arms (Figure 7, C).
3.If you are installing a second DIMM, repeat Step 2 using the top (DIMM 1) socket (Figure 7, D).
Figure 7. Installing System Memory
To remove an
28
