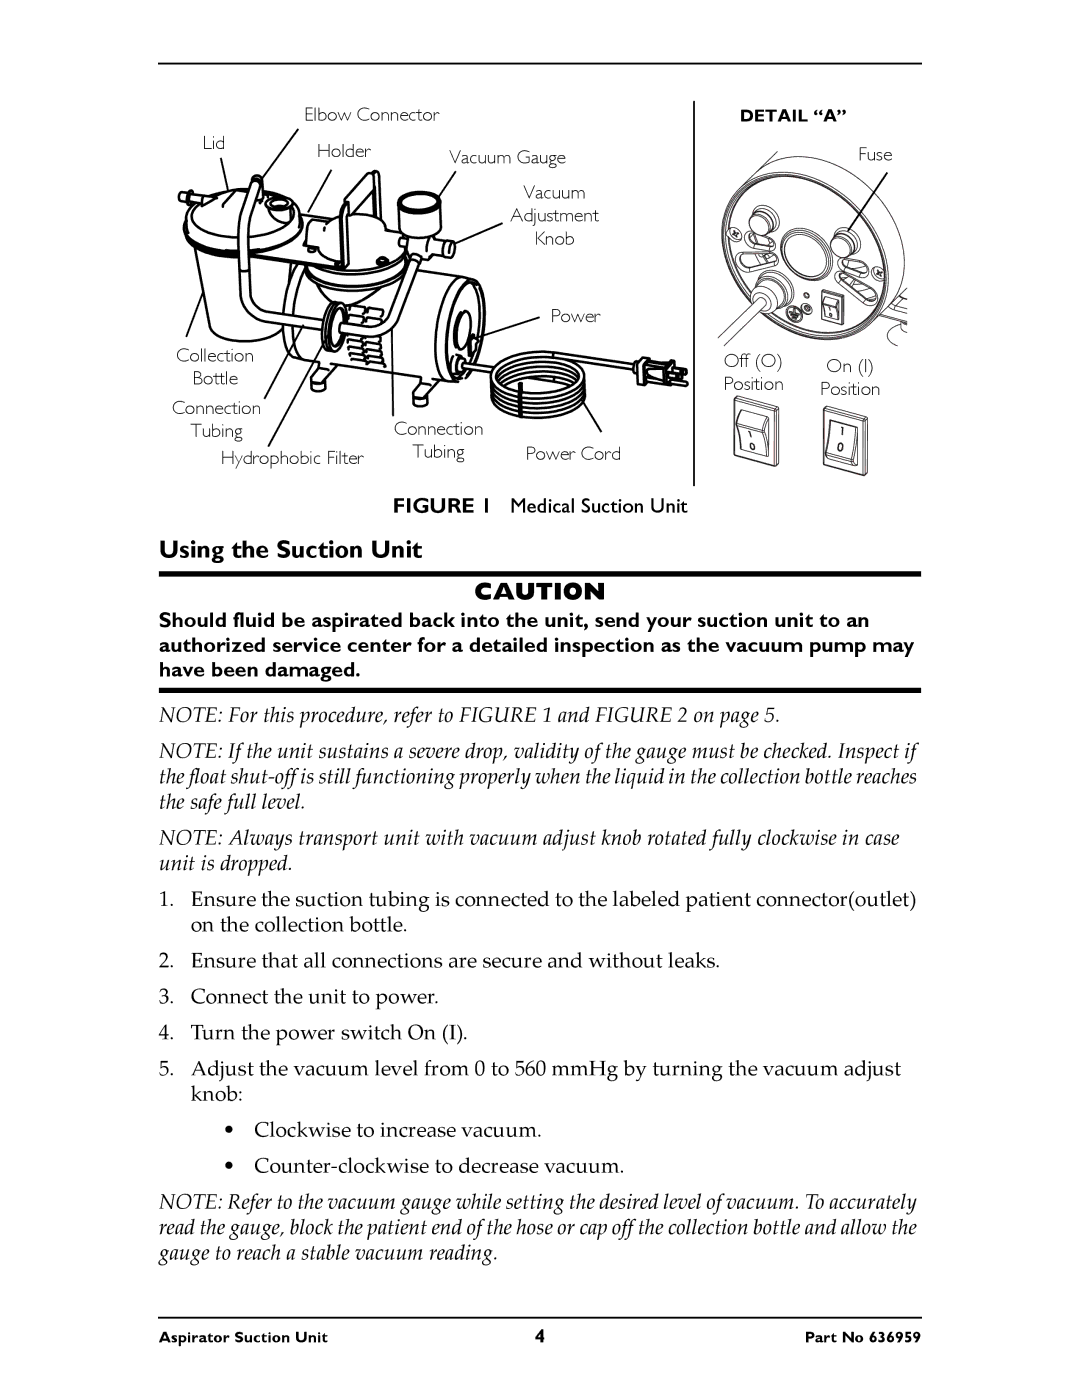
| Elbow Connector |
|
Lid | Holder | Vacuum Gauge |
| ||
|
|
Vacuum
Adjustment
Knob
|
| Power |
Collection |
|
|
Bottle |
|
|
Connection | Connection |
|
Tubing |
| |
Hydrophobic Filter | Tubing | Power Cord |
DETAIL “A”
Fuse
Off (O) | On (I) |
Position | Position |
FIGURE 1 Medical Suction Unit
Using the Suction Unit
CAUTION
Should fluid be aspirated back into the unit, send your suction unit to an authorized service center for a detailed inspection as the vacuum pump may have been damaged.
NOTE: For this procedure, refer to FIGURE 1 and FIGURE 2 on page 5.
NOTE: If the unit sustains a severe drop, validity of the gauge must be checked. Inspect if the float shut‐off is still functioning properly when the liquid in the collection bottle reaches the safe full level.
NOTE: Always transport unit with vacuum adjust knob rotated fully clockwise in case unit is dropped.
1.Ensure the suction tubing is connected to the labeled patient connector(outlet) on the collection bottle.
2.Ensure that all connections are secure and without leaks.
3.Connect the unit to power.
4.Turn the power switch On (I).
5.Adjust the vacuum level from 0 to 560 mmHg by turning the vacuum adjust knob:
•Clockwise to increase vacuum.
•Counter‐clockwise to decrease vacuum.
NOTE: Refer to the vacuum gauge while setting the desired level of vacuum. To accurately read the gauge, block the patient end of the hose or cap off the collection bottle and allow the gauge to reach a stable vacuum reading.
Aspirator Suction Unit | 4 | Part No 636959 |