FRONT RIGGINGS | SECTION 3 |
Section 3 - Front Riggings includes the following:
Installing/Removing the Footrest
Footrest Height Adjustment
Raising/Lowering the Elevated Legrest Assembly
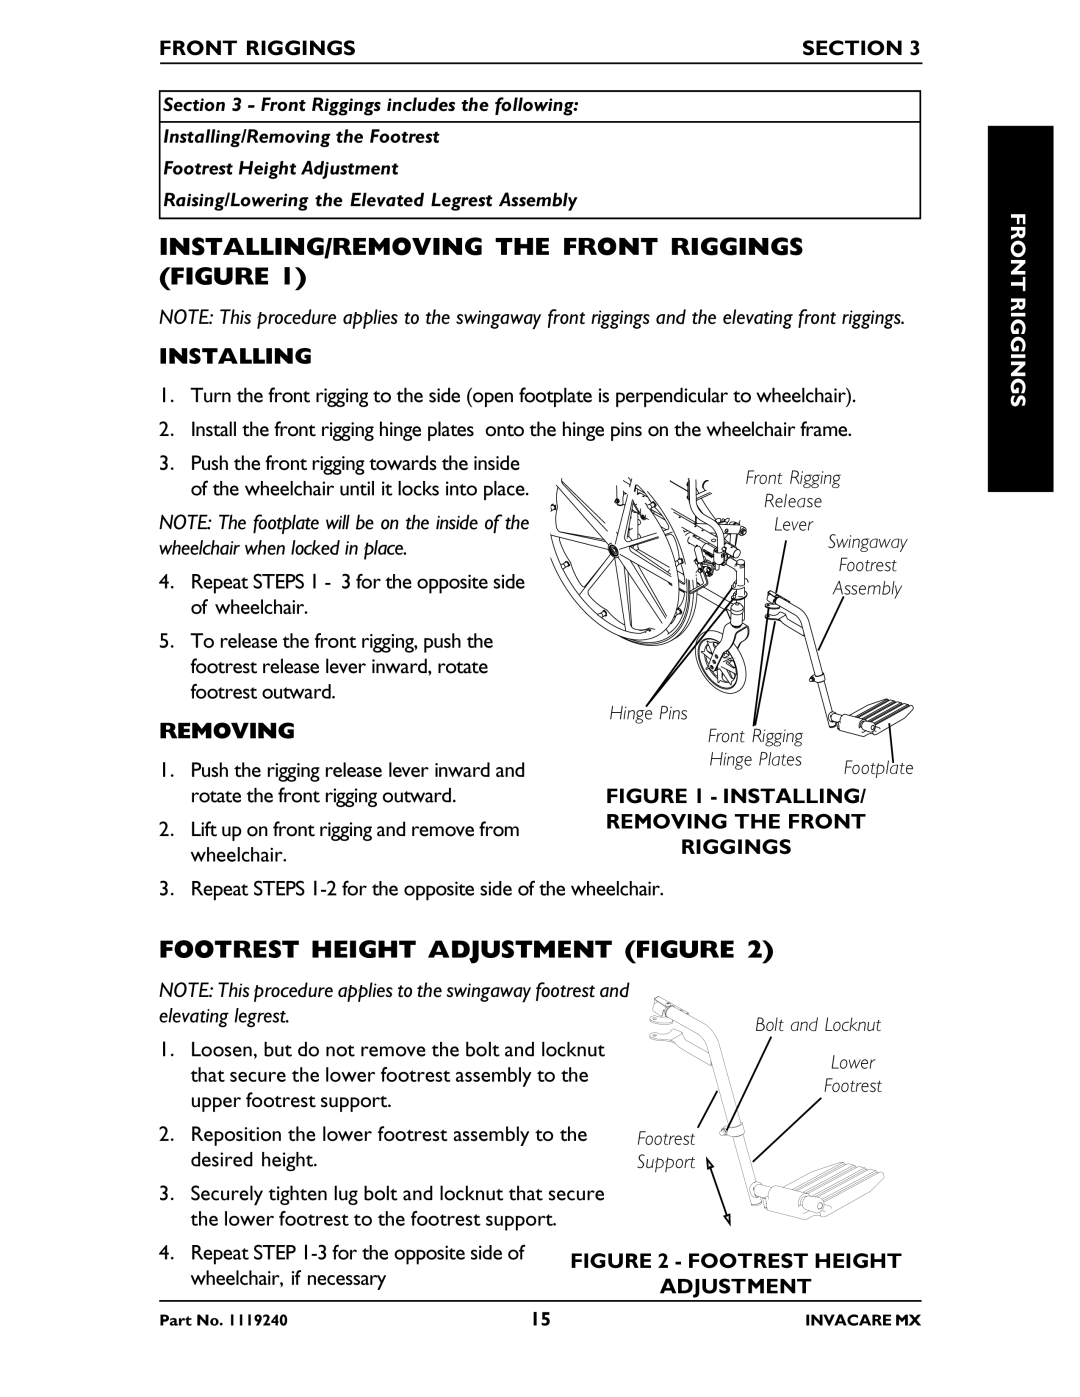
INSTALLING/REMOVING THE FRONT RIGGINGS (FIGURE 1)
NOTE: This procedure applies to the swingaway front riggings and the elevating front riggings.
INSTALLING
1.Turn the front rigging to the side (open footplate is perpendicular to wheelchair).
2.Install the front rigging hinge plates onto the hinge pins on the wheelchair frame.
FRONT RIGGINGS
3.Push the front rigging towards the inside of the wheelchair until it locks into place.
NOTE: The footplate will be on the inside of the wheelchair when locked in place.
4.Repeat STEPS 1 - 3 for the opposite side of wheelchair.
5.To release the front rigging, push the footrest release lever inward, rotate footrest outward.
REMOVING
1.Push the rigging release lever inward and rotate the front rigging outward.
2.Lift up on front rigging and remove from wheelchair.
Front Rigging
Release
Lever Swingaway
Footrest
Assembly
Hinge Pins
Front Rigging |
|
Hinge Plates | Footplate |
|
FIGURE 1 - INSTALLING/
REMOVING THE FRONT
RIGGINGS
3. Repeat STEPS
FOOTREST HEIGHT ADJUSTMENT (FIGURE 2)
NOTE: This procedure applies to the swingaway footrest and elevating legrest.
1.Loosen, but do not remove the bolt and locknut that secure the lower footrest assembly to the upper footrest support.
2.Reposition the lower footrest assembly to the desired height.
3.Securely tighten lug bolt and locknut that secure the lower footrest to the footrest support.
Footrest Support
Bolt and Locknut
Lower
Footrest
4. Repeat STEP | FIGURE 2 - FOOTREST HEIGHT | |
wheelchair, if necessary | ||
ADJUSTMENT | ||
|
Part No. 1119240 | 15 | INVACARE MX |
