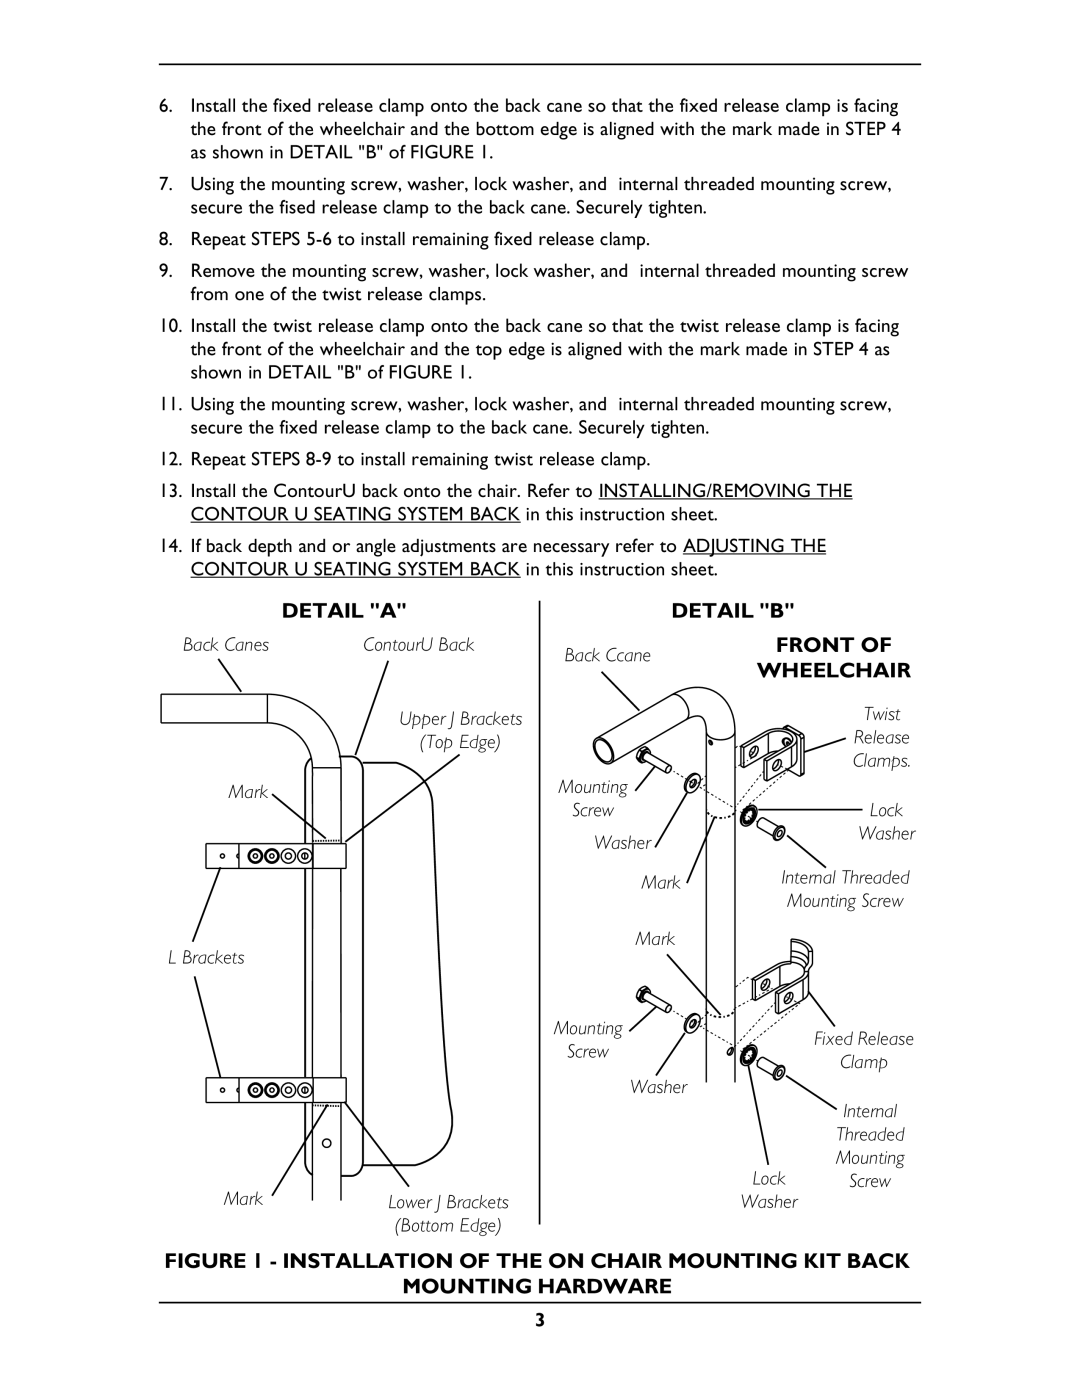
6.Install the fixed release clamp onto the back cane so that the fixed release clamp is facing the front of the wheelchair and the bottom edge is aligned with the mark made in STEP 4 as shown in DETAIL "B" of FIGURE 1.
7.Using the mounting screw, washer, lock washer, and internal threaded mounting screw, secure the fised release clamp to the back cane. Securely tighten.
8.Repeat STEPS
9.Remove the mounting screw, washer, lock washer, and internal threaded mounting screw from one of the twist release clamps.
10.Install the twist release clamp onto the back cane so that the twist release clamp is facing the front of the wheelchair and the top edge is aligned with the mark made in STEP 4 as shown in DETAIL "B" of FIGURE 1.
11.Using the mounting screw, washer, lock washer, and internal threaded mounting screw, secure the fixed release clamp to the back cane. Securely tighten.
12.Repeat STEPS
13.Install the ContourU back onto the chair. Refer to INSTALLING/REMOVING THE CONTOUR U SEATING SYSTEM BACK in this instruction sheet.
14.If back depth and or angle adjustments are necessary refer to ADJUSTING THE CONTOUR U SEATING SYSTEM BACK in this instruction sheet.
DETAIL "A"
Back Canes | ContourU Back |
Upper J Brackets
(Top Edge)
Mark
L Brackets
Mark | Lower J Brackets |
| (Bottom Edge) |
DETAIL "B"
Back Ccane | FRONT OF | |
WHEELCHAIR | ||
| ||
| Twist | |
| Release | |
| Clamps. | |
Mounting |
| |
Screw | Lock | |
Washer | Washer | |
| ||
Mark | Internal Threaded | |
| Mounting Screw | |
Mark |
|
Mounting | Fixed Release | |
Screw | ||
Clamp | ||
|
Washer
Internal
Threaded
Mounting
Lock Screw
Washer
FIGURE 1 - INSTALLATION OF THE ON CHAIR MOUNTING KIT BACK
MOUNTING HARDWARE
3