ADJUSTING THE ON CHAIR MOUNTING KIT MOUNTING HARDWARE FOR THE CONTOUR U SEATING SYSTEM BACK
NOTE: Refer to GENERAL and INSTALLATION WARNINGS in the SAFETY SUMMARY in this instruction sheet.
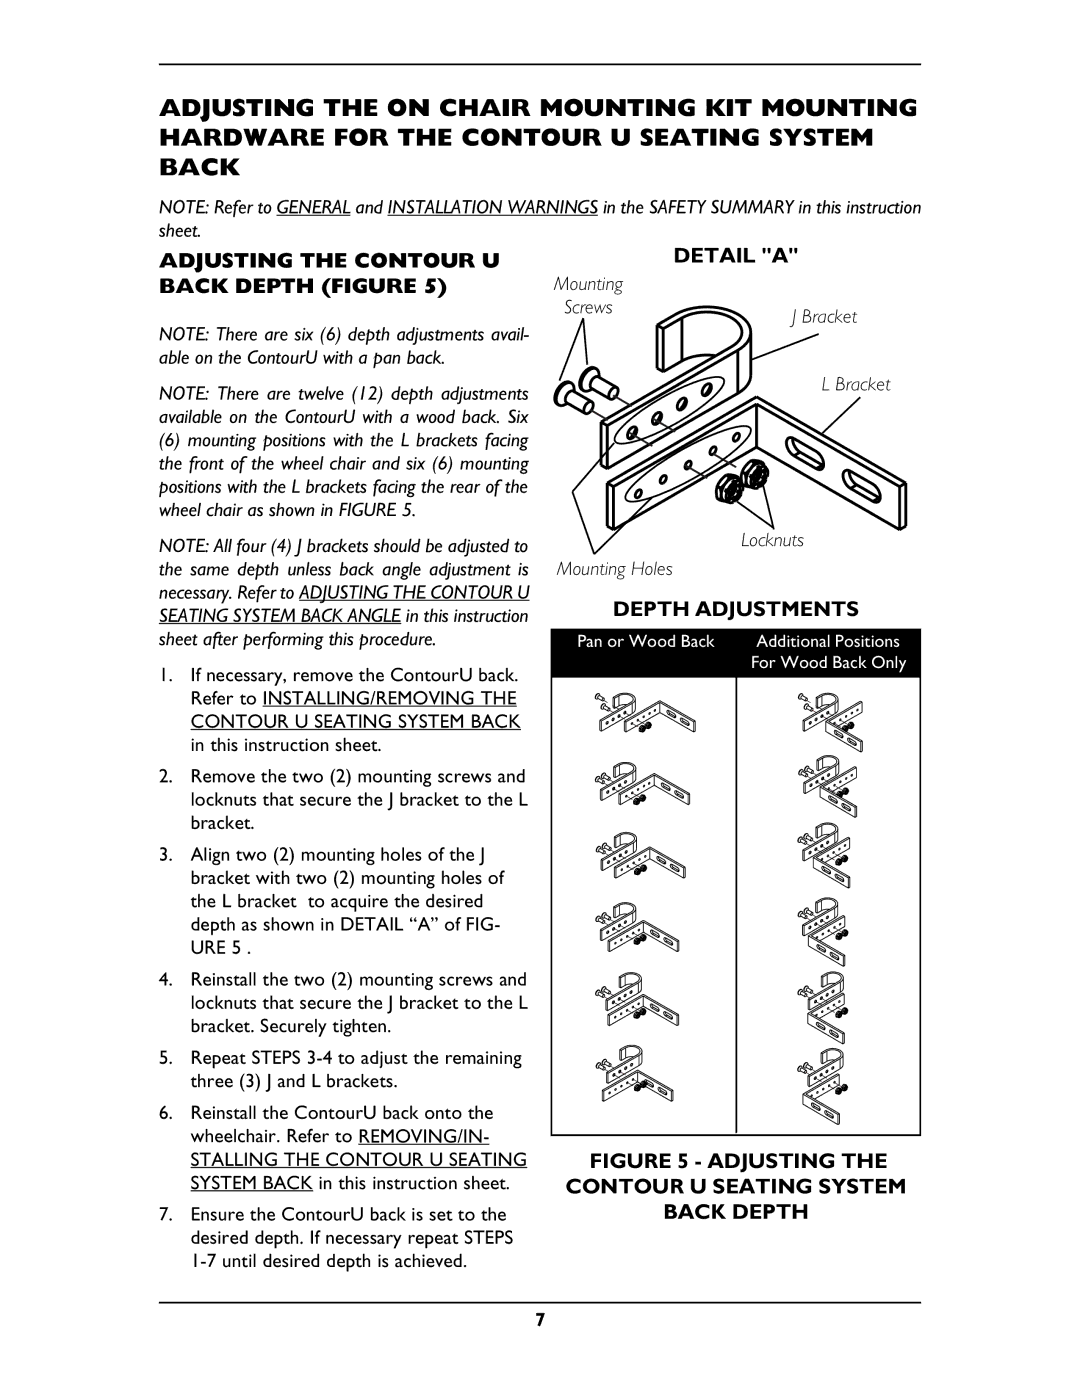
ADJUSTING THE CONTOUR U BACK DEPTH (FIGURE 5)
NOTE: There are six (6) depth adjustments avail- able on the ContourU with a pan back.
NOTE: There are twelve (12) depth adjustments available on the ContourU with a wood back. Six
(6)mounting positions with the L brackets facing the front of the wheel chair and six (6) mounting positions with the L brackets facing the rear of the wheel chair as shown in FIGURE 5.
NOTE: All four (4) J brackets should be adjusted to the same depth unless back angle adjustment is necessary. Refer to ADJUSTING THE CONTOUR U SEATING SYSTEM BACK ANGLE in this instruction sheet after performing this procedure.
1.If necessary, remove the ContourU back. Refer to INSTALLING/REMOVING THE CONTOUR U SEATING SYSTEM BACK in this instruction sheet.
2.Remove the two (2) mounting screws and locknuts that secure the J bracket to the L bracket.
3.Align two (2) mounting holes of the J bracket with two (2) mounting holes of the L bracket to acquire the desired depth as shown in DETAIL “A” of FIG- URE 5 .
4.Reinstall the two (2) mounting screws and locknuts that secure the J bracket to the L bracket. Securely tighten.
5.Repeat STEPS
6.Reinstall the ContourU back onto the wheelchair. Refer to REMOVING/IN-
STALLING THE CONTOUR U SEATING SYSTEM BACK in this instruction sheet.
7.Ensure the ContourU back is set to the desired depth. If necessary repeat STEPS
DETAIL "A"
Mounting |
|
Screws | J Bracket |
| |
| L Bracket |
Locknuts
Mounting Holes
DEPTH ADJUSTMENTS
Pan or Wood Back Additional Positions
For Wood Back Only
FIGURE 5 - ADJUSTING THE CONTOUR U SEATING SYSTEM BACK DEPTH
7