ADJUSTING THE CONTOUR U SEATING SYSTEM BACK ANGLE (FIGURE 6)
NOTE: Before performing this procedure all four (4) J brackets must be adjusted to the same depth. Refer to ADJUSTING THE CONTOUR U SEATING SYSTEM BACK DEPTH in this instruction sheet.
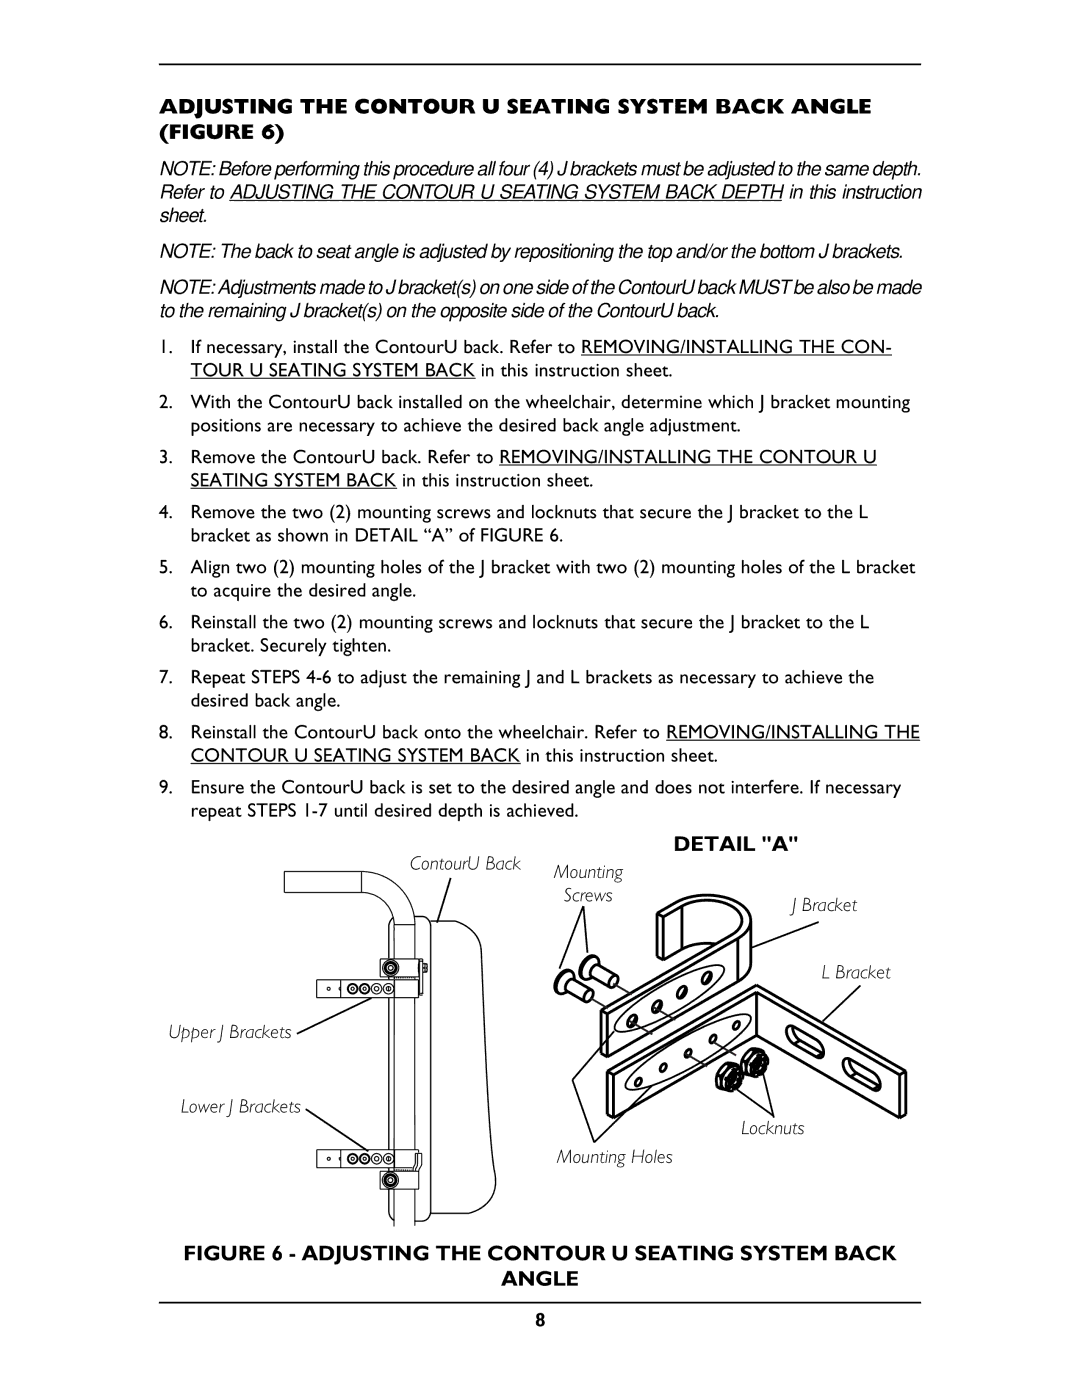
NOTE: The back to seat angle is adjusted by repositioning the top and/or the bottom J brackets.
NOTE: Adjustments made to J bracket(s) on one side of the ContourU back MUST be also be made to the remaining J bracket(s) on the opposite side of the ContourU back.
1.If necessary, install the ContourU back. Refer to REMOVING/INSTALLING THE CON- TOUR U SEATING SYSTEM BACK in this instruction sheet.
2.With the ContourU back installed on the wheelchair, determine which J bracket mounting positions are necessary to achieve the desired back angle adjustment.
3.Remove the ContourU back. Refer to REMOVING/INSTALLING THE CONTOUR U SEATING SYSTEM BACK in this instruction sheet.
4.Remove the two (2) mounting screws and locknuts that secure the J bracket to the L bracket as shown in DETAIL “A” of FIGURE 6.
5.Align two (2) mounting holes of the J bracket with two (2) mounting holes of the L bracket to acquire the desired angle.
6.Reinstall the two (2) mounting screws and locknuts that secure the J bracket to the L bracket. Securely tighten.
7.Repeat STEPS
8.Reinstall the ContourU back onto the wheelchair. Refer to REMOVING/INSTALLING THE CONTOUR U SEATING SYSTEM BACK in this instruction sheet.
9.Ensure the ContourU back is set to the desired angle and does not interfere. If necessary repeat STEPS
ContourU Back |
| DETAIL "A" |
Mounting |
| |
|
| |
| Screws | J Bracket |
|
| |
|
| L Bracket |
Upper J Brackets
Lower J Brackets
Locknuts
Mounting Holes
FIGURE 6 - ADJUSTING THE CONTOUR U SEATING SYSTEM BACK
ANGLE
8