SECTION
3.Securely tighten the lug bolt and locknut that secure the lower footrest to the footrest support.
4.Repeat STEPS 1‐3 for the opposite side of the wheelchair footrest, if necessary.
Replacing Heel Loops
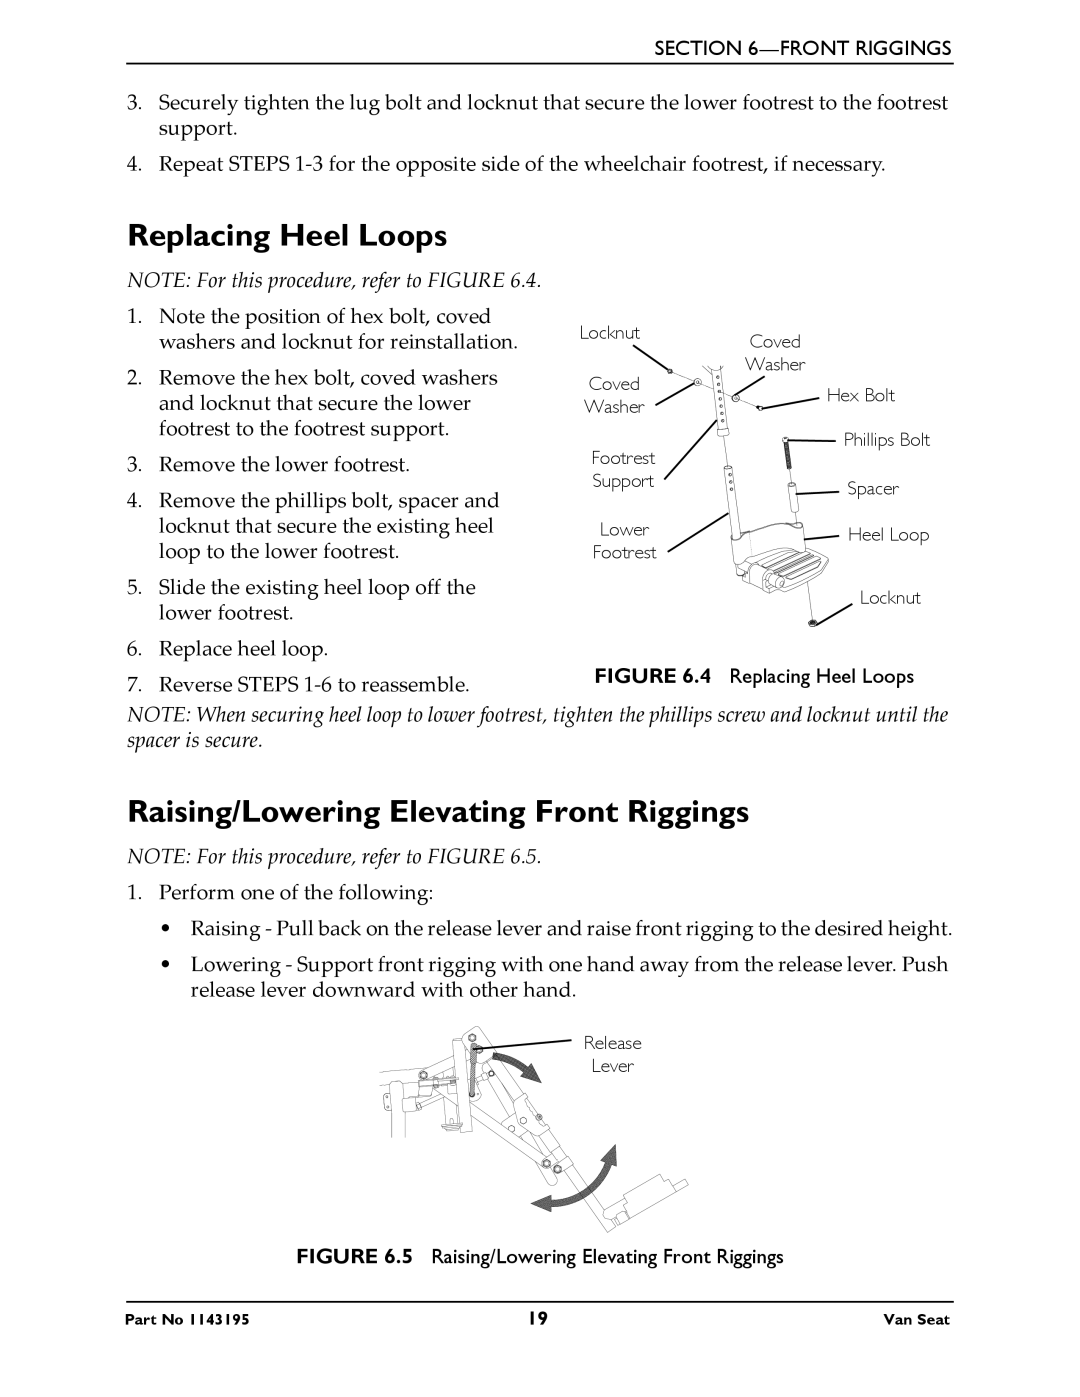
NOTE: For this procedure, refer to FIGURE 6.4.
1.Note the position of hex bolt, coved washers and locknut for reinstallation.
2.Remove the hex bolt, coved washers and locknut that secure the lower footrest to the footrest support.
3.Remove the lower footrest.
4.Remove the phillips bolt, spacer and locknut that secure the existing heel loop to the lower footrest.
5.Slide the existing heel loop off the lower footrest.
6.Replace heel loop.
7.Reverse STEPS 1‐6 to reassemble.
Locknut | Coved | |
| ||
Coved | Washer | |
Hex Bolt | ||
Washer | ||
| ||
Footrest | Phillips Bolt | |
| ||
Support | Spacer | |
| ||
Lower | Heel Loop | |
Footrest |
| |
| Locknut |
FIGURE 6.4 Replacing Heel Loops
NOTE: When securing heel loop to lower footrest, tighten the phillips screw and locknut until the spacer is secure.
Raising/Lowering Elevating Front Riggings
NOTE: For this procedure, refer to FIGURE 6.5.
1.Perform one of the following:
•Raising ‐ Pull back on the release lever and raise front rigging to the desired height.
•Lowering ‐ Support front rigging with one hand away from the release lever. Push release lever downward with other hand.
Release
Lever
FIGURE 6.5 Raising/Lowering Elevating Front Riggings
Part No 1143195 | 19 | Van Seat |
