A t t a c h t h e M o u n t i n g P l a t e t o t h e P r o j e c t o r
CAUTION: Use only the hardware that is provided with the LP 425 Ceiling Mount. Using different hardware may damage your projector.
Attach the Mounting Plate to the Projector
1Set the projector on a table with the bottom side up.
2Insert the 2 screws into the 2 quick release sleeves.
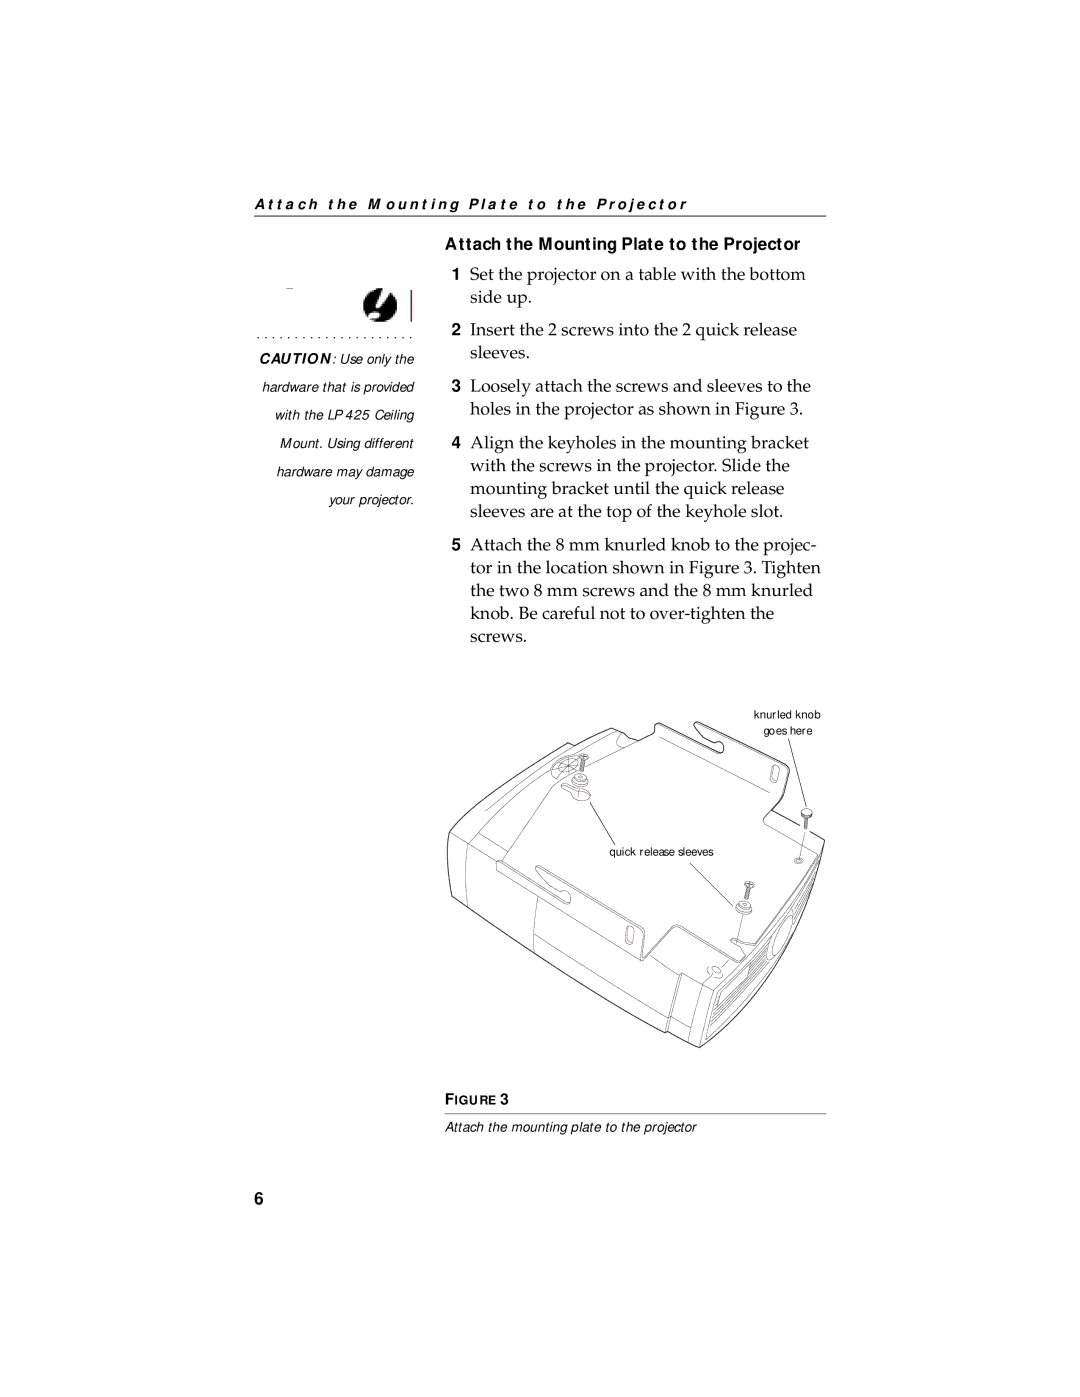
3Loosely attach the screws and sleeves to the holes in the projector as shown in Figure 3.
4Align the keyholes in the mounting bracket with the screws in the projector. Slide the mounting bracket until the quick release sleeves are at the top of the keyhole slot.
5Attach the 8 mm knurled knob to the projec- tor in the location shown in Figure 3. Tighten the two 8 mm screws and the 8 mm knurled knob. Be careful not to
knurled knob
goes here
quick release sleeves
FIGURE 3
Attach the mounting plate to the projector
6