
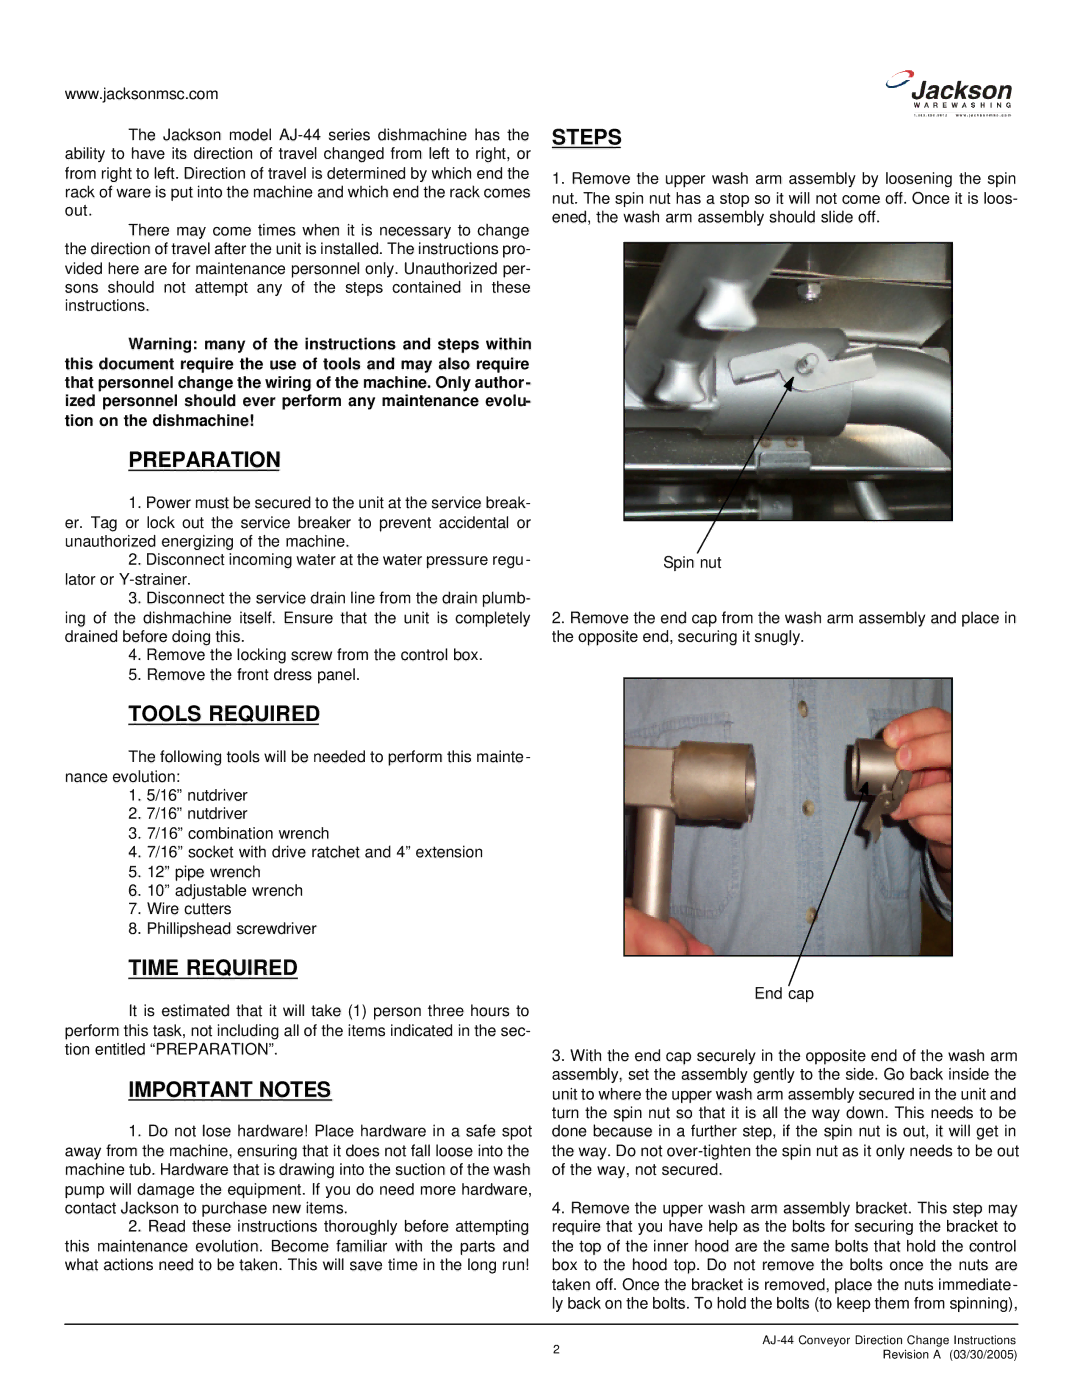
AJ-44, Rack Conveyor Dishmachine specifications
The Jackson Rack Conveyor Dishmachine stands out as an essential tool in commercial kitchens, designed to streamline the dishwashing process while maintaining superior cleanliness and efficiency. This state-of-the-art machine is engineered specifically for high-volume workflows, making it a staple in restaurants, cafeterias, and other food service establishments.One of its main features is the innovative rack conveyor system, which allows for continuous loading and unloading of dishes. This system eliminates bottlenecks in the cleaning process, significantly increasing throughput. The conveyor runs smoothly, allowing for an uninterrupted wash cycle that can handle a large volume of dishes in a short amount of time.
Additionally, the Jackson Rack Conveyor Dishmachine is equipped with advanced wash and rinsing technologies. The machine utilizes powerful spray arms strategically positioned to ensure optimal coverage and thorough cleaning. This multi-level spraying system ensures that every inch of dishware is sanitized, providing peace of mind regarding the cleanliness of the items served to customers.
Energy efficiency is a key characteristic of this dishmachine. With eco-friendly designs and technologies, it conserves both water and energy while still delivering outstanding cleaning performance. The unit boasts a low water consumption rate and advanced heat recovery systems that recycle energy, making it a sustainable choice for any establishment aiming to reduce its ecological footprint.
Another notable feature is the digital control panel, which allows operators to easily navigate through various wash cycles and settings. This user-friendly interface streamlines the operation, enabling quick adjustments to accommodate different types and sizes of dishware. The control panel also provides diagnostic functions to monitor performance and flag maintenance needs, ensuring that the machine operates at peak efficiency.
Durability is also a hallmark of the Jackson Rack Conveyor Dishmachine. Constructed with high-quality stainless steel, it withstands the rigors of a busy kitchen environment while resisting corrosion and wear. This robust design ensures longevity and reliability, reducing the total cost of ownership over its lifespan.
In summary, the Jackson Rack Conveyor Dishmachine combines efficiency, advanced technology, and durable construction to provide an exceptional dishwashing solution. Its innovative features make it an asset for any commercial kitchen, simplifying the dishwashing process while promoting cleanliness and sustainability.