SETTING UP THE GTI AMPLIFIER
REPLACING THE FUSE OR NEON TUBES
The JBL A6000/A3000GTi amplifier is equipped with an internal fuse, a
to replace the part:
NOTE: For neon tube replacement, see your authorized JBL car audio dealer to purchase new StreetGlow® neon tubes in 6- or
NOTE: Although the following steps discuss and illustrate how to disassemble a JBL A6000GTi, the disassembly procedure for a JBL A3000GTi is similar.
1.Disconnect and unmount the amplifier from the vehicle. On a soft surface, turn the amplifier over to view the bottom. Using a
2.Turn the amplifier over to view the top. Using a 5
3.Slide the clear cover off and set it aside (see Figure 14).
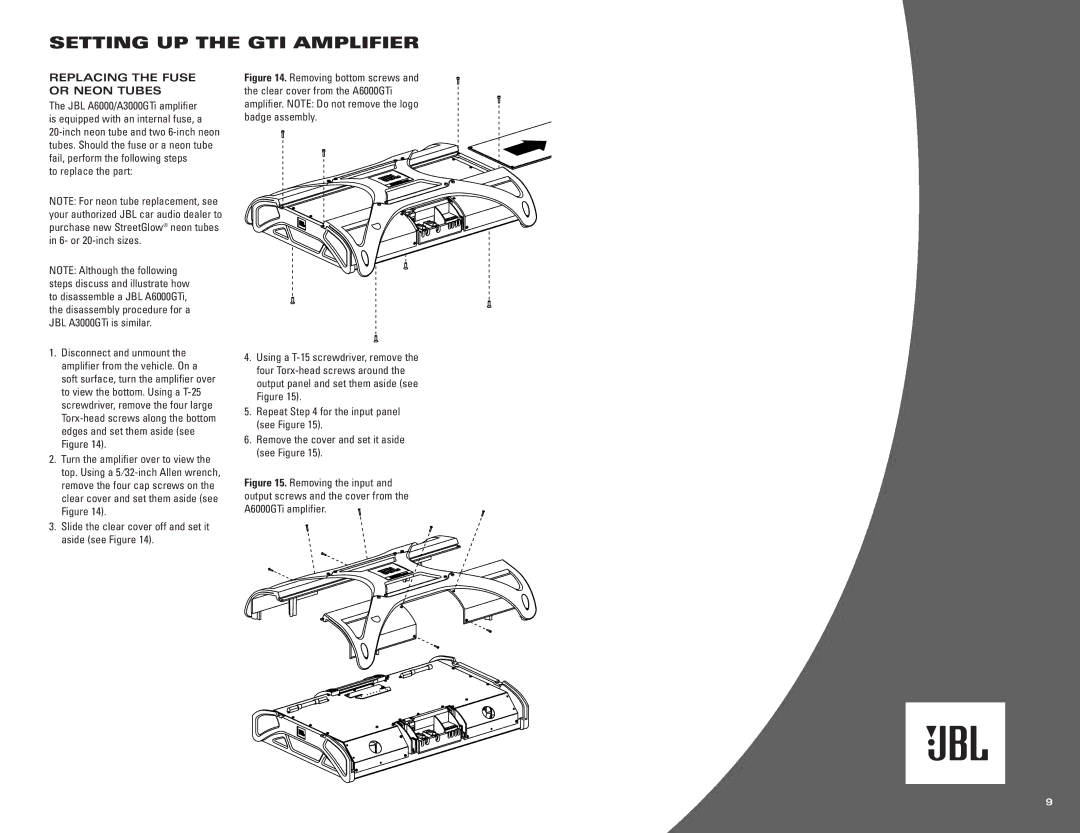
Figure 14. Removing bottom screws and the clear cover from the A6000GTi amplifier. NOTE: Do not remove the logo badge assembly.
4.Using a T-15 screwdriver, remove the four Torx-head screws around the output panel and set them aside (see Figure 15).
5.Repeat Step 4 for the input panel (see Figure 15).
6.Remove the cover and set it aside (see Figure 15).
Figure 15. Removing the input and output screws and the cover from the A6000GTi amplifier. 
9