
gto6506c specifications
The JBL GTO6506C is a premium component speaker system designed to deliver an unmatched audio experience for car enthusiasts and everyday listeners alike. With a focus on innovation and quality, JBL has incorporated several advanced technologies into this speaker model, making it a top choice for those seeking to upgrade their vehicle's sound system.One of the standout features of the GTO6506C is its 6.5-inch polypropylene woofer. This material is lightweight yet durable, enabling swift cone movement for accurate bass reproduction. Coupled with a robust butyl rubber surround, the woofer ensures longevity and minimizes distortion during heavy use. The woofer's design allows for an impressive power handling capability, rated at 180 watts peak and 60 watts RMS, providing listeners with the necessary headroom for higher volumes without sacrificing sound quality.
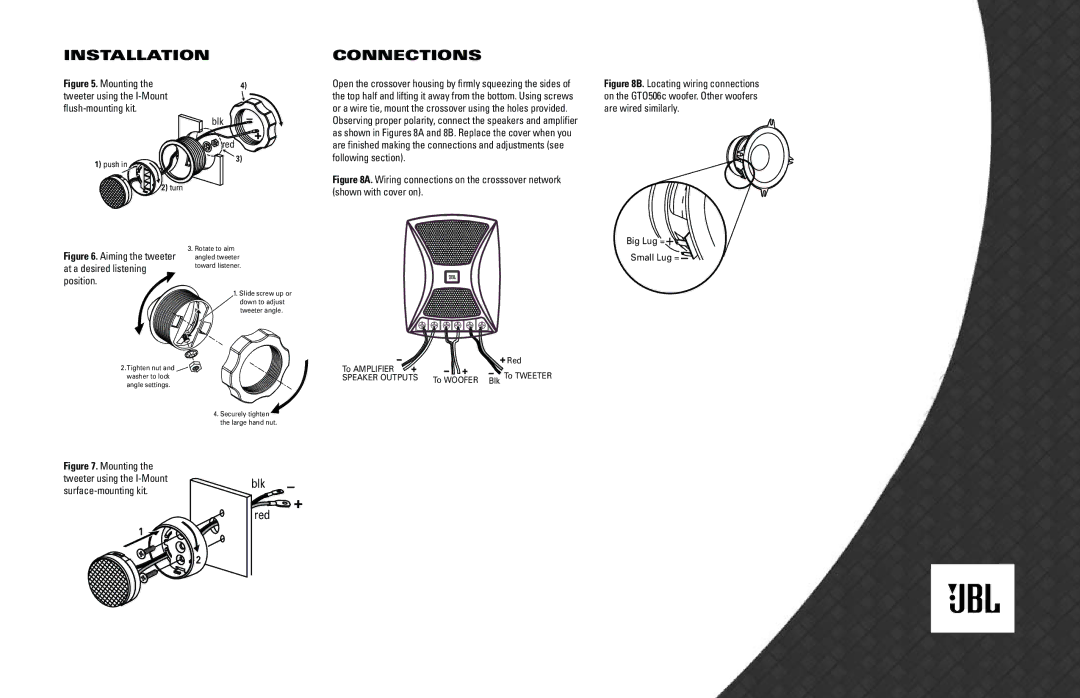
The accompanying 0.75-inch soft dome tweeter is engineered to produce crystal-clear highs. The tweeter is equipped with a 270-degree waveguide that optimizes sound dispersion. This feature ensures that every passenger in the car benefits from the same exceptional audio clarity, regardless of their position. Additionally, the tweeter's ability to handle frequencies up to 21 kHz provides a dynamic listening experience that truly captures the nuances of your favorite recordings.
A noteworthy characteristic of the GTO6506C is the integrated crossover network. The two-way crossover allows for precise audio separation, ensuring that the correct frequencies are sent to the appropriate speaker component. This feature not only enhances overall sound quality but also aids in achieving a more balanced audio profile, crucial for reproducing various music styles.
Installation flexibility is another highlight of this system. The GTO6506C comes with multiple mounting options, making it suitable for a variety of vehicle models. Its shallow mounting depth makes it easier to fit into tighter spaces without compromising performance, ensuring that even those with limited installation experience can seamlessly upgrade their sound system.
Furthermore, the JBL GTO6506C is designed with aesthetic appeal in mind. Its sleek and modern look complements any vehicle interior, allowing for a visually pleasing setup without detracting from style.
In conclusion, the JBL GTO6506C stands out as a remarkable component speaker system. With its innovative technologies, high-quality materials, and user-friendly installation, this model is ideal for anyone looking to elevate their in-car audio experience. Whether you’re a casual listener or a serious audiophile, the GTO6506C promises sound that will impress and endure.