Important notes
Prior to the final installation, carry out a sound check. If high distortion or intermittent sound is experienced, it is possible that the wiring from the CD receiver to the boat's electrical system is poor or that the battery needs recharging.
If the battery and its charging circuit are OK, then rewire the yellow fused wire of the CD player directly to the positive terminal (+) of the boat battery.
Marine accessory shops stock the connector blocks and the 10 Amp cable that may be necessary for extending the fuse wire connection.

 Grounding
Make sure that the black wire on the wiring harness is connected to a good ground point on the boat. If the chassis of the boat is used as a grounding point, make sure that the surface is scraped clean of paint before attaching the wire to it.
It is preferable to connect the black ground wire directly to negative terminal
![]()
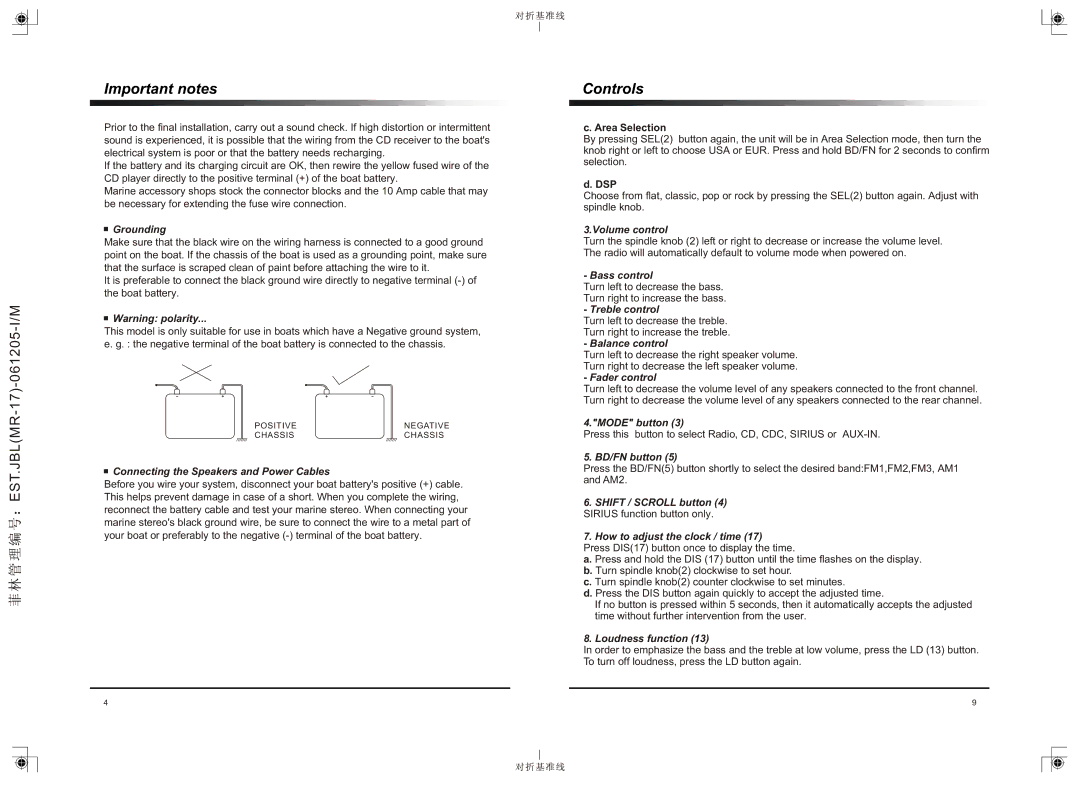
![]() Warning: polarity...
Warning: polarity...
This model is only suitable for use in boats which have a Negative ground system, e. g. : the negative terminal of the boat battery is connected to the chassis.
POSITIVE |
| NEGATIVE |
CHASSIS |
| CHASSIS |

 Connecting the Speakers and Power Cables
Before you wire your system, disconnect your boat battery's positive (+) cable. This helps prevent damage in case of a short. When you complete the wiring, reconnect the battery cable and test your marine stereo. When connecting your marine stereo's black ground wire, be sure to connect the wire to a metal part of your boat or preferably to the negative
Controls
c. Area Selection
By pressing SEL(2) button again, the unit will be in Area Selection mode, then turn the knob right or left to choose USA or EUR. Press and hold BD/FN for 2 seconds to confirm selection.
d. DSP
Choose from flat, classic, pop or rock by pressing the SEL(2) button again. Adjust with spindle knob.
3.Volume control
Turn the spindle knob (2) left or right to decrease or increase the volume level. The radio will automatically default to volume mode when powered on.
-Bass control
Turn left to decrease the bass.
Turn right to increase the bass.
-Treble control
Turn left to decrease the treble.
Turn right to increase the treble.
-Balance control
Turn left to decrease the right speaker volume.
Turn right to decrease the left speaker volume.
-Fader control
Turn left to decrease the volume level of any speakers connected to the front channel. Turn right to decrease the volume level of any speakers connected to the rear channel.
4."MODE" button (3)
Press this button to select Radio, CD, CDC, SIRIUS or
5. BD/FN button (5)
Press the BD/FN(5) button shortly to select the desired band:FM1,FM2,FM3, AM1 and AM2.
6.SHIFT / SCROLL button (4) SIRIUS function button only.
7.How to adjust the clock / time (17)
Press DIS(17) button once to display the time.
a. Press and hold the DIS (17) button until the time flashes on the display. b. Turn spindle knob(2) clockwise to set hour.
c. Turn spindle knob(2) counter clockwise to set minutes.
d. Press the DIS button again quickly to accept the adjusted time.
If no button is pressed within 5 seconds, then it automatically accepts the adjusted time without further intervention from the user.
8. Loudness function (13)
In order to emphasize the bass and the treble at low volume, press the LD (13) button. To turn off loudness, press the LD button again.
4 | 9 |