7.Set the oven temperature by selecting one of the displayed temperatures or use the number pads to enter the temperature.

The display will briefly show the selected temperatures for the oven and probe.

After 10 seconds, the display will show the actual oven temperature and actual probe temperature.

IMPORTANT: If the probe is removed from the oven receptacle at any time during the cooking process, the control will prompt INSERT PROBE. If the probe is not reinserted within 30 seconds, the program will be canceled and the oven will turn off.

8.When the selected internal temperature of the food has been reached, the oven will shut off and a “PROBE END” appears on the display.

NOTE: To avoid overcooking the food, remove it from the oven as soon as the oven shuts off.

9.Using the handle of the probe, remove the probe from the jack. The probe will be hot. Hold probe with an oven mitt or pot holder when removing from the oven.

To Change Probe Temperature, Oven Setting:

Press CANCEL, then repeat previous steps.

After cooking, unplug the probe and remove food from oven.

See “General Cleaning” section to clean probe.

Drying

(on some models)

For best results, use a drying rack. A drying rack allows air to circulate evenly around the food. If you would like to purchase a drying rack, one may be ordered. See “Assistance or Service” section to order. Ask for Part Number DRYINGRACK.

The convection fan will operate during the drying procedure.

To Set Drying:

1.Open the oven door slightly. The oven door needs to be opened slightly to allow moisture to escape from the oven during the drying process.

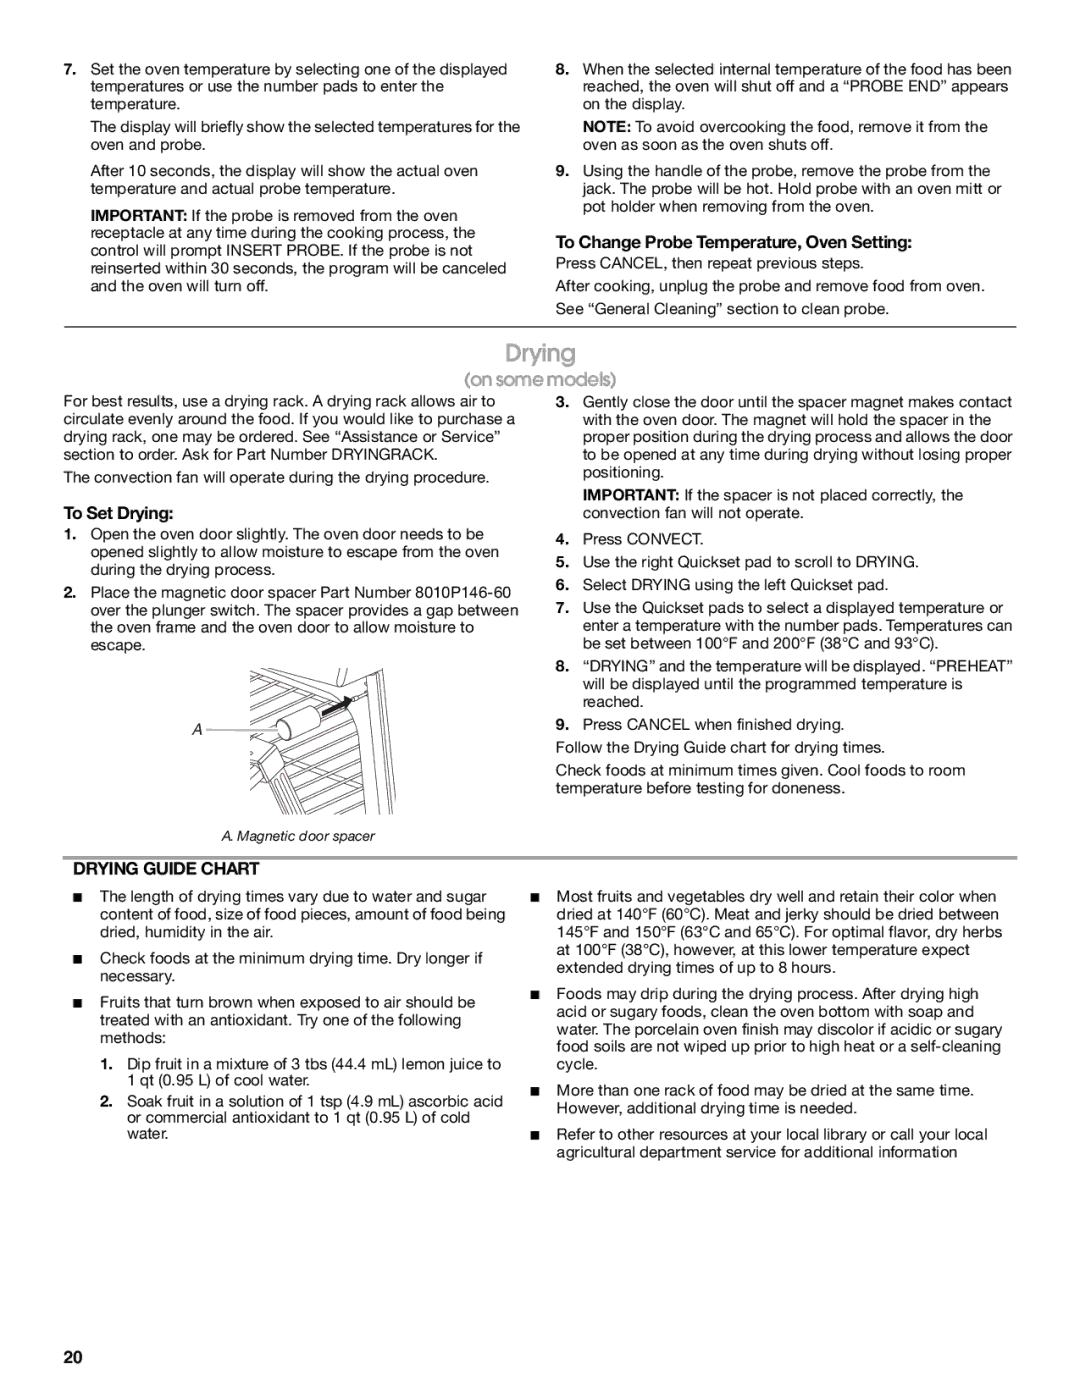
2.Place the magnetic door spacer Part Number 8010P146-60 over the plunger switch. The spacer provides a gap between the oven frame and the oven door to allow moisture to escape.

A

3.Gently close the door until the spacer magnet makes contact with the oven door. The magnet will hold the spacer in the proper position during the drying process and allows the door to be opened at any time during drying without losing proper positioning.

IMPORTANT: If the spacer is not placed correctly, the convection fan will not operate.

4.Press CONVECT.

5.Use the right Quickset pad to scroll to DRYING.

6.Select DRYING using the left Quickset pad.

7.Use the Quickset pads to select a displayed temperature or enter a temperature with the number pads. Temperatures can be set between 100°F and 200°F (38°C and 93°C).

8.“DRYING” and the temperature will be displayed. “PREHEAT” will be displayed until the programmed temperature is reached.

9.Press CANCEL when finished drying.

Follow the Drying Guide chart for drying times.

Check foods at minimum times given. Cool foods to room temperature before testing for doneness.

A. Magnetic door spacer

DRYING GUIDE CHART

The length of drying times vary due to water and sugar content of food, size of food pieces, amount of food being dried, humidity in the air.

Check foods at the minimum drying time. Dry longer if necessary.

Fruits that turn brown when exposed to air should be treated with an antioxidant. Try one of the following methods:

1.Dip fruit in a mixture of 3 tbs (44.4 mL) lemon juice to 1 qt (0.95 L) of cool water.

2.Soak fruit in a solution of 1 tsp (4.9 mL) ascorbic acid or commercial antioxidant to 1 qt (0.95 L) of cold water.

Most fruits and vegetables dry well and retain their color when dried at 140°F (60°C). Meat and jerky should be dried between 145°F and 150°F (63°C and 65°C). For optimal flavor, dry herbs at 100°F (38°C), however, at this lower temperature expect extended drying times of up to 8 hours.

Foods may drip during the drying process. After drying high acid or sugary foods, clean the oven bottom with soap and water. The porcelain oven finish may discolor if acidic or sugary food soils are not wiped up prior to high heat or a self-cleaning cycle.

More than one rack of food may be dried at the same time. However, additional drying time is needed.

Refer to other resources at your local library or call your local agricultural department service for additional information

20

Page 20
Image 20
Jenn-Air JGS8850, JGS8860 manual To Change Probe Temperature, Oven Setting, To Set Drying, Drying Guide Chart

JGS8860, JGS8850 specifications

Jenn-Air is a name synonymous with luxury and performance in the realm of kitchen appliances, and its gas cooktops like the JGS8750, JGS8850, and JGS8860 are no exception. Each model is engineered to elevate the cooking experience with innovative features and sophisticated design.

The Jenn-Air JGS8750 is known for its powerful sealed burners that provide precise temperature control, making it ideal for both simmering sauces and searing meats. One standout feature is its dual-stacked burner design, which allows for high-output cooking with up to 20,000 BTUs. This versatility is further enhanced by the inclusion of a professional-style griddle, providing an expansive cooking area for pancakes, grilled sandwiches, and more. This model also features a sleek stainless-steel finish, giving it a polished look that complements any kitchen decor.

Moving on to the JGS8850, this cooktop offers similar capabilities but introduces a few additional features that cater to the serious home chef. It is equipped with a classic bridge burner, which creates a cohesive cooking surface for long pans or griddles, ensuring even heat distribution. With its intuitive control knobs that are positioned for ease of access, users can confidently switch between different cooking techniques without losing focus on their culinary creations. The JGS8850 also boasts a robust design, ensuring durability and longevity in a busy kitchen environment.

The JGS8860 takes things up a notch with its cutting-edge Induction technology. This dynamic feature allows for rapid heating and efficient energy use, heating only the cookware and leaving the cooktop surface cool to the touch. The JGS8860 also offers smart features, including a touchscreen control panel that provides precise cooking settings at your fingertips. Enhanced safety features such as automatic shut-off and child lock further ensure peace of mind while cooking.

Across these models, Jenn-Air emphasizes ease of cleaning with features like dishwasher-safe grates and smooth surface finishes that reduce mess. Each cooktop comes with multiple burner sizes, catering to various cookware needs, from small saucepans to large stockpots.

In conclusion, the Jenn-Air JGS8750, JGS8850, and JGS8860 exemplify luxury, functionality, and innovation. These models are perfect for anyone looking to upgrade their cooking experience, balancing performance with aesthetic appeal in a stylish package. Whether boiling, simmering, or searing, Jenn-Air delivers unparalleled results in the modern kitchen.