INTRODUCTION
Thank you for choosing a Jensen. We’ve tried to make the instructions in this owner’s
manual clear and easy to follow. If you take a few minutes to look through it, you’ll learn how to use all of the features of your new Jensen antenna for maximum enjoyment.
Contents
Precautions………………………………………………………………………………………….….1
Preparation…………………………………………………………………………………………..….1
Installation………………………………………………………………………………………...…1- 4
Operation………………………………………………………………………………………….……5
Specifications…………………………………………………………………………………………..5
System Layout………………………………………………………………………………………….6
Troubleshooting………………………………………………………………………………………...7
PRECAUTIONS
•Proper Power Supply
This product is designed to operate with a 12 volt DC, negative ground power system
•Use Authorized Service Centers
Do not attempt to disassemble or adjust this precision product. Contact a professional for service
•Do not install couplers or splitters between the wall plate and antenna
Installation of any item on this cable lead may cause a short. This cable provides power to the Antenna preamp.
•Power Supply should disconnected during installation
Connect all coax cable connections before connecting +12VDC wire to the wall plate. The switch should be in the OFF position when connecting/disconnecting cables.
•All coaxial cable used should be
•Painting the Antenna is not recommended and may affect performance
•Do not use solvents to clean antenna. Use only mild soap and water.
PREPARATION
Please read all instructions before beginning the installation.
Tools and Supplies
•Drill or Battery Driver with a #2 Phillips Bit
•½” Drill Bit
•Caulking Gun
•Tube of Approved Exterior Roof Caulk
•
•16AWG Power & Ground Wire
ANTENNA INSTALLATION
1.Remove all packaging contents from shipping box.
2.Locate the Antenna Housing
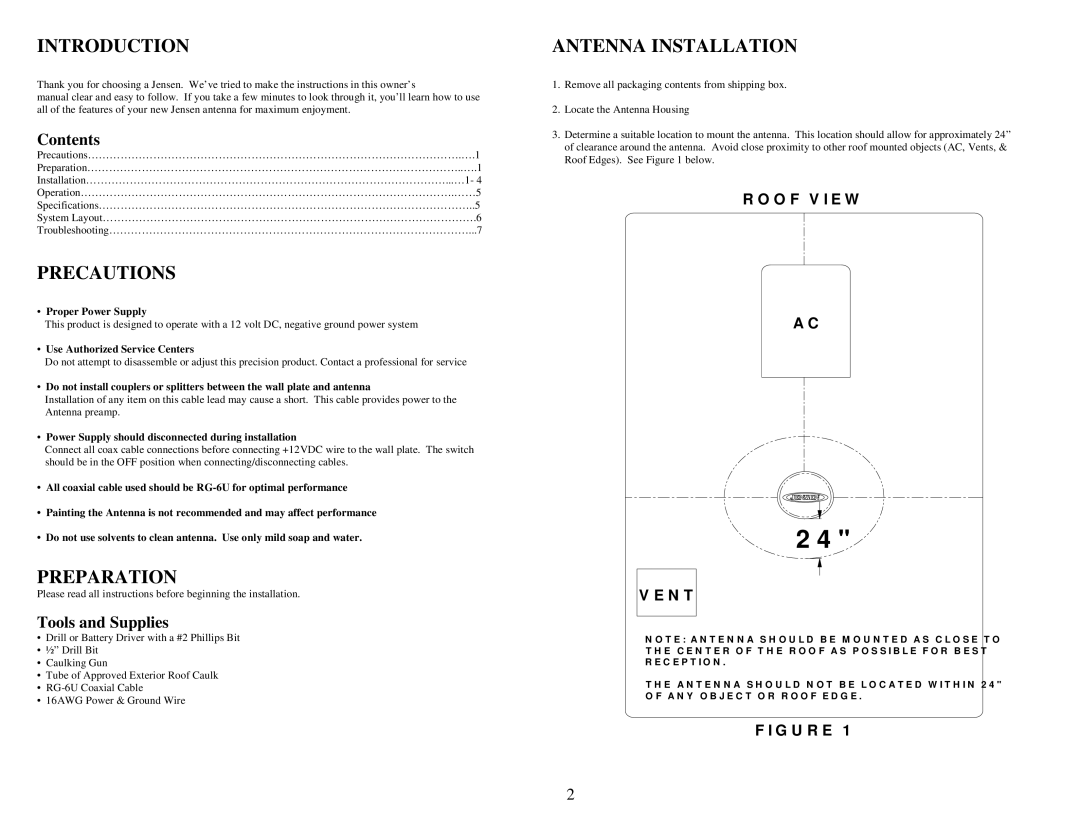
3.Determine a suitable location to mount the antenna. This location should allow for approximately 24” of clearance around the antenna. Avoid close proximity to other roof mounted objects (AC, Vents, & Roof Edges). See Figure 1 below.
R O O F V IE W
A C
2 4 " ![]()
![]()
![]()
![]()
V E N T
N O T E : A N T E N N A S H O U L D B E M O U N T E D A S C L O S E T O
T H E C E N T E R O F T H E R O O F A S P O S S IB L E F O R B E S T
R E C E P T IO N .
T H E A N T E N N A S H O U L D N O T B E L O C A T E D W IT H IN 2 4 "
O F A N Y O B J E C T O R R O O F E D G E .
F IG U R E 1
2