Blade Replacement
A
The choice of blade pitch is governed by the thickness of the work to be cut: the thinner the workpiece, the more teeth advised. A minimum of 3 teeth should engage the workpiece at all times. If the teeth of the blade are so far apart that they straddle the work, severe damage to the workpiece and to the blade can result.
1.Disconnect machine from power source.
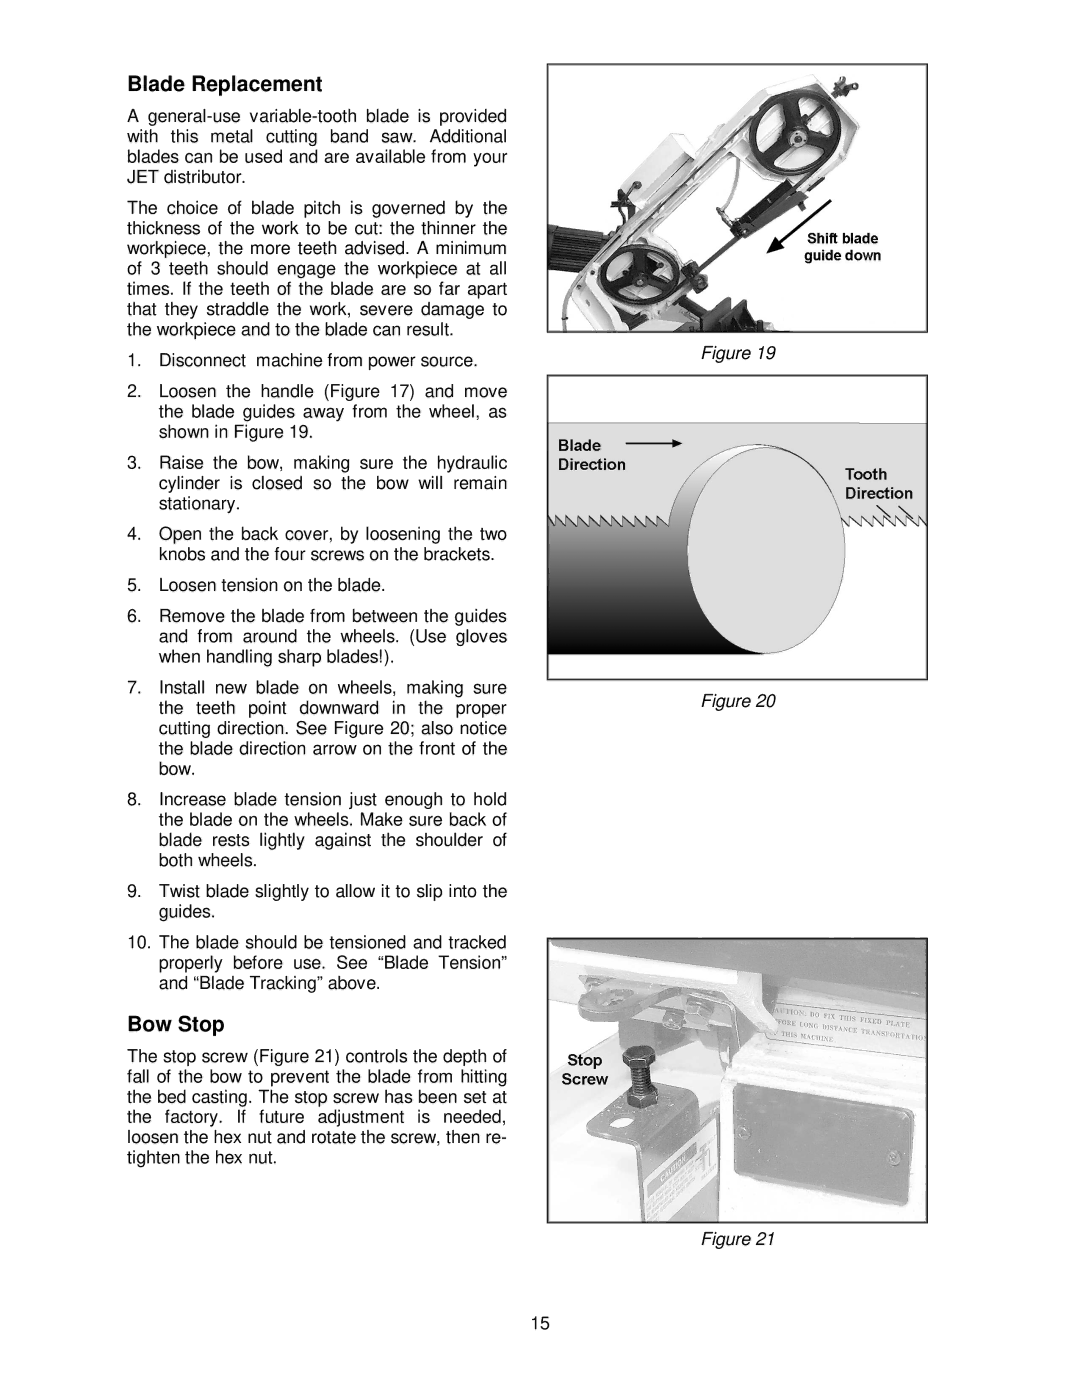
2.Loosen the handle (Figure 17) and move the blade guides away from the wheel, as shown in Figure 19.
3.Raise the bow, making sure the hydraulic cylinder is closed so the bow will remain stationary.
4.Open the back cover, by loosening the two knobs and the four screws on the brackets.
5.Loosen tension on the blade.
6.Remove the blade from between the guides and from around the wheels. (Use gloves when handling sharp blades!).
7.Install new blade on wheels, making sure the teeth point downward in the proper cutting direction. See Figure 20; also notice the blade direction arrow on the front of the bow.
8.Increase blade tension just enough to hold the blade on the wheels. Make sure back of blade rests lightly against the shoulder of both wheels.
9.Twist blade slightly to allow it to slip into the guides.
10.The blade should be tensioned and tracked properly before use. See “Blade Tension” and “Blade Tracking” above.
Bow Stop
The stop screw (Figure 21) controls the depth of fall of the bow to prevent the blade from hitting the bed casting. The stop screw has been set at the factory. If future adjustment is needed, loosen the hex nut and rotate the screw, then re- tighten the hex nut.
Figure 19
Figure 20
Figure 21
15
