Adjustments
Removing the Chuck and Arbor
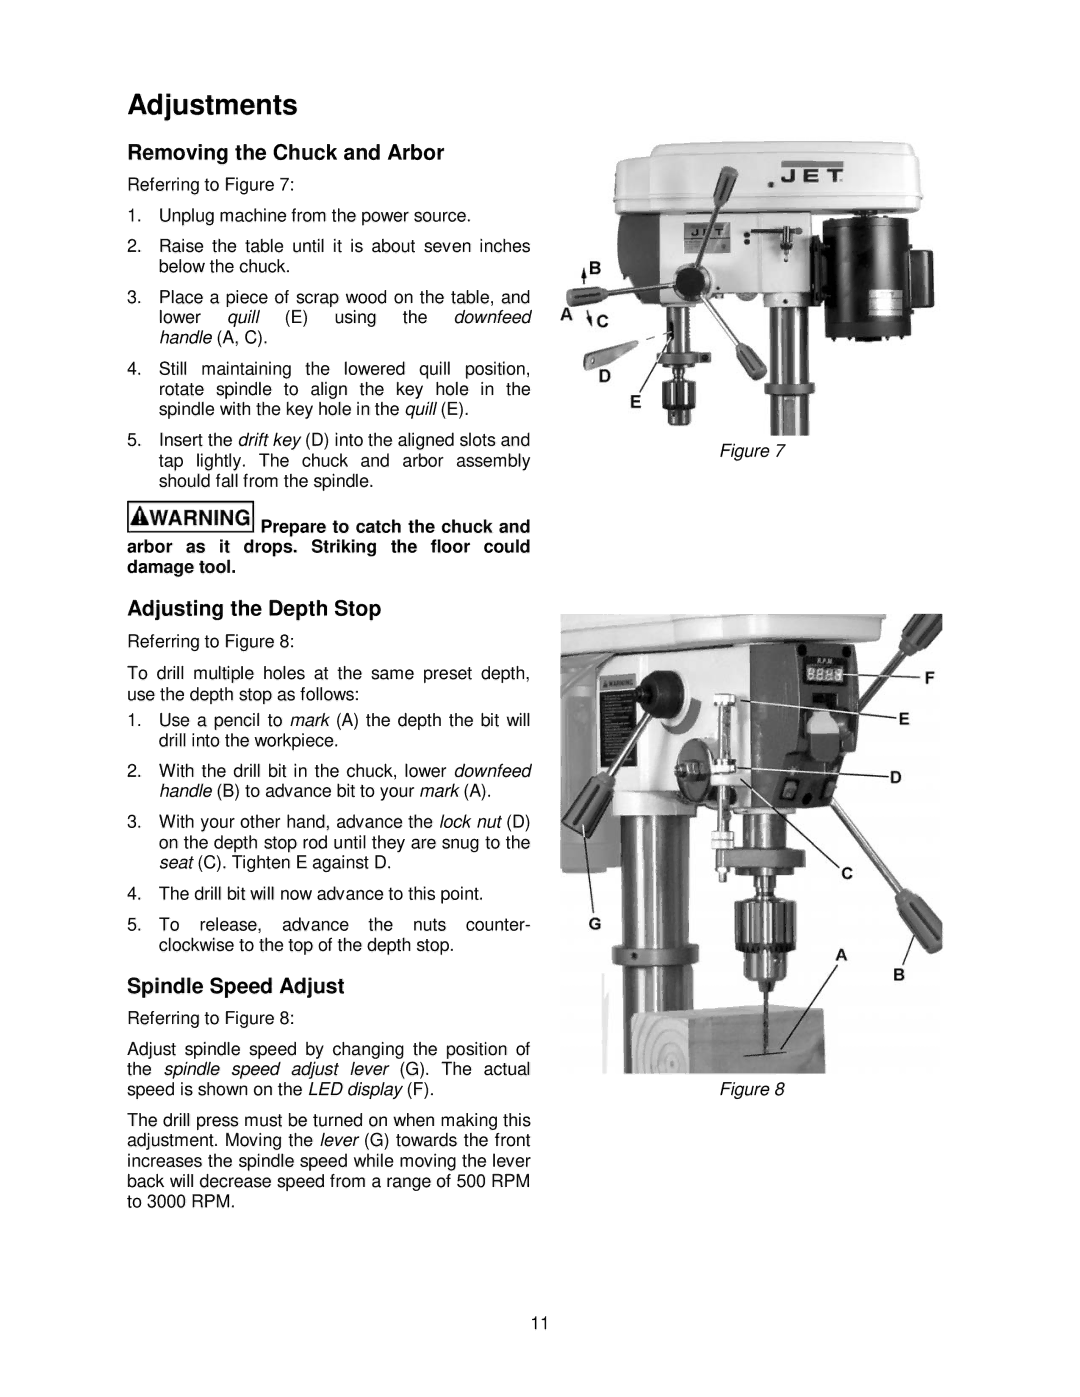
Referring to Figure 7:
1.Unplug machine from the power source.
2.Raise the table until it is about seven inches below the chuck.
3.Place a piece of scrap wood on the table, and lower quill (E) using the downfeed handle (A, C).
4.Still maintaining the lowered quill position, rotate spindle to align the key hole in the spindle with the key hole in the quill (E).
5.Insert the drift key (D) into the aligned slots and tap lightly. The chuck and arbor assembly should fall from the spindle.
![]() Prepare to catch the chuck and arbor as it drops. Striking the floor could damage tool.
Prepare to catch the chuck and arbor as it drops. Striking the floor could damage tool.
Adjusting the Depth Stop
Referring to Figure 8:
To drill multiple holes at the same preset depth, use the depth stop as follows:
1.Use a pencil to mark (A) the depth the bit will drill into the workpiece.
2.With the drill bit in the chuck, lower downfeed handle (B) to advance bit to your mark (A).
3.With your other hand, advance the lock nut (D) on the depth stop rod until they are snug to the seat (C). Tighten E against D.
4.The drill bit will now advance to this point.
5.To release, advance the nuts counter- clockwise to the top of the depth stop.
Spindle Speed Adjust
Referring to Figure 8:
Adjust spindle speed by changing the position of the spindle speed adjust lever (G). The actual speed is shown on the LED display (F).
The drill press must be turned on when making this adjustment. Moving the lever (G) towards the front increases the spindle speed while moving the lever back will decrease speed from a range of 500 RPM to 3000 RPM.
Figure 7
Figure 8
11