Mounting the Head
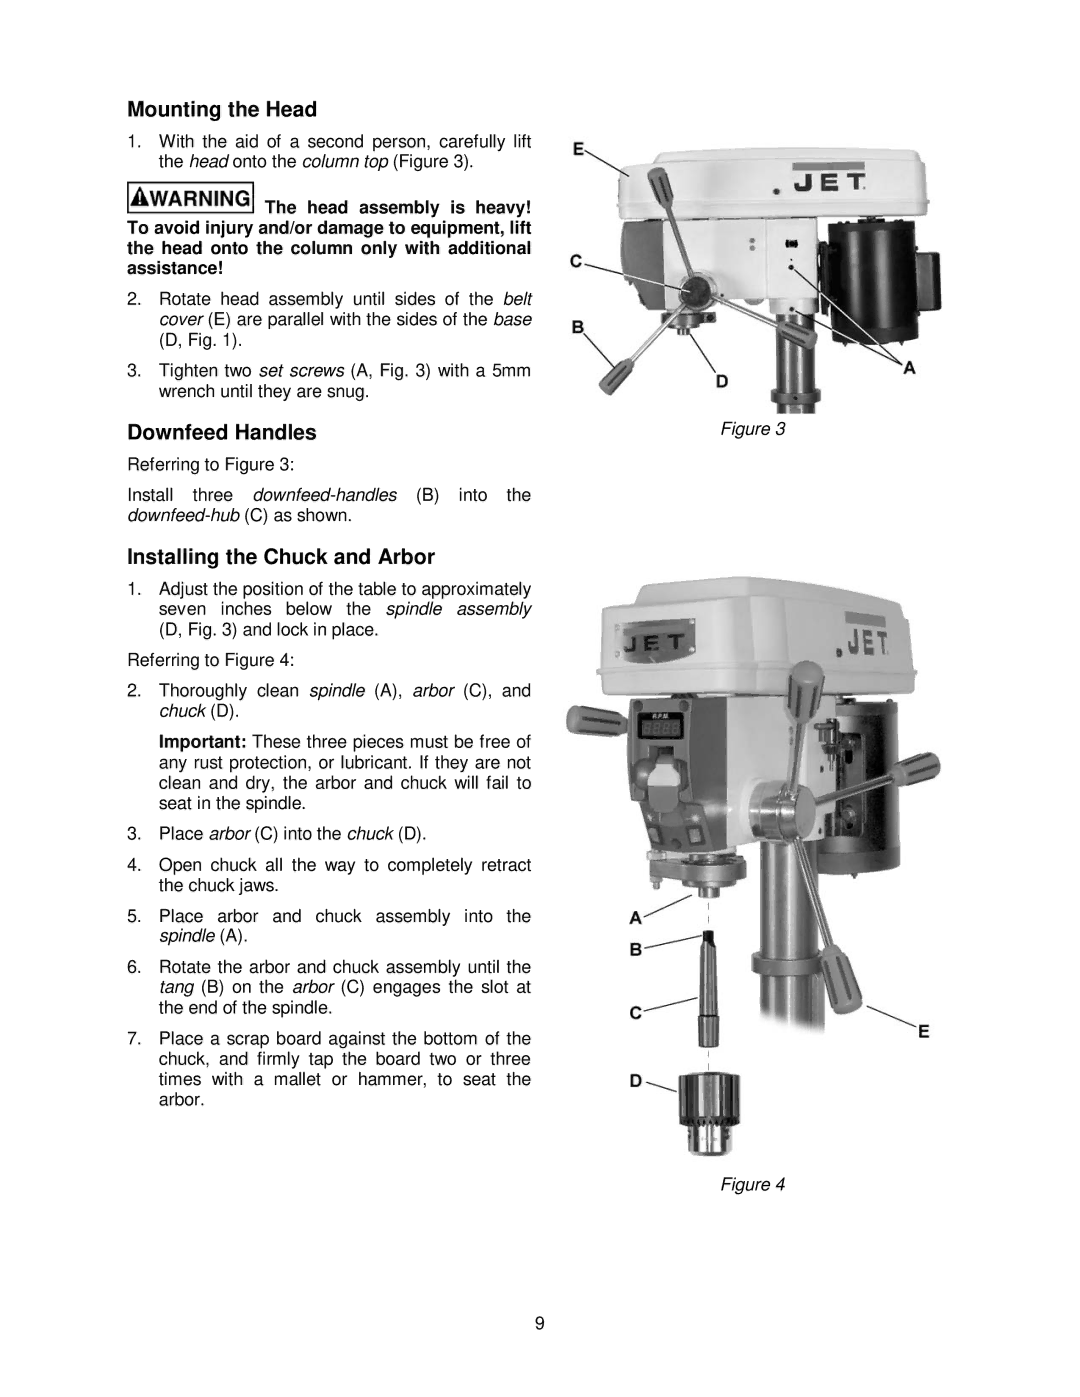
1.With the aid of a second person, carefully lift the head onto the column top (Figure 3).
![]() The head assembly is heavy! To avoid injury and/or damage to equipment, lift the head onto the column only with additional assistance!
The head assembly is heavy! To avoid injury and/or damage to equipment, lift the head onto the column only with additional assistance!
2.Rotate head assembly until sides of the belt cover (E) are parallel with the sides of the base (D, Fig. 1).
3.Tighten two set screws (A, Fig. 3) with a 5mm wrench until they are snug.
Downfeed Handles
Referring to Figure 3:
Install three
Installing the Chuck and Arbor
1.Adjust the position of the table to approximately seven inches below the spindle assembly (D, Fig. 3) and lock in place.
Referring to Figure 4:
2.Thoroughly clean spindle (A), arbor (C), and chuck (D).
Important: These three pieces must be free of any rust protection, or lubricant. If they are not clean and dry, the arbor and chuck will fail to seat in the spindle.
3.Place arbor (C) into the chuck (D).
4.Open chuck all the way to completely retract the chuck jaws.
5.Place arbor and chuck assembly into the spindle (A).
6.Rotate the arbor and chuck assembly until the tang (B) on the arbor (C) engages the slot at the end of the spindle.
7.Place a scrap board against the bottom of the chuck, and firmly tap the board two or three times with a mallet or hammer, to seat the arbor.
9
Figure 3
Figure 4
