Return Spring Adjustment
The return spring is adjusted at the factory and
should not need further adjustment. If adjustment is deemed necessary:
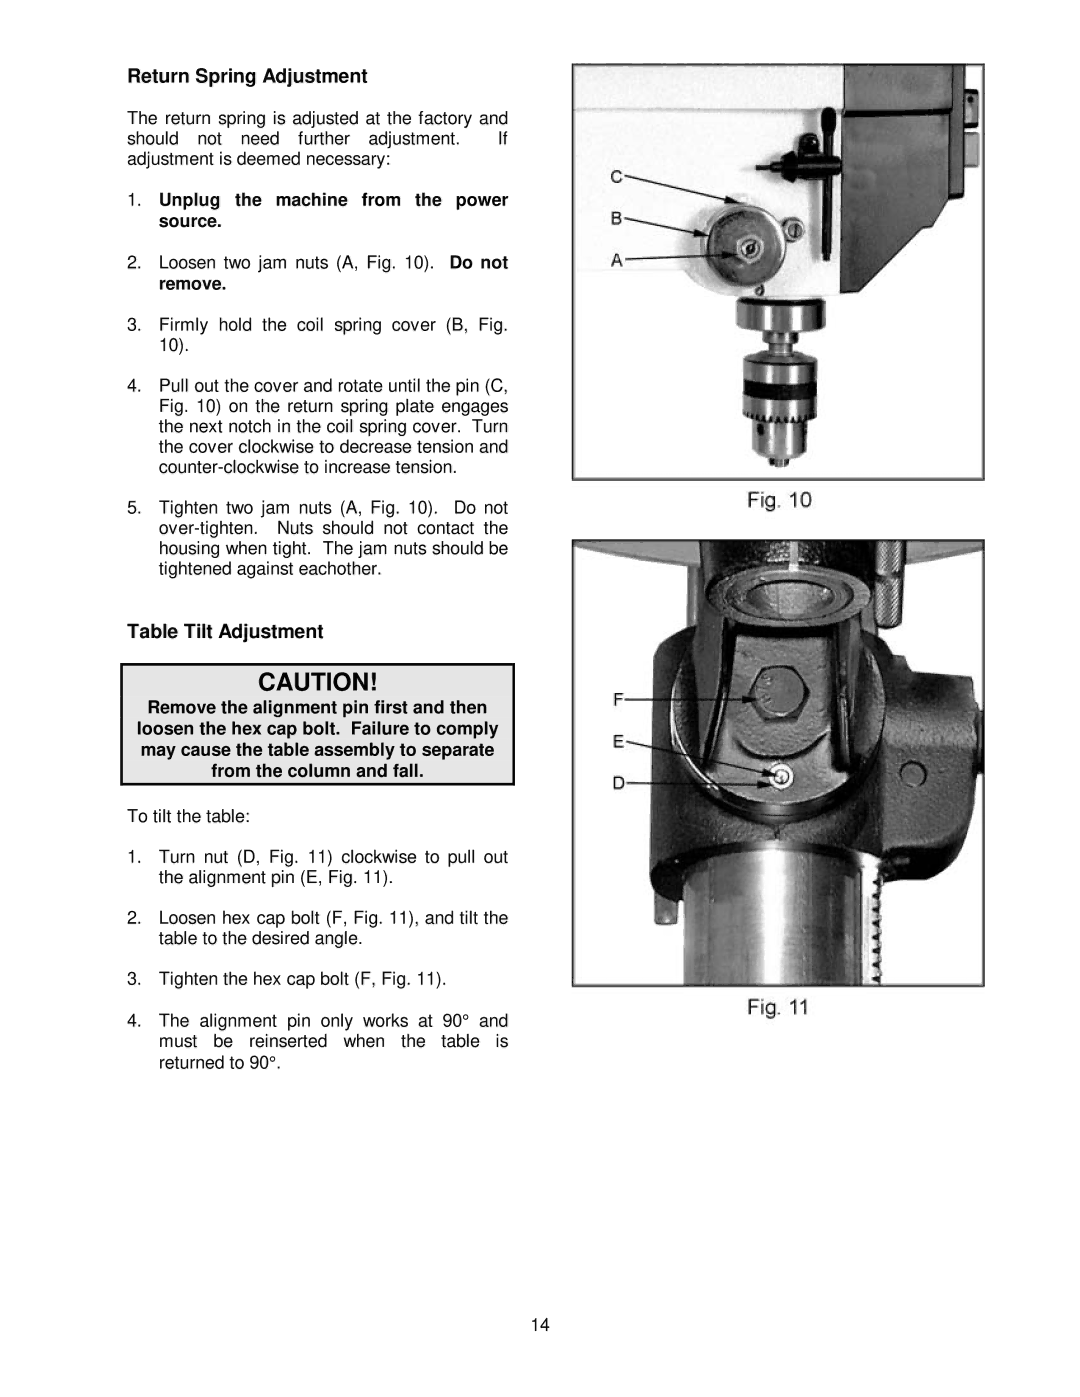
1.Unplug the machine from the power source.
2.Loosen two jam nuts (A, Fig. 10). Do not remove.
3.Firmly hold the coil spring cover (B, Fig. 10).
4.Pull out the cover and rotate until the pin (C, Fig. 10) on the return spring plate engages the next notch in the coil spring cover. Turn the cover clockwise to decrease tension and
5.Tighten two jam nuts (A, Fig. 10). Do not
Table Tilt Adjustment
CAUTION!
Remove the alignment pin first and then loosen the hex cap bolt. Failure to comply may cause the table assembly to separate from the column and fall.
To tilt the table:
1.Turn nut (D, Fig. 11) clockwise to pull out the alignment pin (E, Fig. 11).
2.Loosen hex cap bolt (F, Fig. 11), and tilt the table to the desired angle.
3.Tighten the hex cap bolt (F, Fig. 11).
4.The alignment pin only works at 90° and
must be reinserted when the table is returned to 90°.
14