6.0Setup and assembly
6.1Shipping contents
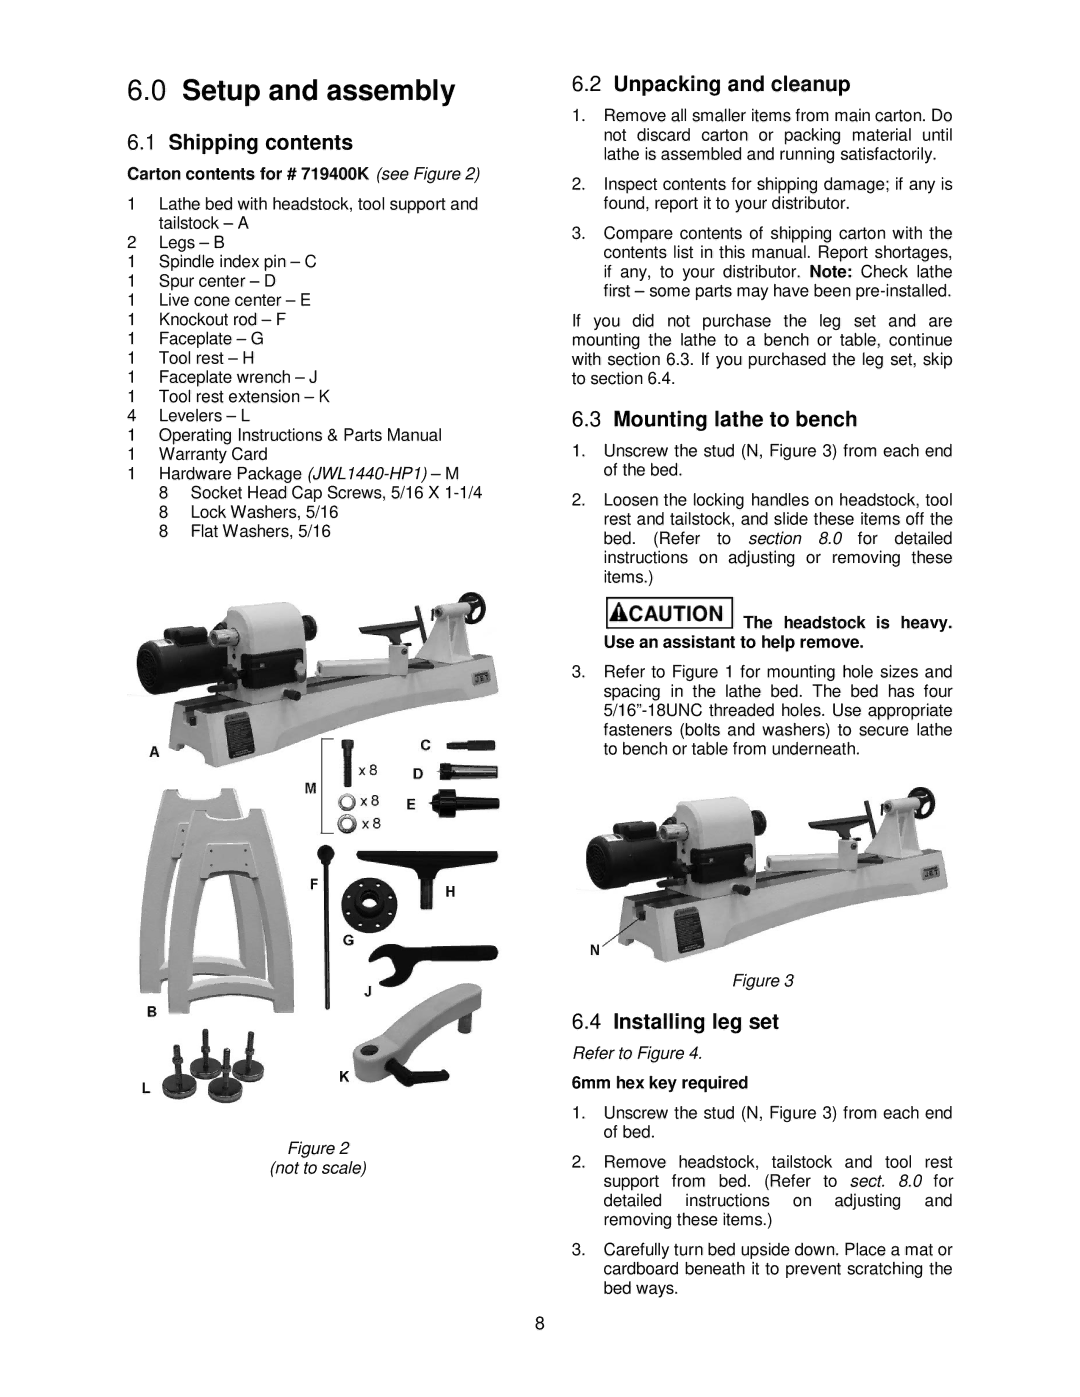
Carton contents for # 719400K (see Figure 2)
1Lathe bed with headstock, tool support and tailstock – A
2Legs – B
1Spindle index pin – C
1Spur center – D
1Live cone center – E
1Knockout rod – F
1Faceplate – G
1Tool rest – H
1Faceplate wrench – J
1Tool rest extension – K
4Levelers – L
1Operating Instructions & Parts Manual
1Warranty Card
1Hardware Package
8 Socket Head Cap Screws, 5/16 X
8 Flat Washers, 5/16
Figure 2
(not to scale)
6.2Unpacking and cleanup
1.Remove all smaller items from main carton. Do not discard carton or packing material until lathe is assembled and running satisfactorily.
2.Inspect contents for shipping damage; if any is found, report it to your distributor.
3.Compare contents of shipping carton with the contents list in this manual. Report shortages, if any, to your distributor. Note: Check lathe first – some parts may have been
If you did not purchase the leg set and are mounting the lathe to a bench or table, continue with section 6.3. If you purchased the leg set, skip to section 6.4.
6.3Mounting lathe to bench
1.Unscrew the stud (N, Figure 3) from each end of the bed.
2.Loosen the locking handles on headstock, tool rest and tailstock, and slide these items off the bed. (Refer to section 8.0 for detailed instructions on adjusting or removing these items.)
![]() The headstock is heavy. Use an assistant to help remove.
The headstock is heavy. Use an assistant to help remove.
3.Refer to Figure 1 for mounting hole sizes and spacing in the lathe bed. The bed has four
Figure 3
6.4Installing leg set
Refer to Figure 4.
6mm hex key required
1.Unscrew the stud (N, Figure 3) from each end of bed.
2.Remove headstock, tailstock and tool rest support from bed. (Refer to sect. 8.0 for detailed instructions on adjusting and removing these items.)
3.Carefully turn bed upside down. Place a mat or cardboard beneath it to prevent scratching the bed ways.
8