S H
Basic Working Techniques
E N G L I
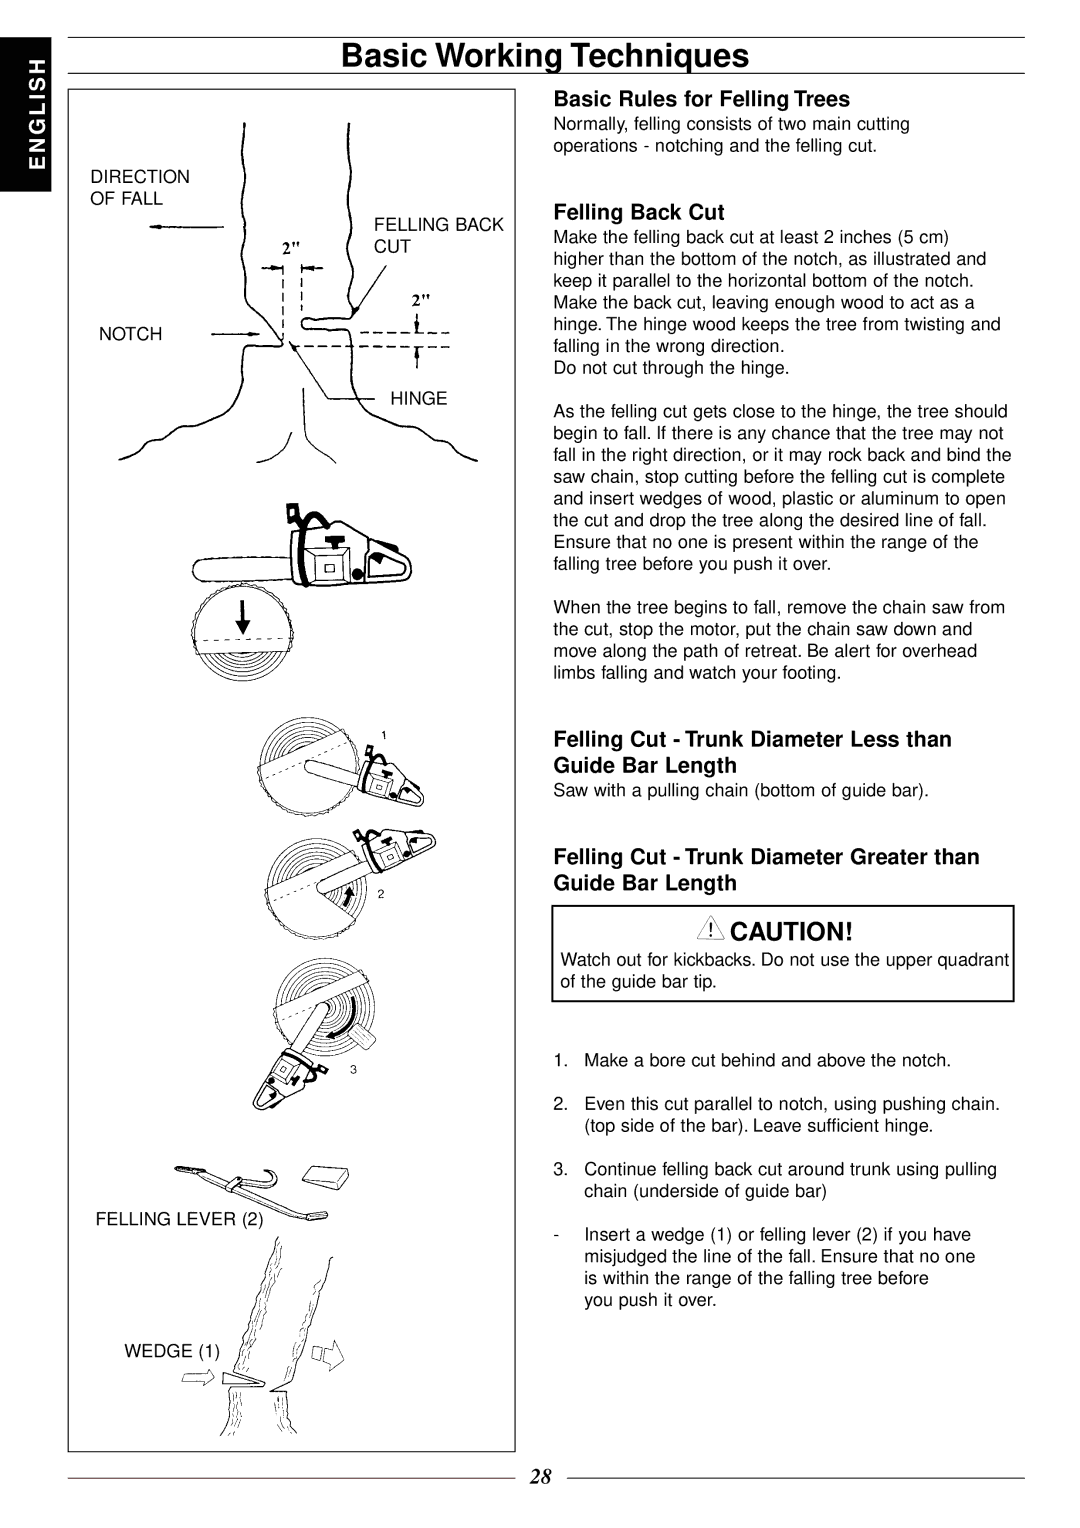
DIRECTION OF FALL
FELLING BACK CUT
NOTCH
HINGE
FELLING LEVER (2)
Basic Rules for Felling Trees
Normally, felling consists of two main cutting operations - notching and the felling cut.
Felling Back Cut
Make the felling back cut at least 2 inches (5 cm) higher than the bottom of the notch, as illustrated and keep it parallel to the horizontal bottom of the notch. Make the back cut, leaving enough wood to act as a hinge. The hinge wood keeps the tree from twisting and falling in the wrong direction.
Do not cut through the hinge.
As the felling cut gets close to the hinge, the tree should begin to fall. If there is any chance that the tree may not fall in the right direction, or it may rock back and bind the saw chain, stop cutting before the felling cut is complete and insert wedges of wood, plastic or aluminum to open the cut and drop the tree along the desired line of fall.
Ensure that no one is present within the range of the falling tree before you push it over.
When the tree begins to fall, remove the chain saw from the cut, stop the motor, put the chain saw down and move along the path of retreat. Be alert for overhead limbs falling and watch your footing.
Felling Cut - Trunk Diameter Less than Guide Bar Length
Saw with a pulling chain (bottom of guide bar).
Felling Cut - Trunk Diameter Greater than Guide Bar Length
![]() CAUTION!
CAUTION!
Watch out for kickbacks. Do not use the upper quadrant of the guide bar tip.
1.Make a bore cut behind and above the notch.
2.Even this cut parallel to notch, using pushing chain. (top side of the bar). Leave sufficient hinge.
3.Continue felling back cut around trunk using pulling chain (underside of guide bar)
-Insert a wedge (1) or felling lever (2) if you have misjudged the line of the fall. Ensure that no one is within the range of the falling tree before you push it over.
WEDGE (1)
28
