Setting up your TV
Caution
• Turn off all the equipment including the TV before connecting anything.
Connecting the aerial and video cassette recorder (VCR)
•The connecting cables are not provided.
•For further details, refer to the manuals provided with the devices to be connected.
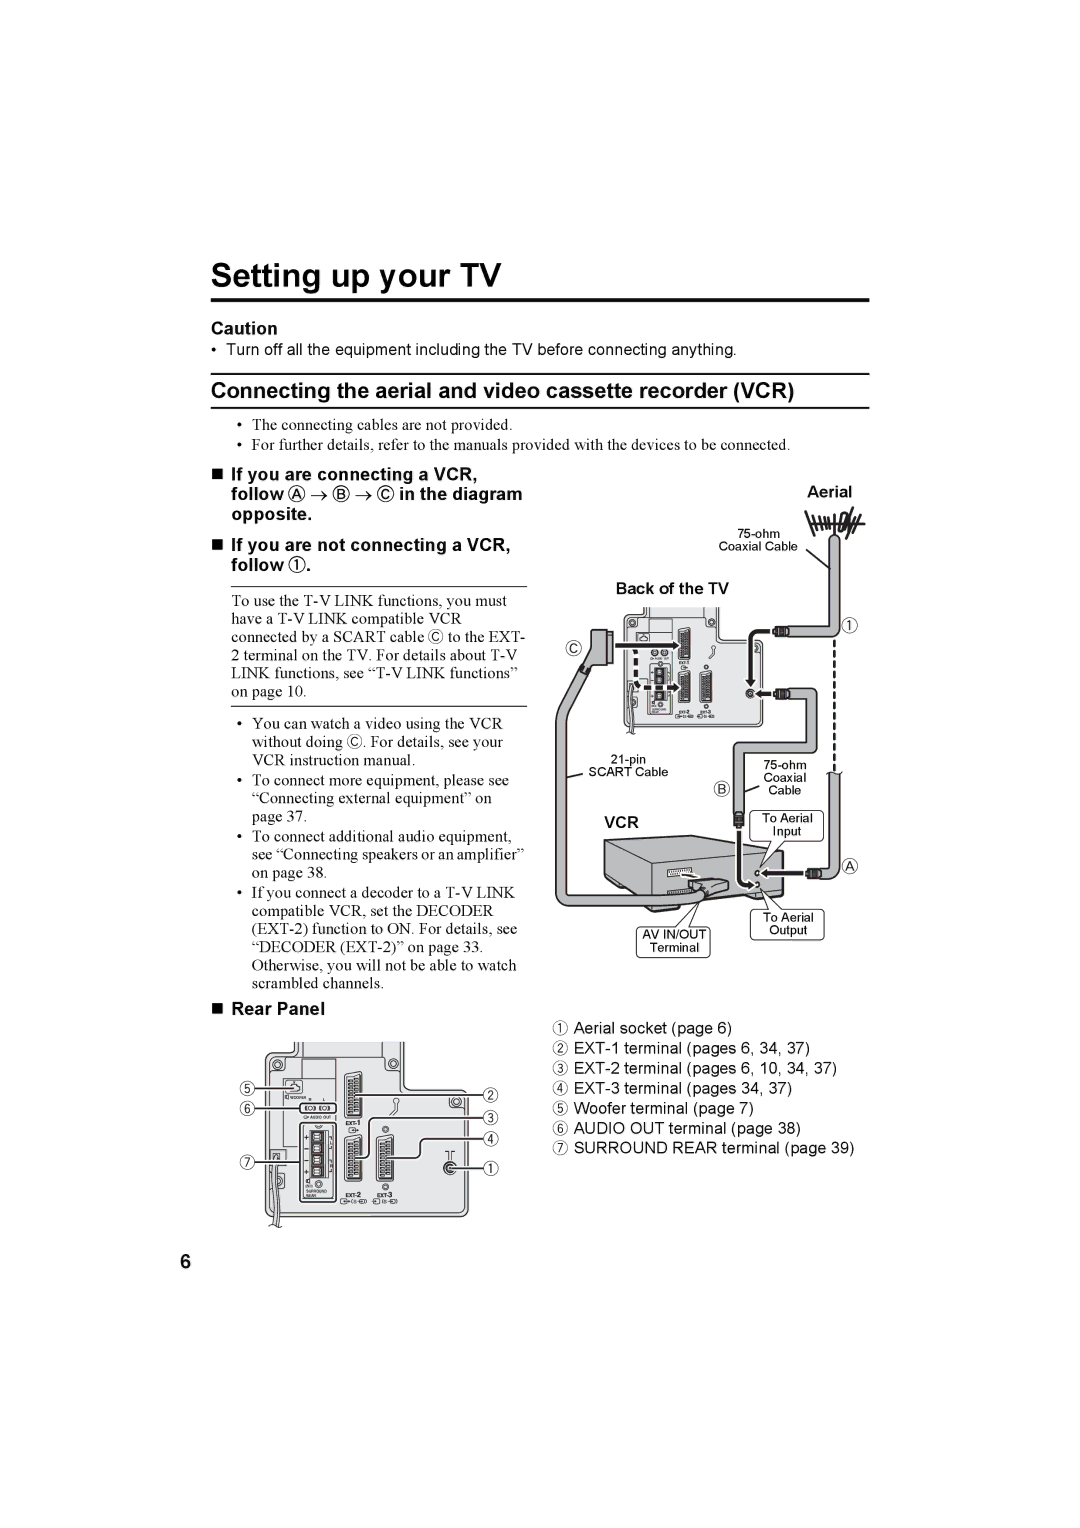
If you are connecting a VCR, follow A → B → C in the diagram opposite.
If you are not connecting a VCR, follow 1.
To use the
•You can watch a video using the VCR without doing C. For details, see your VCR instruction manual.
•To connect more equipment, please see “Connecting external equipment” on page 37.
•To connect additional audio equipment, see “Connecting speakers or an amplifier” on page 38.
•If you connect a decoder to a
Rear Panel
WOOFER R | L |
![]() AUDIO OUT
AUDIO OUT
Aerial
Coaxial Cable
Back of the TV
AUDIO OUT |
SURROUND |
REAR |
|
| ||
SCART Cable |
|
| |
|
| Coaxial | |
|
|
| Cable |
VCR |
|
| To Aerial |
|
| ||
|
|
| Input |
To Aerial
AV IN/OUT Output
Terminal
1 Aerial socket (page 6)
2
3
4
5 Woofer terminal (page 7)
6 AUDIO OUT terminal (page 38)
7 SURROUND REAR terminal (page 39)
SURROUND REAR
6