INSTALLING THE CEILING MOUNT ON THE CEILING
Install the ceiling mount on the ceiling.
To ensure safety, special techniques are required for installation. Do not attempt to perform the installation work yourself.
200
English
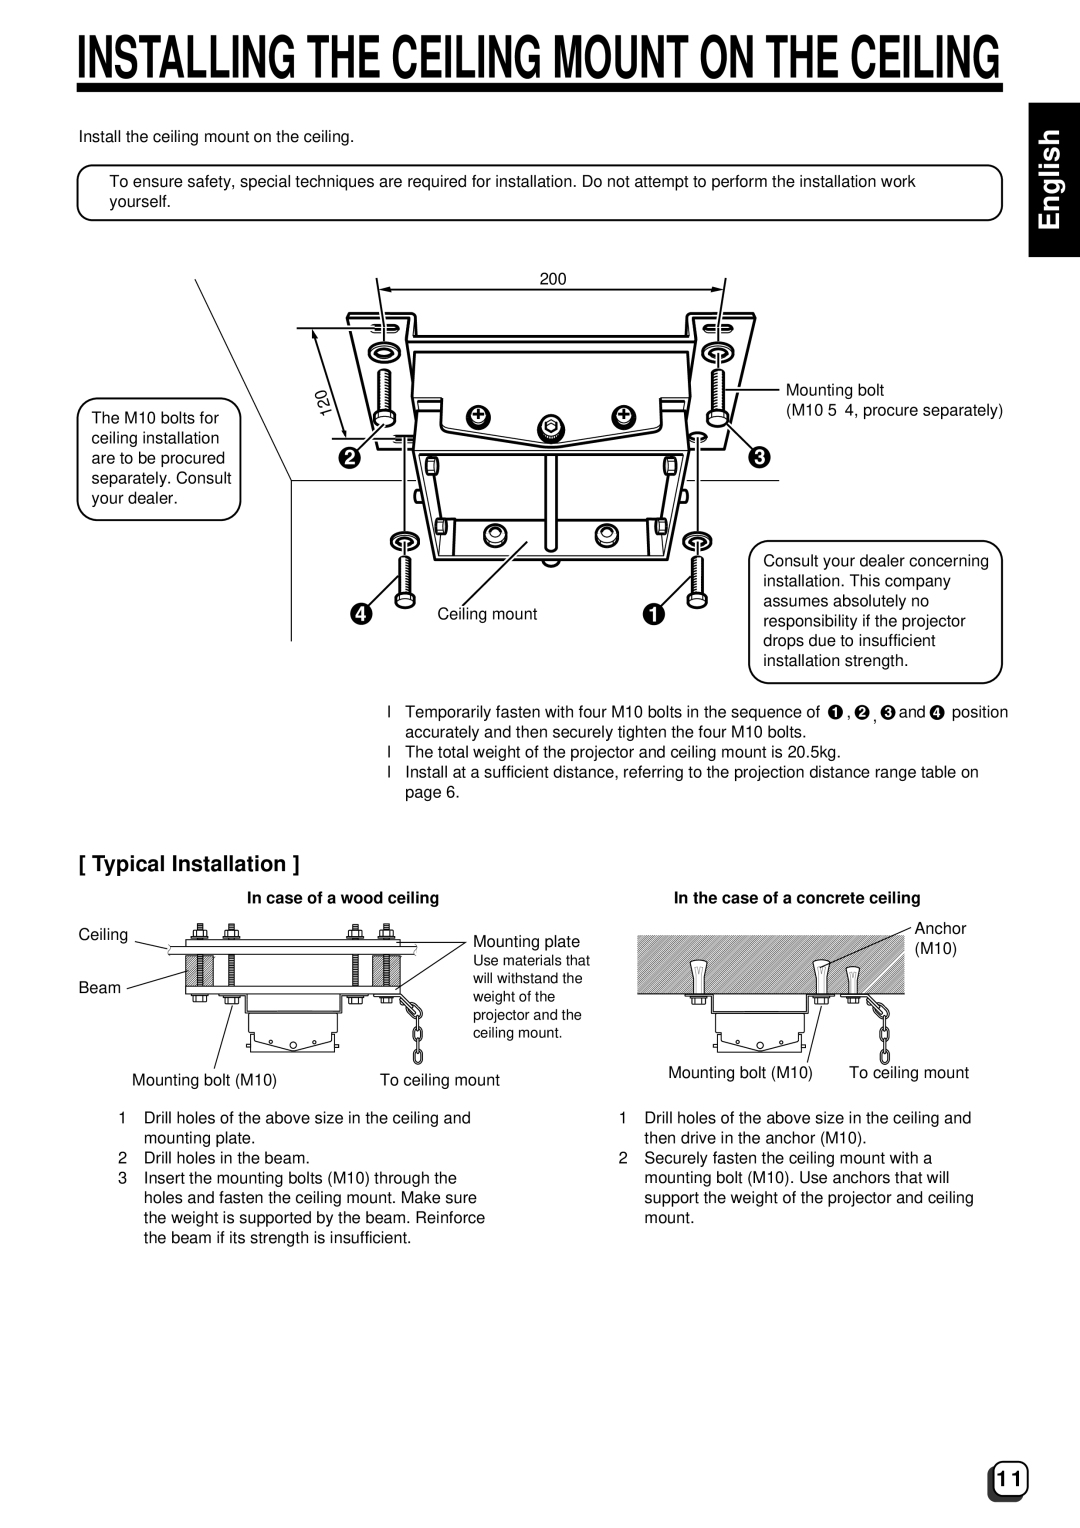
The M10 bolts for ceiling installation are to be procured separately. Consult your dealer.
![]()
![]() Mounting bolt
Mounting bolt
(M10 ✕ 4, procure separately)
| Consult your dealer concerning | |
| installation. This company | |
Ceiling mount | assumes absolutely no | |
responsibility if the projector | ||
| ||
| drops due to insufficient | |
| installation strength. |
●Temporarily fasten with four M10 bolts in the sequence of ![]() ,
, ![]() ,
, ![]() and
and ![]() position accurately and then securely tighten the four M10 bolts.
position accurately and then securely tighten the four M10 bolts.
●The total weight of the projector and ceiling mount is 20.5kg.
●Install at a sufficient distance, referring to the projection distance range table on page 6.
[ Typical Installation ]
In case of a wood ceiling
Ceiling |
Beam |
Mounting plate
Use materials that will withstand the weight of the projector and the ceiling mount.
In the case of a concrete ceiling
Anchor (M10)
Mounting bolt (M10) | To ceiling mount |
1Drill holes of the above size in the ceiling and mounting plate.
2Drill holes in the beam.
3Insert the mounting bolts (M10) through the holes and fasten the ceiling mount. Make sure the weight is supported by the beam. Reinforce the beam if its strength is insufficient.
Mounting bolt (M10) | To ceiling mount |
1Drill holes of the above size in the ceiling and then drive in the anchor (M10).
2Securely fasten the ceiling mount with a mounting bolt (M10). Use anchors that will support the weight of the projector and ceiling mount.
11