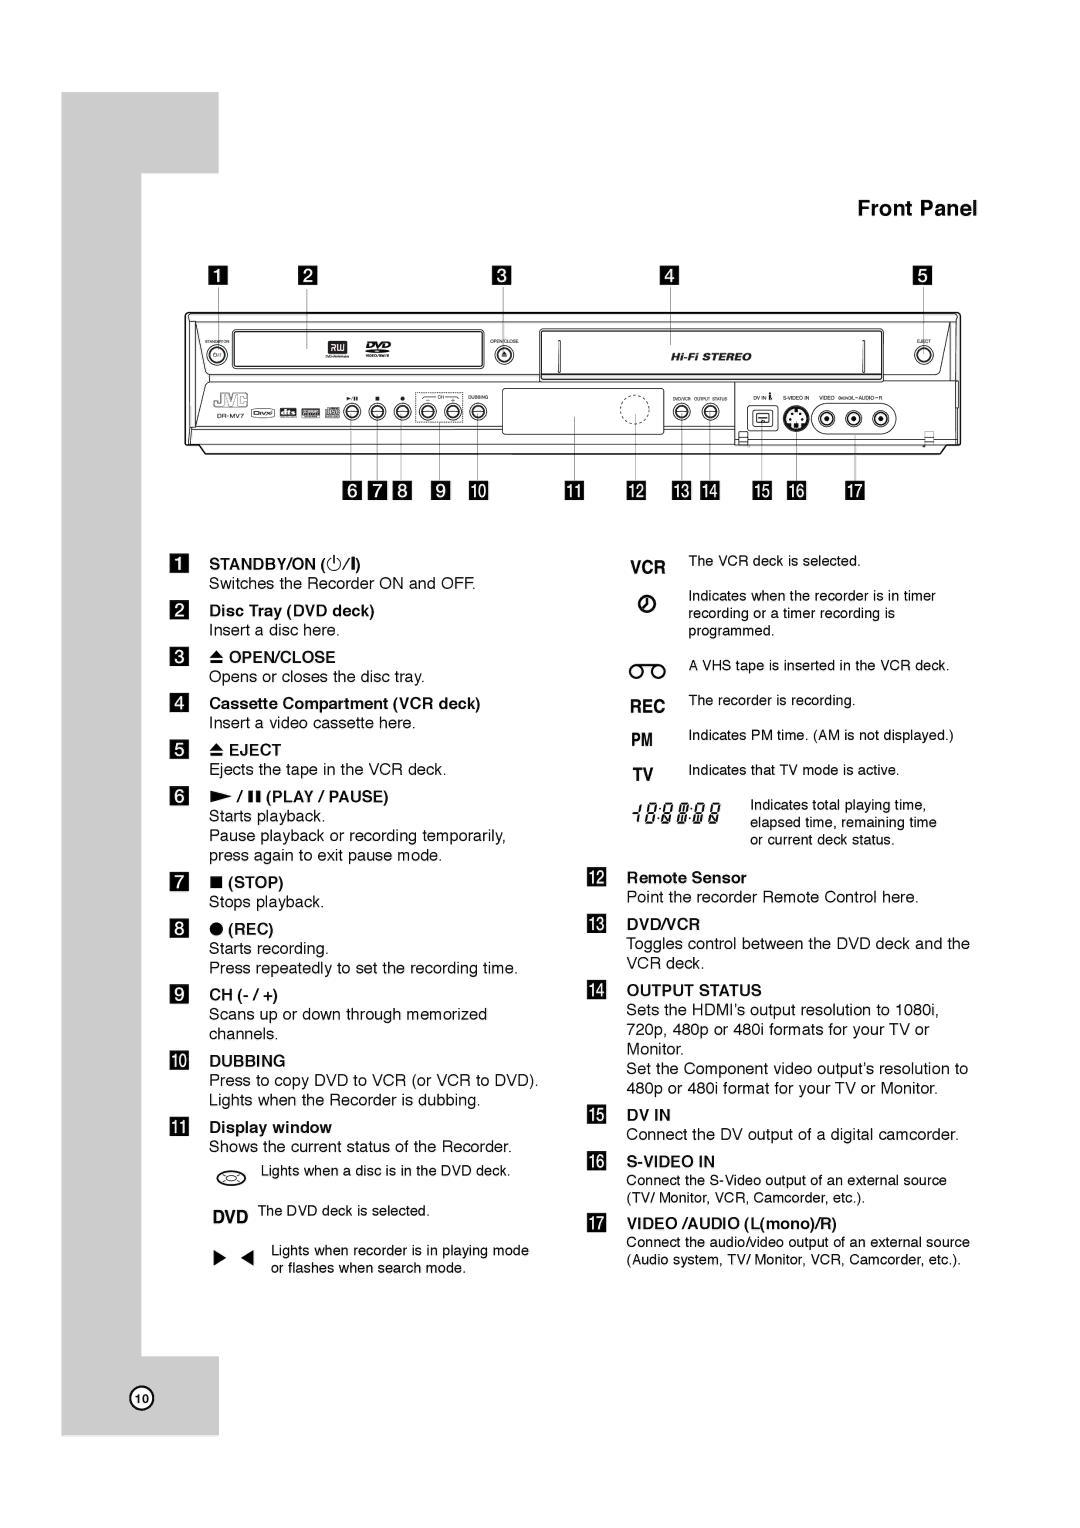
Front Panel
a | b | c | d | e |
|
|
|
|
|
|
|
|
|
|
|
|
|
|
|
|
|
|
|
|
|
|
|
|
|
|
|
|
|
|
|
|
|
|
|
|
|
|
|
|
|
|
|
|
|
|
|
|
f gh i j | k l m n o p q | ||||||||||||||
aSTANDBY/ON (1/`)
Switches the Recorder ON and OFF.
bDisc Tray (DVD deck) Insert a disc here.
cZ OPEN/CLOSE
Opens or closes the disc tray.
dCassette Compartment (VCR deck) Insert a video cassette here.
eZ EJECT
Ejects the tape in the VCR deck.
fN / X (PLAY / PAUSE) Starts playback.
Pause playback or recording temporarily, press again to exit pause mode.
gx (STOP) Stops playback.
hz (REC)
Starts recording.
Press repeatedly to set the recording time.
iCH
Scans up or down through memorized channels.
jDUBBING
Press to copy DVD to VCR (or VCR to DVD). Lights when the Recorder is dubbing.
kDisplay window
Shows the current status of the Recorder.
![]() Lights when a disc is in the DVD deck.
Lights when a disc is in the DVD deck.
![]() The DVD deck is selected.
The DVD deck is selected.
Lights when recorder is in playing mode or flashes when search mode.
The VCR deck is selected.
Indicates when the recorder is in timer recording or a timer recording is programmed.
A VHS tape is inserted in the VCR deck.
The recorder is recording.
Indicates PM time. (AM is not displayed.)
Indicates that TV mode is active.
Indicates total playing time, elapsed time, remaining time or current deck status.
lRemote Sensor
Point the recorder Remote Control here.
mDVD/VCR
Toggles control between the DVD deck and the VCR deck.
nOUTPUT STATUS
Sets the HDMI’s output resolution to 1080i, 720p, 480p or 480i formats for your TV or Monitor.
Set the Component video output’s resolution to 480p or 480i format for your TV or Monitor.
oDV IN
Connect the DV output of a digital camcorder.
p
Connect the
qVIDEO /AUDIO (L(mono)/R)
Connect the audio/video output of an external source (Audio system, TV/ Monitor, VCR, Camcorder, etc.).
10
