22![]()
![]()
![]()
![]()
![]()
![]()
![]()
![]()
![]()
![]()
![]()
![]()
![]()
![]()
![]()
![]()
![]()
![]()
![]()
![]()
![]()
![]()
![]()
![]()
![]()
![]()
![]()
![]()
![]()
![]()
![]()
![]()
![]()
![]()
![]()
![]()
RECORDI NG
NG

 Advanced
 Featur
 es
es (cont.)
Digital Image Stabilizer
This feature compensates for unstable images caused by
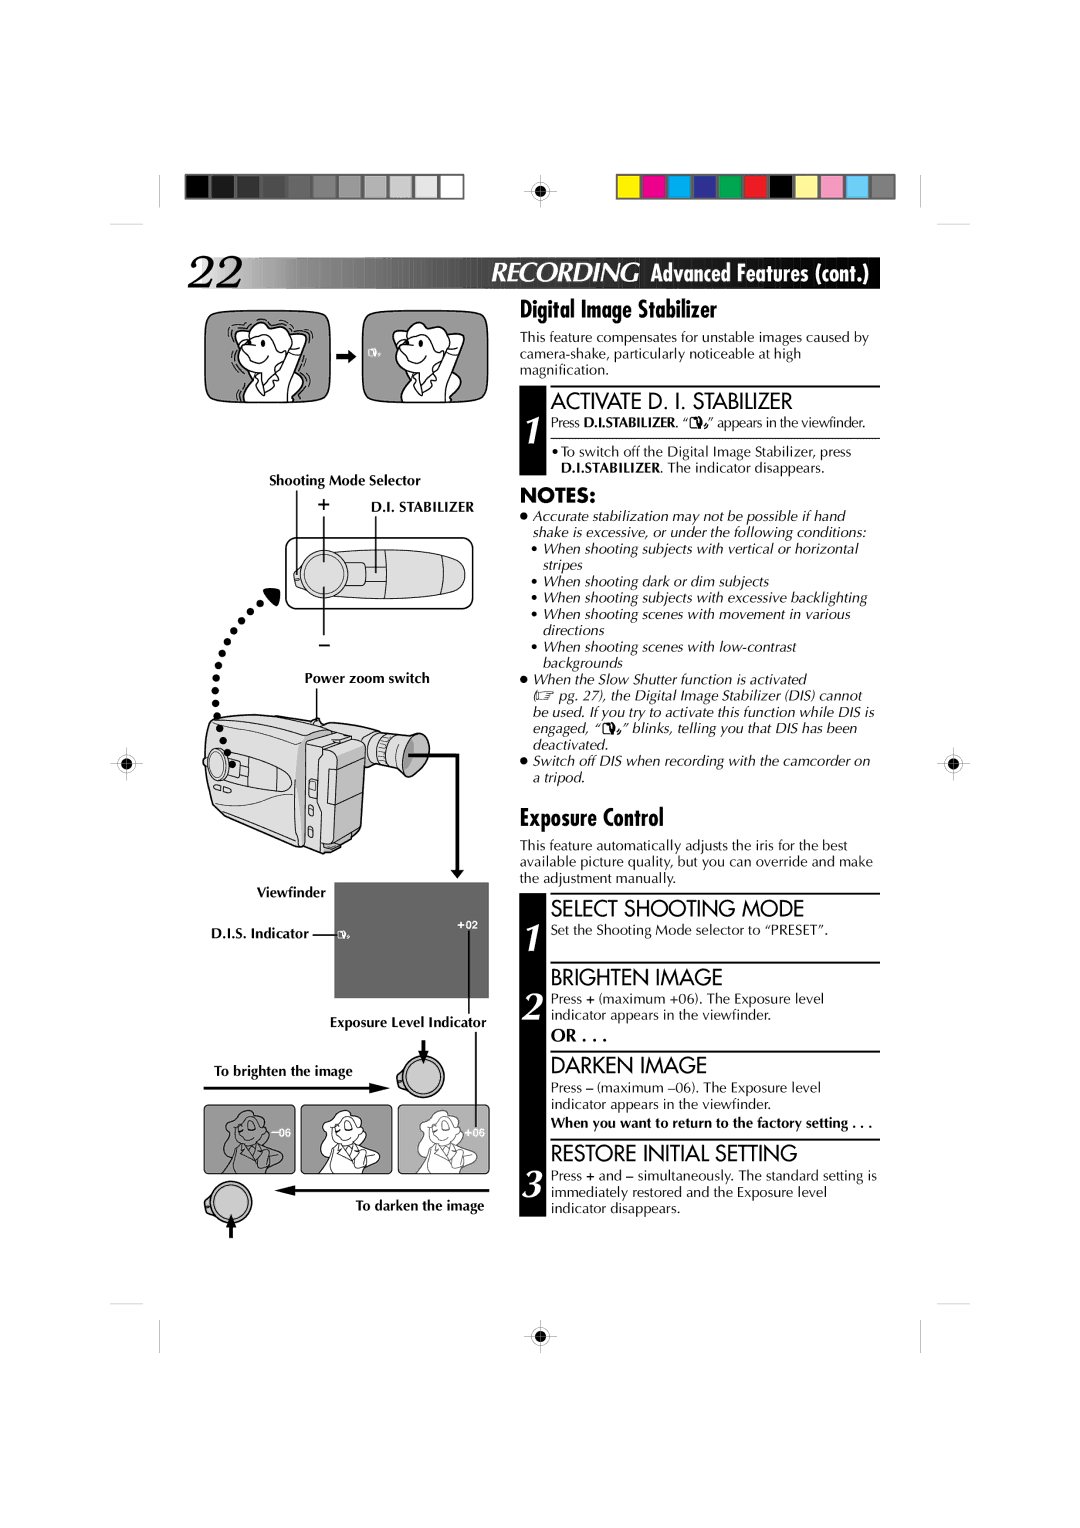
Shooting Mode Selector
+D.I. STABILIZER
–
Power zoom switch
ACTIVATE D. I. STABILIZER
1 Press D.I.STABILIZER. “![]()
![]() ” appears in the viewfinder. •To switch off the Digital Image Stabilizer, press
” appears in the viewfinder. •To switch off the Digital Image Stabilizer, press
D.I.STABILIZER. The indicator disappears.
NOTES:
●Accurate stabilization may not be possible if hand shake is excessive, or under the following conditions:
•When shooting subjects with vertical or horizontal stripes
•When shooting dark or dim subjects
•When shooting subjects with excessive backlighting
•When shooting scenes with movement in various directions
•When shooting scenes with
●When the Slow Shutter function is activated
(☞ pg. 27), the Digital Image Stabilizer (DIS) cannot be used. If you try to activate this function while DIS is engaged, “![]()
![]() ” blinks, telling you that DIS has been deactivated.
” blinks, telling you that DIS has been deactivated.
●Switch off DIS when recording with the camcorder on a tripod.
Viewfinder
D.I.S. Indicator ![]()
![]()
![]()
+02
Exposure Control
This feature automatically adjusts the iris for the best available picture quality, but you can override and make the adjustment manually.
SELECT SHOOTING MODE
1 Set the Shooting Mode selector to “PRESET”.
BRIGHTEN IMAGE
Exposure Level Indicator
To brighten the image
+06 |
To darken the image
2 Press + (maximum +06). The Exposure level indicator appears in the viewfinder.
OR . . .
DARKEN IMAGE
Press – (maximum
When you want to return to the factory setting . . .
RESTORE INITIAL SETTING
3 Press + and – simultaneously. The standard setting is immediately restored and the Exposure level indicator disappears.