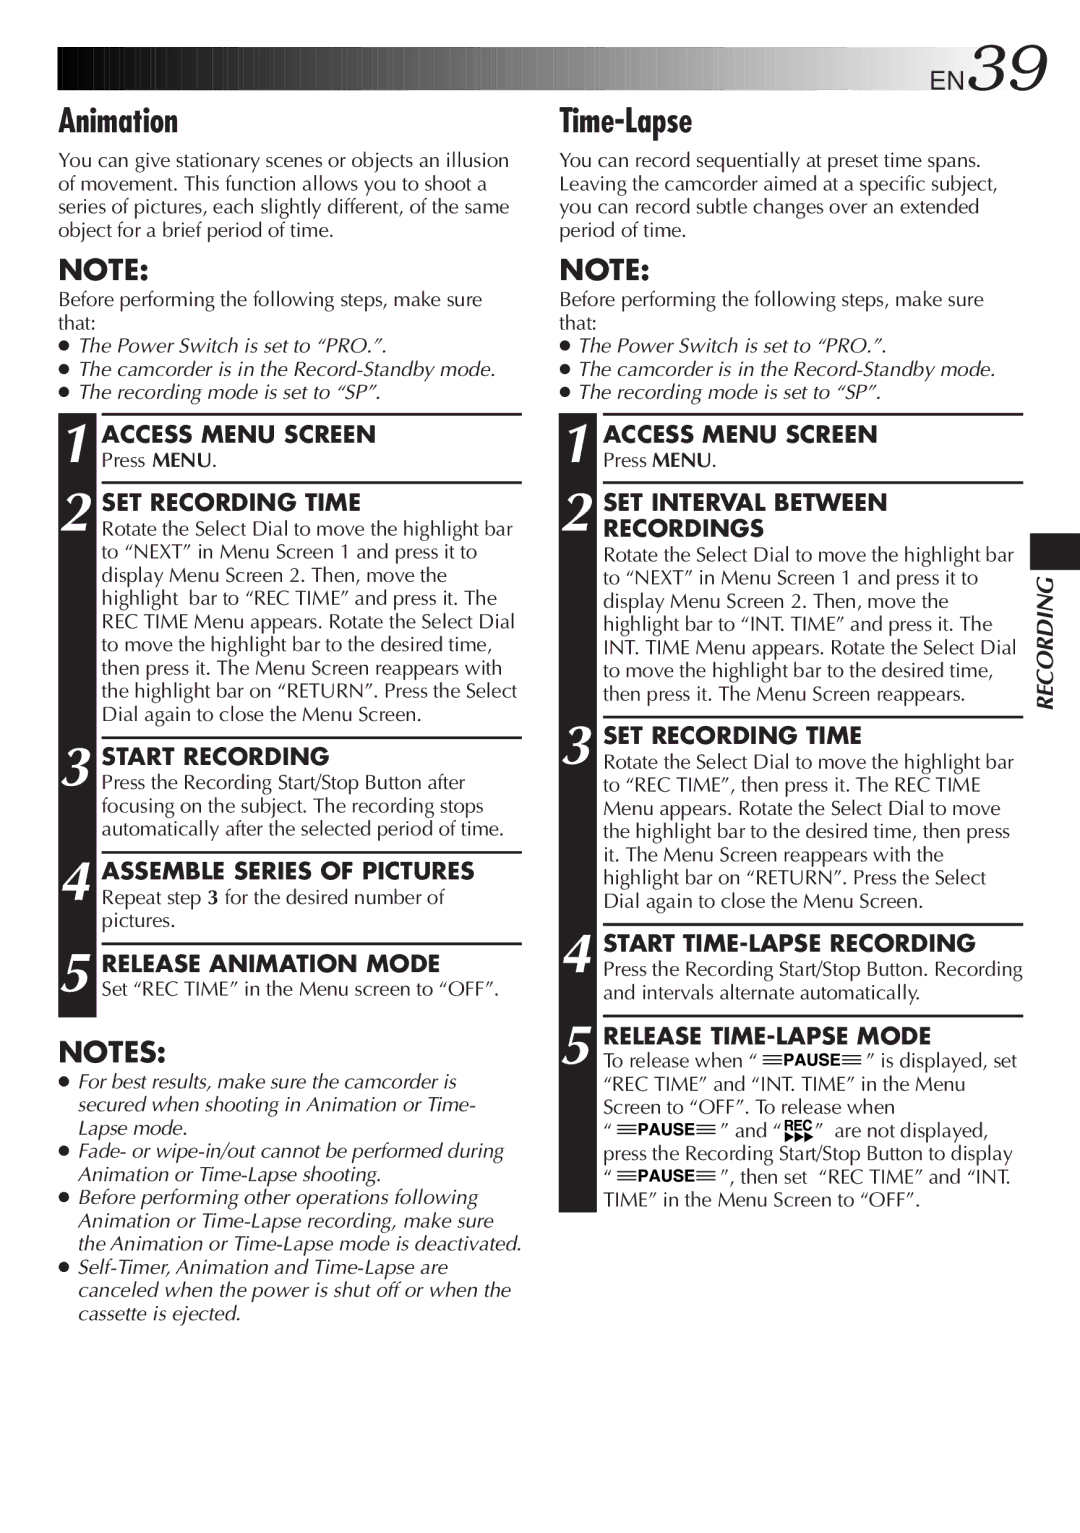
JVC GR-AXM217UM manual Animation, Time-Lapse

Models: GR-AXM217UM

1 60
Download 60 pages 59.47 Kb
Page 39
Image 39

Animation

You can give stationary scenes or objects an illusion of movement. This function allows you to shoot a series of pictures, each slightly different, of the same object for a brief period of time.

NOTE:

Before performing the following steps, make sure that:

The Power Switch is set to “PRO.”.

The camcorder is in the Record-Standby mode.

The recording mode is set to “SP”.

1 ACCESS MENU SCREEN

Press MENU.

2 SET RECORDING TIME

Rotate the Select Dial to move the highlight bar to “NEXT” in Menu Screen 1 and press it to display Menu Screen 2. Then, move the highlight bar to “REC TIME” and press it. The REC TIME Menu appears. Rotate the Select Dial to move the highlight bar to the desired time, then press it. The Menu Screen reappears with the highlight bar on “RETURN”. Press the Select Dial again to close the Menu Screen.

3 START RECORDING

Press the Recording Start/Stop Button after focusing on the subject. The recording stops automatically after the selected period of time.

4 ASSEMBLE SERIES OF PICTURES Repeat step 3 for the desired number of pictures.

5 RELEASE ANIMATION MODE

Set “REC TIME” in the Menu screen to “OFF”.

NOTES:

For best results, make sure the camcorder is secured when shooting in Animation or Time- Lapse mode.

Fade- or wipe-in/out cannot be performed during Animation or Time-Lapse shooting.

Before performing other operations following Animation or Time-Lapse recording, make sure the Animation or Time-Lapse mode is deactivated.

Self-Timer, Animation and Time-Lapse are canceled when the power is shut off or when the cassette is ejected.

EN39

Time-Lapse

You can record sequentially at preset time spans. Leaving the camcorder aimed at a specific subject, you can record subtle changes over an extended period of time.

NOTE:

Before performing the following steps, make sure that:

The Power Switch is set to “PRO.”.

The camcorder is in the Record-Standby mode.

The recording mode is set to “SP”.


ACCESS MENU SCREEN


1 Press MENU.


SET INTERVAL BETWEEN


2 RECORDINGS


Rotate the Select Dial to move the highlight bar


to “NEXT” in Menu Screen 1 and press it to

RECORDING


display Menu Screen 2. Then, move the


highlight bar to “INT. TIME” and press it. The


INT. TIME Menu appears. Rotate the Select Dial


to move the highlight bar to the desired time,


then press it. The Menu Screen reappears.


SET RECORDING TIME


3 Rotate the Select Dial to move the highlight bar


to “REC TIME”, then press it. The REC TIME


Menu appears. Rotate the Select Dial to move


the highlight bar to the desired time, then press


it. The Menu Screen reappears with the


highlight bar on “RETURN”. Press the Select


Dial again to close the Menu Screen.


START TIME-LAPSE RECORDING


4 Press the Recording Start/Stop Button. Recording


and intervals alternate automatically.


RELEASE TIME-LAPSE MODE


5 To release when “


” is displayed, set


“REC TIME” and “INT. TIME” in the Menu Screen to “OFF”. To release when

” and “” are not displayed, press the Recording Start/Stop Button to display

”, then set “REC TIME” and “INT. TIME” in the Menu Screen to “OFF”.

Page 39
Image 39
JVC GR-AXM217UM manual Animation, Time-Lapse

GR-AXM217UM specifications

The JVC GR-AXM217UM is a compact and versatile camcorder that gained recognition for its user-friendly design and impressive array of features, making it suitable for both novice and experienced videographers. This camcorder, released in the early 2000s, exemplifies the advancements in consumer video technology at the time, offering a balance of performance and ease of use.

One of the standout features of the GR-AXM217UM is its 700x Zoom capability, which allows users to capture distant subjects with remarkable clarity. This powerful zoom is complemented by a 32mm wide-angle lens that provides a broader perspective, making it ideal for various shooting scenarios, from expansive landscapes to close-up portraits.

The camcorder also boasts a Super VHS-C format, which enhances video quality significantly compared to standard VHS. The Super VHS-C tapes accommodate higher resolution video, ensuring that recordings are crisp and vibrant. This is particularly beneficial for preserving family memories or creating content that demands a higher standard of visual fidelity.

In terms of usability, the JVC GR-AXM217UM features a built-in image stabilizer, which is crucial for reducing the blurriness often associated with handheld shooting. This technology helps maintain steady footage, even in dynamic situations, allowing users to achieve professional-looking results with minimal effort.

Additionally, the camcorder comes equipped with a 3.5-inch color LCD screen that flips out, enabling users to easily monitor their recordings and adjust framing without difficulty. The intuitive interface allows for straightforward navigation through menus, making it accessible even for those new to video recording.

Audio quality is another essential aspect of the GR-AXM217UM, and it does not disappoint. The camcorder includes a built-in microphone and offers options for external microphone connections, catering to users who require enhanced audio fidelity for their projects.

In summary, the JVC GR-AXM217UM is a remarkable camcorder that combines high-quality video performance with user-friendly features. Its powerful zoom, Super VHS-C format, image stabilization technology, and convenient display make it a preferred choice for capturing life's moments with ease. Whether for personal use or creative endeavors, this camcorder continues to hold value for those looking to explore the world of video recording.