
GR-DVL105 specifications
The JVC GR-DVL105 is a compact, versatile digital camcorder that was popular in the early 2000s, known for its user-friendly features and impressive video quality. This camcorder is part of the JVC Everio series, which aimed to provide an accessible yet powerful solution for amateur videographers and those looking to capture memorable moments with ease.One of the standout characteristics of the JVC GR-DVL105 is its 1/4-inch CCD sensor, which ensures high-quality video recording. This camcorder can capture video in standard resolution, making it ideal for home videos and small projects. The GR-DVL105 supports both VHS-C and Mini DV formats, providing flexibility for users who may have existing tapes. This compatibility allows for easy transitioning between editing formats and playback options.
The camcorder features a 10x optical zoom lens, which enhances its ability to capture distant subjects with clarity. The zoom functionality is complemented by a digital zoom feature, providing even greater reach while still maintaining decent quality. The JVC GR-DVL105's automatic focus and exposure settings make it simple for users to get the right shot, allowing them to concentrate on creative aspects rather than technical details.
In terms of design, the JVC GR-DVL105 is compact and lightweight, fitting comfortably in the hand for extended shooting sessions. The camcorder is equipped with a 2.5-inch LCD screen that provides a clear view for framing and composing shots. This LCD is also helpful for playback, allowing users to review their footage conveniently. The user interface is straightforward, offering intuitive controls that facilitate easy navigation through settings and menus.
Battery life is another important feature of the JVC GR-DVL105. The camcorder is powered by a rechargeable lithium-ion battery, which provides several hours of recording time under normal shooting conditions. This longevity makes it suitable for day-long events or outings.
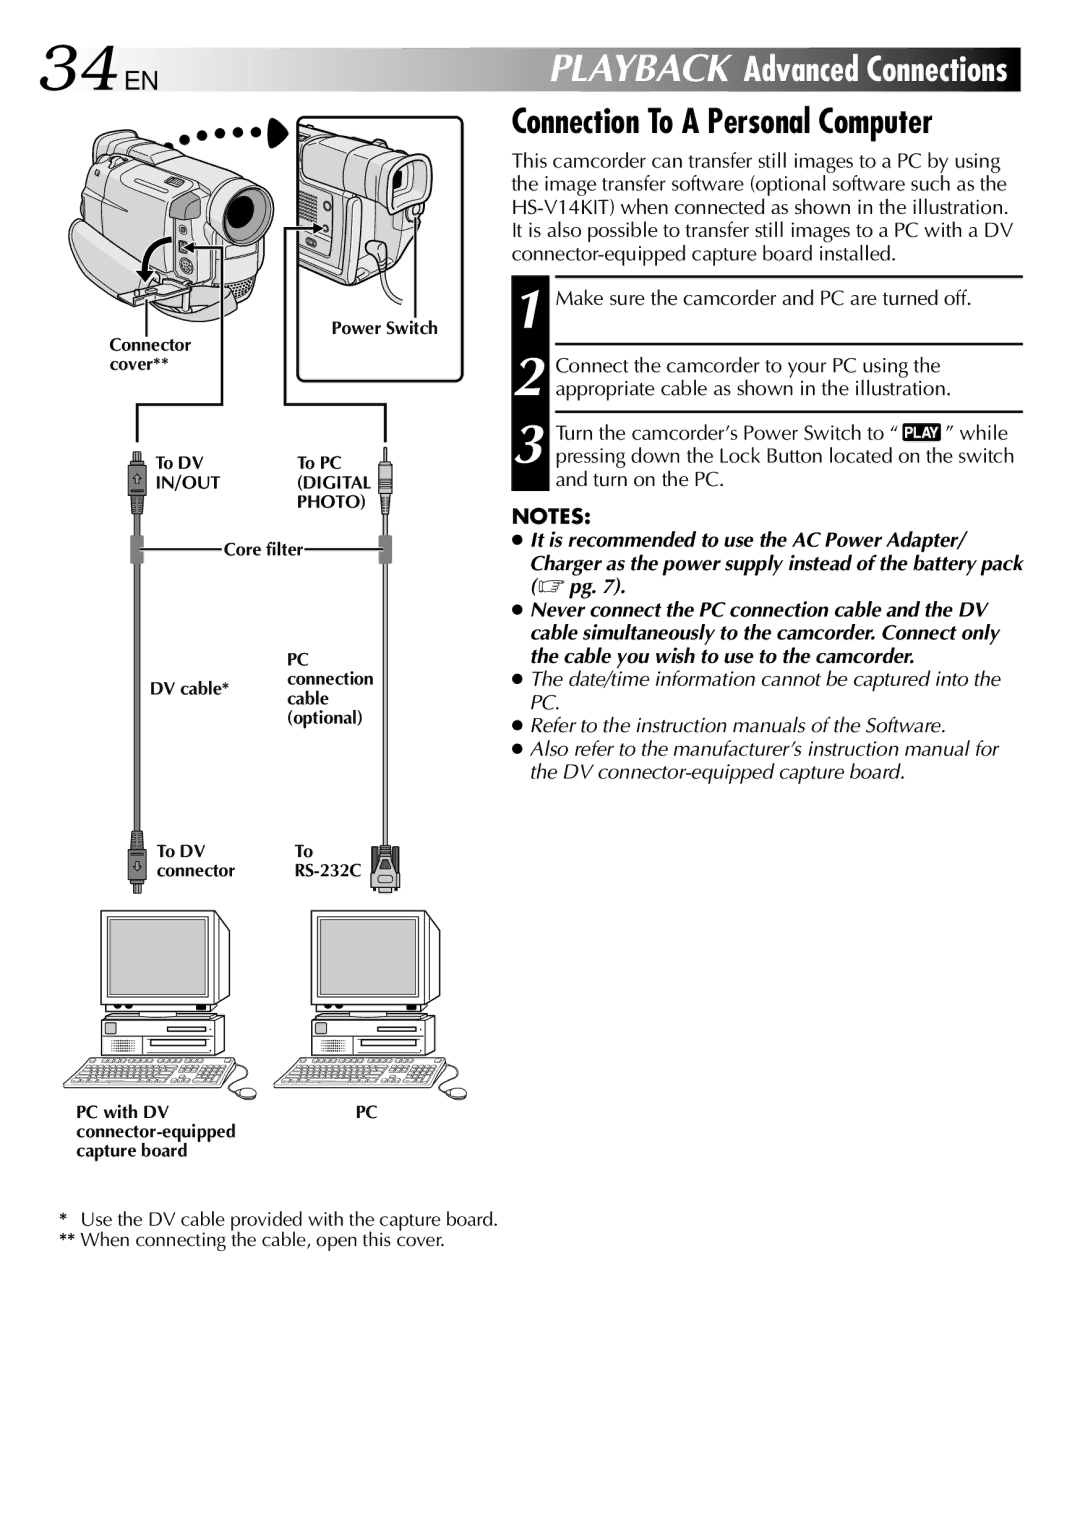
In terms of connectivity, the JVC GR-DVL105 includes various outputs for connecting to TVs and other devices, ensuring that users can easily share their content. Overall, the JVC GR-DVL105 represents a reliable choice for those seeking a functional and performant camcorder for capturing life's fleeting moments in quality video format.