10 EN | GETTING STARTED (cont.) |
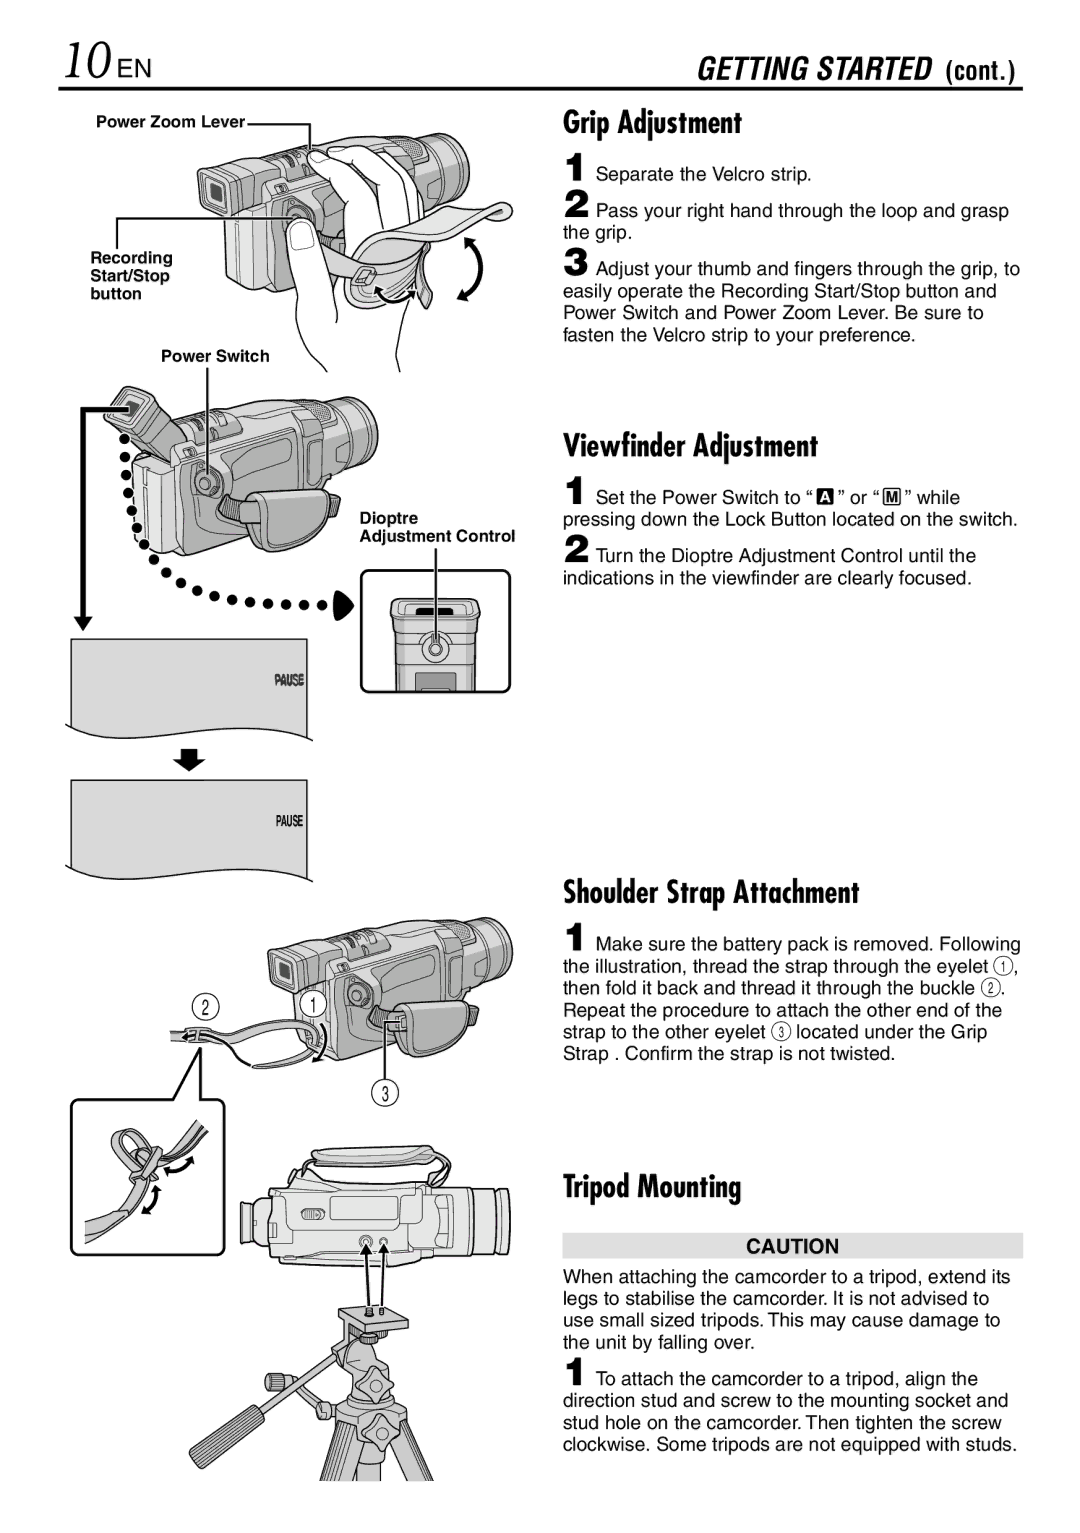
Power Zoom Lever
Recording Start/Stop button
Power Switch
Grip Adjustment
1
2 Pass your right hand through the loop and grasp the grip.
3 Adjust your thumb and fingers through the grip, to easily operate the Recording Start/Stop button and Power Switch and Power Zoom Lever. Be sure to fasten the Velcro strip to your preference.
Dioptre Adjustment Control
Viewfinder Adjustment
1 Set the Power Switch to “![]() ” or “
” or “ ![]() ” while pressing down the Lock Button located on the switch.
” while pressing down the Lock Button located on the switch.
2 Turn the Dioptre Adjustment Control until the indications in the viewfinder are clearly focused.
PAUSE
|
| Shoulder Strap Attachment |
|
| 1 Make sure the battery pack is removed. Following |
|
| the illustration, thread the strap through the eyelet 1, |
2 | 1 | then fold it back and thread it through the buckle 2. |
Repeat the procedure to attach the other end of the | ||
|
| strap to the other eyelet 3 located under the Grip |
|
| Strap . Confirm the strap is not twisted. |
3
Tripod Mounting
CAUTION
When attaching the camcorder to a tripod, extend its legs to stabilise the camcorder. It is not advised to use small sized tripods. This may cause damage to the unit by falling over.
1 To attach the camcorder to a tripod, align the direction stud and screw to the mounting socket and stud hole on the camcorder. Then tighten the screw clockwise. Some tripods are not equipped with studs.