![]()
![]()
![]()
![]()
![]()
![]()
![]()
![]()
![]()
![]()
![]()
![]()
![]()
![]()
![]()
![]()
![]()
![]()
![]()
![]()
![]()
![]()
![]()
![]()
![]()
![]()
![]()
![]()
![]()
![]()
![]()
![]()
![]()
![]()
![]()
![]()
![]()
![]()
![]()
![]()
![]()
![]()
![]()
![]()
![]()
![]()
![]()
![]()
![]()
![]()
![]()
![]()
![]()
![]()
![]()
![]()
![]()
![]()
![]()
![]()
![]()
![]()
![]()
![]()
![]()
![]()
![]()
![]()
![]()
![]()
![]()
![]()
![]()
![]()
![]()
![]()
![]()
![]()
![]()
![]()
![]()
![]()
![]()
![]()
![]()
![]()
![]() EN
EN![]() 59
59![]()
![]()
Digital Dubbing
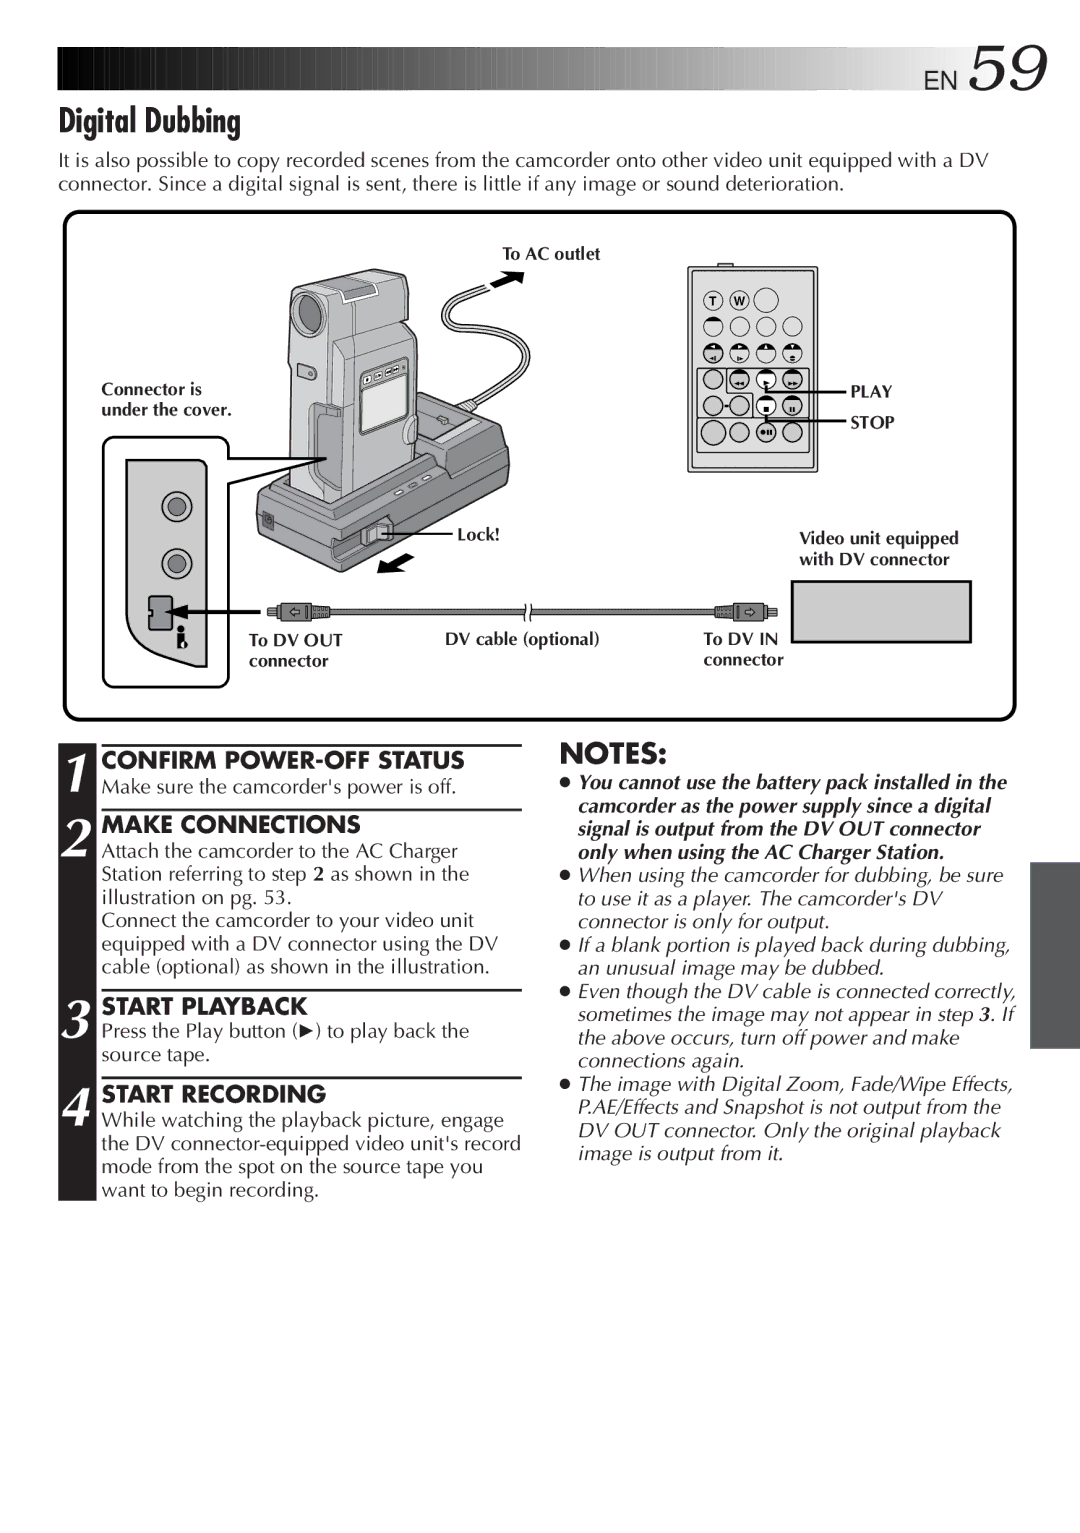
It is also possible to copy recorded scenes from the camcorder onto other video unit equipped with a DV connector. Since a digital signal is sent, there is little if any image or sound deterioration.
| To AC outlet |
|
|
| T W |
Connector is |
| PLAY |
under the cover. |
| STOP |
|
| |
| Lock! | Video unit equipped |
|
| with DV connector |
To DV OUT | DV cable (optional) | To DV IN |
connector |
| connector |
1 CONFIRM
2 MAKE CONNECTIONS
Attach the camcorder to the AC Charger Station referring to step 2 as shown in the illustration on pg. 53.
Connect the camcorder to your video unit equipped with a DV connector using the DV cable (optional) as shown in the illustration.
3 START PLAYBACK
Press the Play button (4) to play back the source tape.
4 START RECORDING
While watching the playback picture, engage the DV
NOTES:
●You cannot use the battery pack installed in the camcorder as the power supply since a digital signal is output from the DV OUT connector only when using the AC Charger Station.
●When using the camcorder for dubbing, be sure to use it as a player. The camcorder's DV connector is only for output.
●If a blank portion is played back during dubbing, an unusual image may be dubbed.
●Even though the DV cable is connected correctly, sometimes the image may not appear in step 3. If the above occurs, turn off power and make connections again.
●The image with Digital Zoom, Fade/Wipe Effects, P.AE/Effects and Snapshot is not output from the DV OUT connector. Only the original playback image is output from it.